
 Pin it
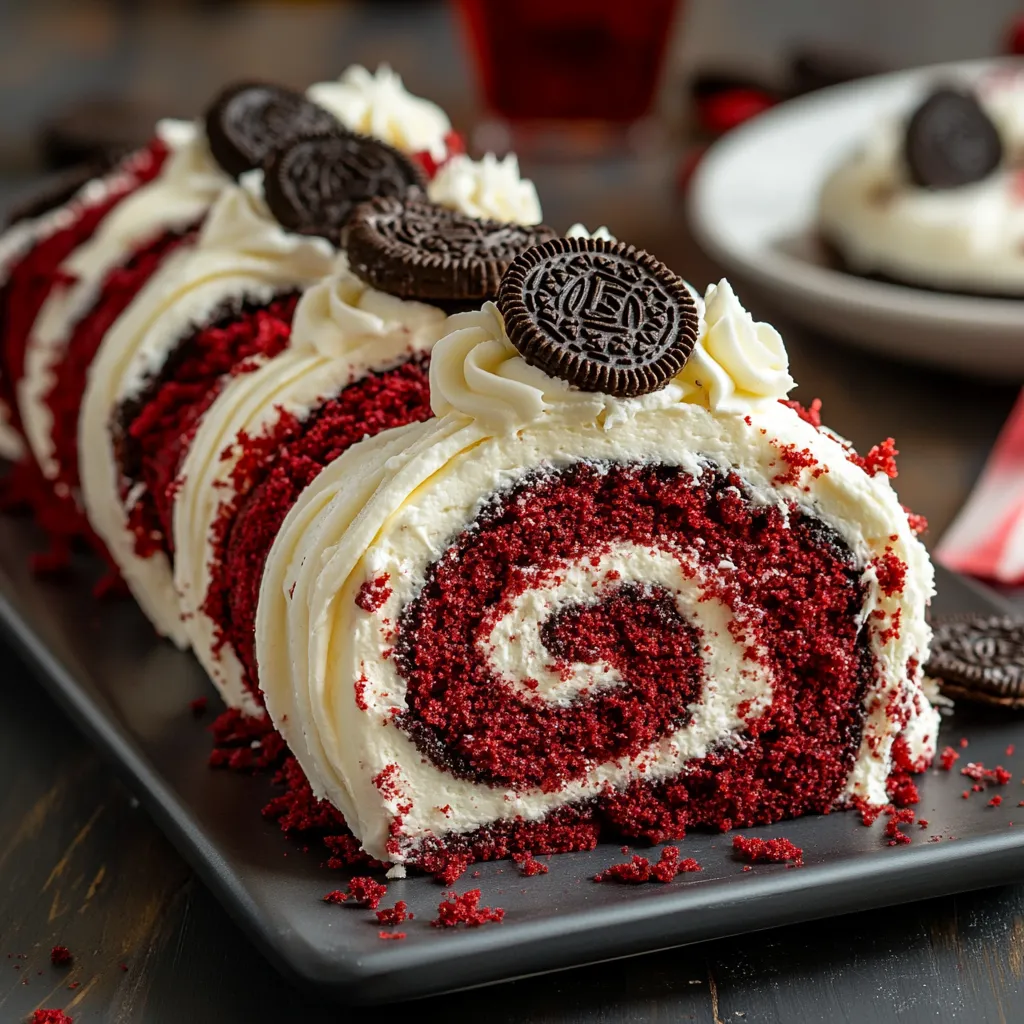
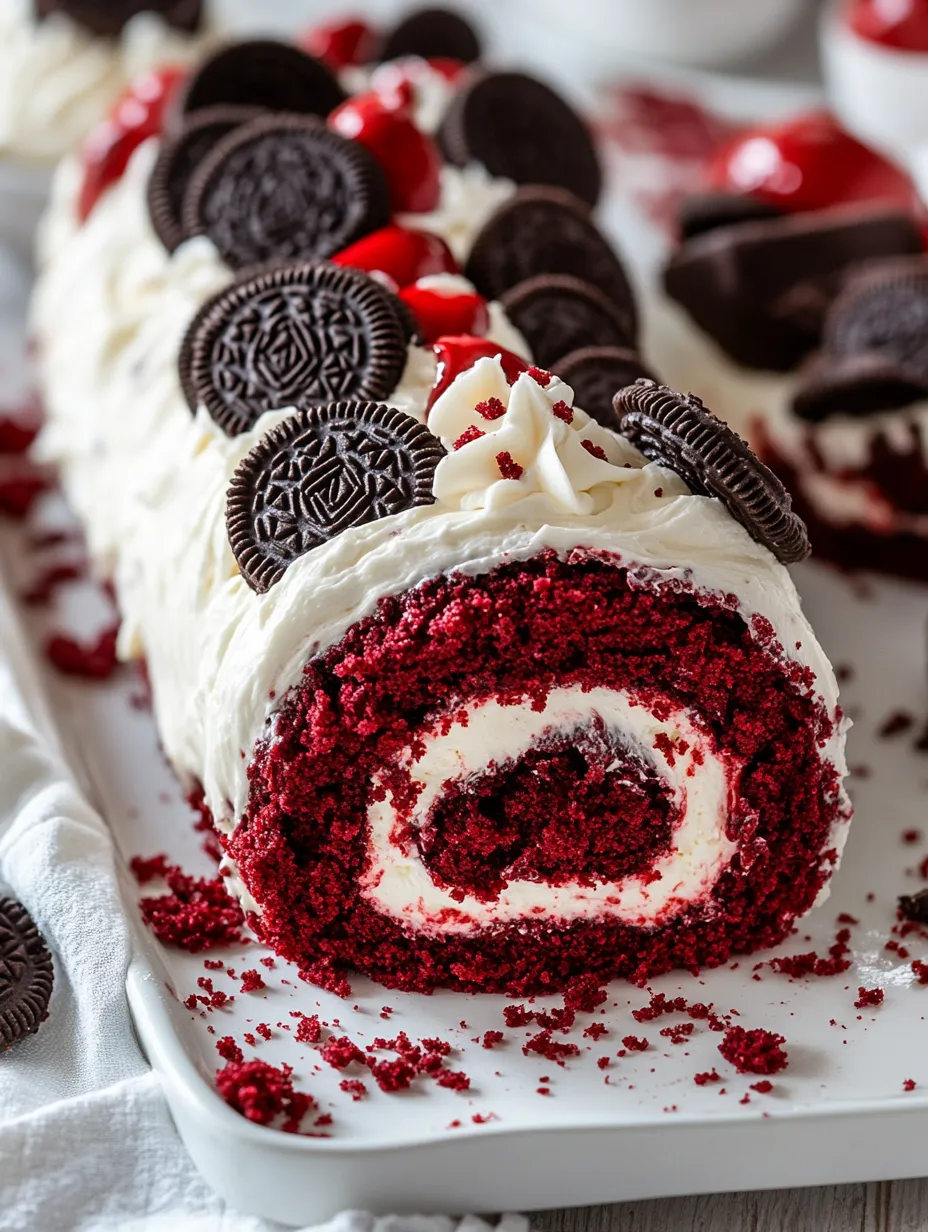
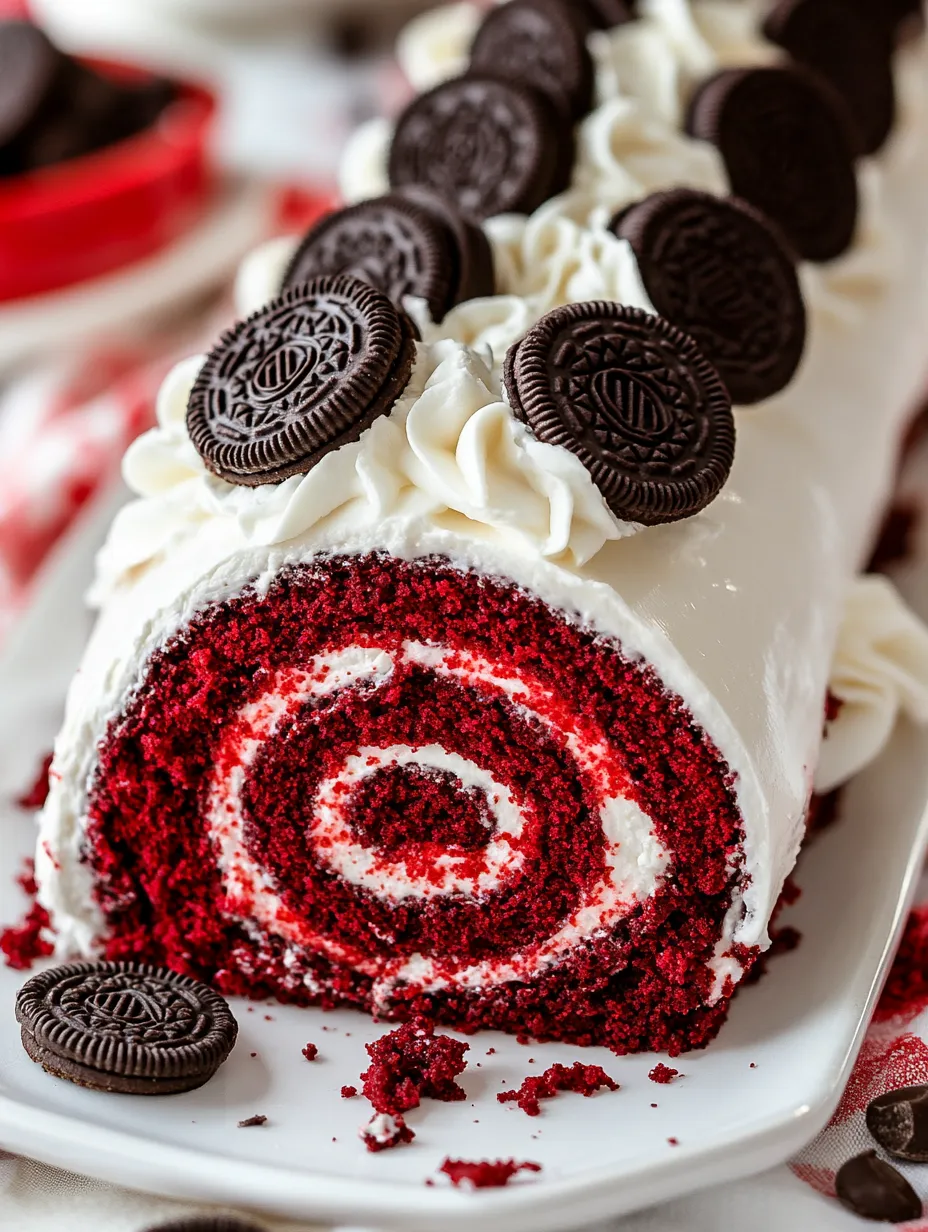
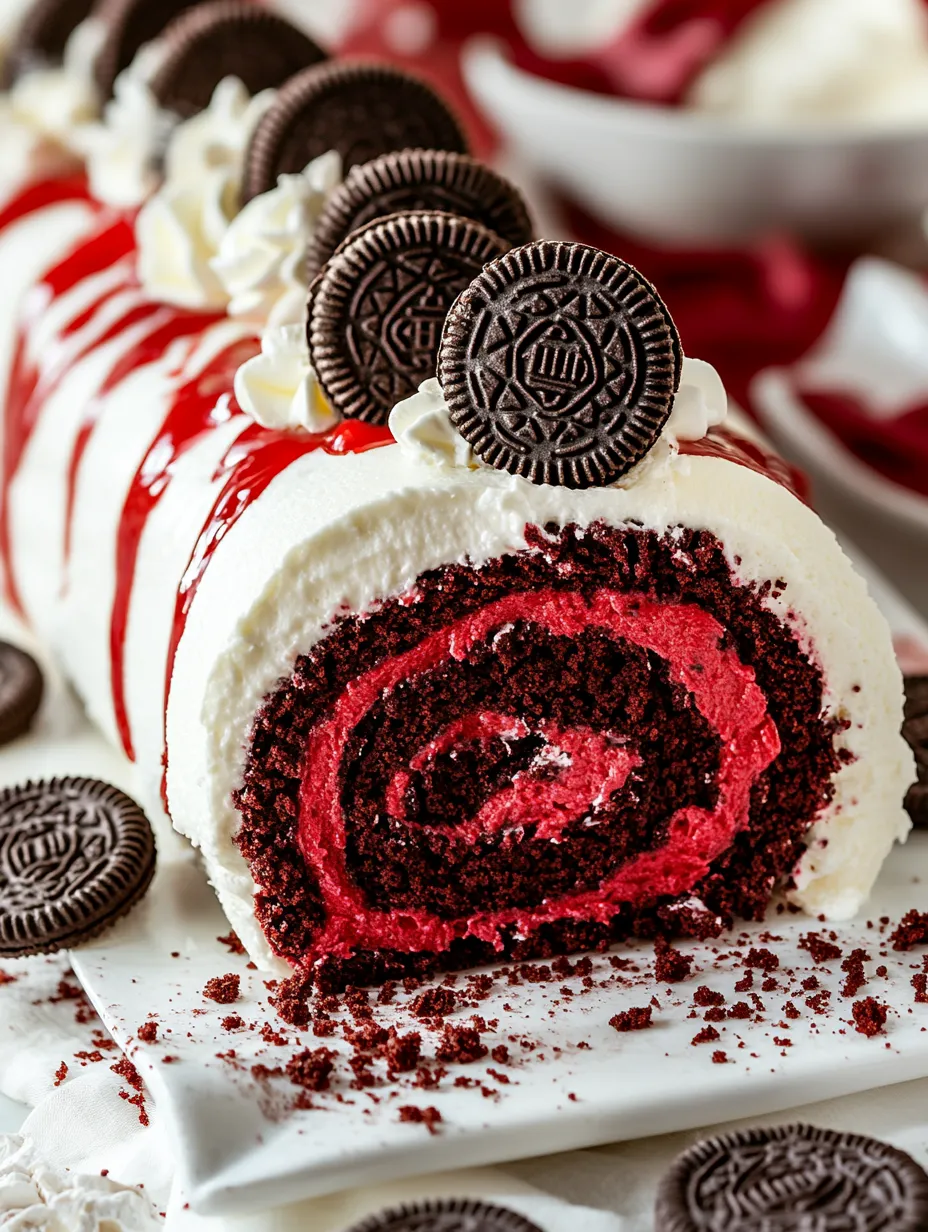
The first time I created this Red Velvet Oreo Cake Roll, I knew I had stumbled upon something extraordinary. This showstopper combines three beloved flavors - rich red velvet, creamy Oreo filling, and silky chocolate ganache - into one impressive dessert. The dramatic swirl revealed with each slice never fails to draw gasps of delight from my guests, while the taste keeps them coming back for seconds.
Last Christmas, I brought this cake roll to our family gathering, and my nephew declared it "the best thing he'd ever eaten." The combination of textures - tender cake, creamy filling, and rich ganache - creates such a memorable dessert experience that it's now requested at every holiday celebration.
Essential Ingredients and Selection Tips
- All-Purpose Flour (3/4 cup): Use unbleached flour for the best texture. I always sift it first to ensure no lumps affect the delicate cake structure
- Cocoa Powder (2 tablespoons): Choose natural unsweetened cocoa powder rather than Dutch-processed for this recipe. The natural acidity helps create that distinctive red velvet flavor
- Buttermilk (1/3 cup): Real buttermilk makes a significant difference in tenderness. If you don't have it, mix 1/3 cup milk with 1 teaspoon lemon juice and let stand for 5 minutes
- Red Food Coloring (1 tablespoon): Gel food coloring provides the most vibrant color without affecting texture. I prefer using natural alternatives like beet powder when possible
- Cream Cheese (8 oz): Always use full-fat cream cheese at room temperature for the smoothest filling. Cold cream cheese will leave lumps
- Oreo Cookies (8-10): Choose regular Oreos, not double-stuffed, for the best filling consistency. Crush them into varying sizes for texture interest
 Pin it
Detailed Step-by-Step Instructions
- Perfect Cake Preparation
- Ensure eggs are at room temperature for maximum volume
- Beat eggs and sugar until the mixture forms ribbons when lifted
- Fold dry ingredients gently to maintain airiness
- Spread batter evenly to corners using an offset spatula
- Check edges frequently while baking - they should be just set
- Master the Initial Roll
- Prepare a clean kitchen towel dusted with powdered sugar
- Flip cake onto towel immediately after baking
- Remove parchment paper carefully
- Begin rolling from short end, using towel as guide
- Roll firmly but not too tight to prevent cracks
- Create the Ideal Filling
- Beat cream cheese until completely smooth
- Add powdered sugar gradually to prevent lumps
- Fold in Oreo pieces last to maintain crunch
- Reserve some larger pieces for texture
- Chill if too soft to spread
- Execute the Final Roll
- Unroll cooled cake gently
- Spread filling evenly, leaving 1/2 inch border
- Use offset spatula for consistent thickness
- Roll tightly using towel as guide
- Wrap in plastic wrap immediately
- Perfect the Ganache Finish
- Chop chocolate finely for smooth melting
- Heat cream just until bubbles form
- Pour over chocolate in thirds, stirring between
- Let cool slightly before pouring
- Start from center for even coverage
 Pin it
When I first started making roll cakes, I was intimidated by the rolling process. After several attempts, I discovered that confidence and quick movements make all the difference. Now, it's become almost therapeutic to create these beautiful swirls.
Seasonal Adaptations
For spring gatherings, I sometimes add fresh berries to the filling. During fall, a touch of cinnamon in the ganache creates a warm, seasonal twist. The versatility of this base recipe allows for endless creative variations.
Presentation Mastery
The key to a professional-looking cake roll lies in the final garnish. I like to create a pattern on top of the ganache while it's still wet using additional crushed Oreos. Sometimes, I'll add chocolate curls or a light dusting of powdered sugar just before serving.
Storage Solutions
Proper storage ensures this cake stays fresh and beautiful. I've found that placing it in a cake keeper in the refrigerator maintains its shape and prevents the ganache from sticking to the cover. Just remember to let it sit at room temperature for 15 minutes before serving.
Having made this cake roll dozens of times, I've come to appreciate how it brings together classic flavors in an elegant presentation. While it might seem daunting at first, the technique becomes second nature with practice. The joy on people's faces when they see and taste this dessert makes every careful step worthwhile.
Versatile Serving Suggestions
Throughout my years of making this cake roll, I've discovered various ways to elevate its presentation. For intimate dinner parties, I slice it on a bias and arrange it with fresh berries and mint leaves. For larger gatherings, I sometimes make two rolls and arrange them in a V-shape, creating a striking centerpiece that serves more guests.
Handling Common Challenges
Even experienced bakers face occasional hurdles. If your cake cracks during rolling, don't panic - I've learned that the filling and ganache can hide minor imperfections beautifully. If the filling seems too soft, a quick 15-minute chill in the freezer works wonders before the final roll.
Making It Your Own
While the classic recipe is outstanding, I've experimented with numerous variations. Adding a teaspoon of espresso powder to the cake batter enhances the chocolate notes, while mixing crushed chocolate-covered espresso beans into the filling adds an elegant coffee twist. During holidays, I sometimes add peppermint extract to the ganache for a festive touch.
 Pin it
Temperature Matters
The success of this cake often depends on temperature control. I've learned that room temperature ingredients blend more smoothly, while chilled components make assembly easier. When working in a warm kitchen, I keep a sheet pan in the freezer to place under my work surface, which helps maintain the ideal temperature.
Creative Gifting
This cake roll makes a wonderful gift. I often slice it into individual portions, wrap them carefully in parchment, and place them in decorative boxes. During the holiday season, I've gifted these slices to neighbors and teachers, always including a handwritten note with storage instructions.
The Red Velvet Oreo Cake Roll has become more than just a recipe in my collection - it's a testament to how baking can bring people together.
Frequently Asked Questions
- → Why do I need to roll the cake while it's warm?
- Rolling while warm helps prevent cracking when you fill it later. The cake 'remembers' the shape as it cools.
- → Can I make this ahead of time?
- Yes! Make it up to 3 days ahead and keep refrigerated. The flavors actually improve over time.
- → Why did my cake crack while rolling?
- The cake might crack if it's overbaked or if you wait too long to roll it. Roll immediately while still warm.
- → Can I freeze this cake roll?
- Yes, wrap it well and freeze for up to 2 months. Thaw overnight in the refrigerator.
- → Can I use different cookies for the filling?
- Absolutely! Try it with other cream-filled cookies like Golden Oreos or chocolate chip cookies.