
 Pin it
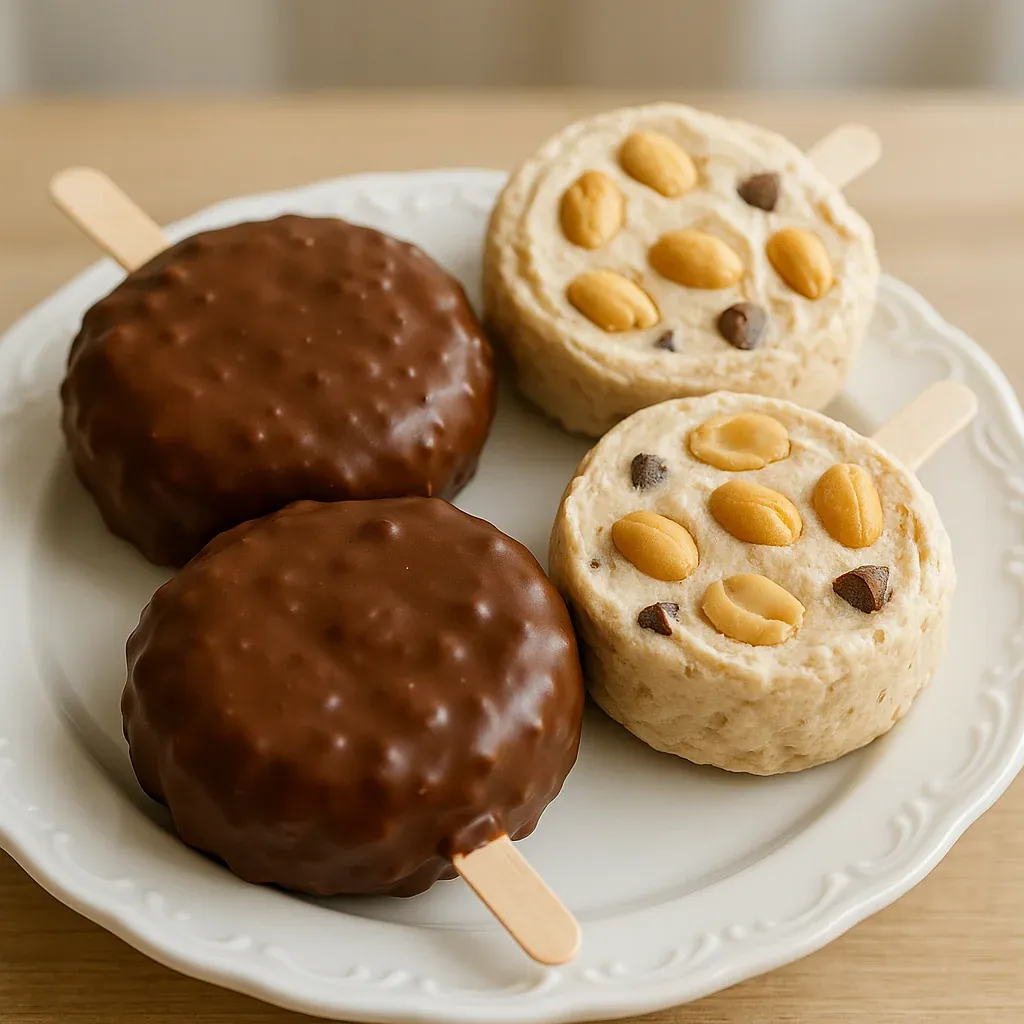
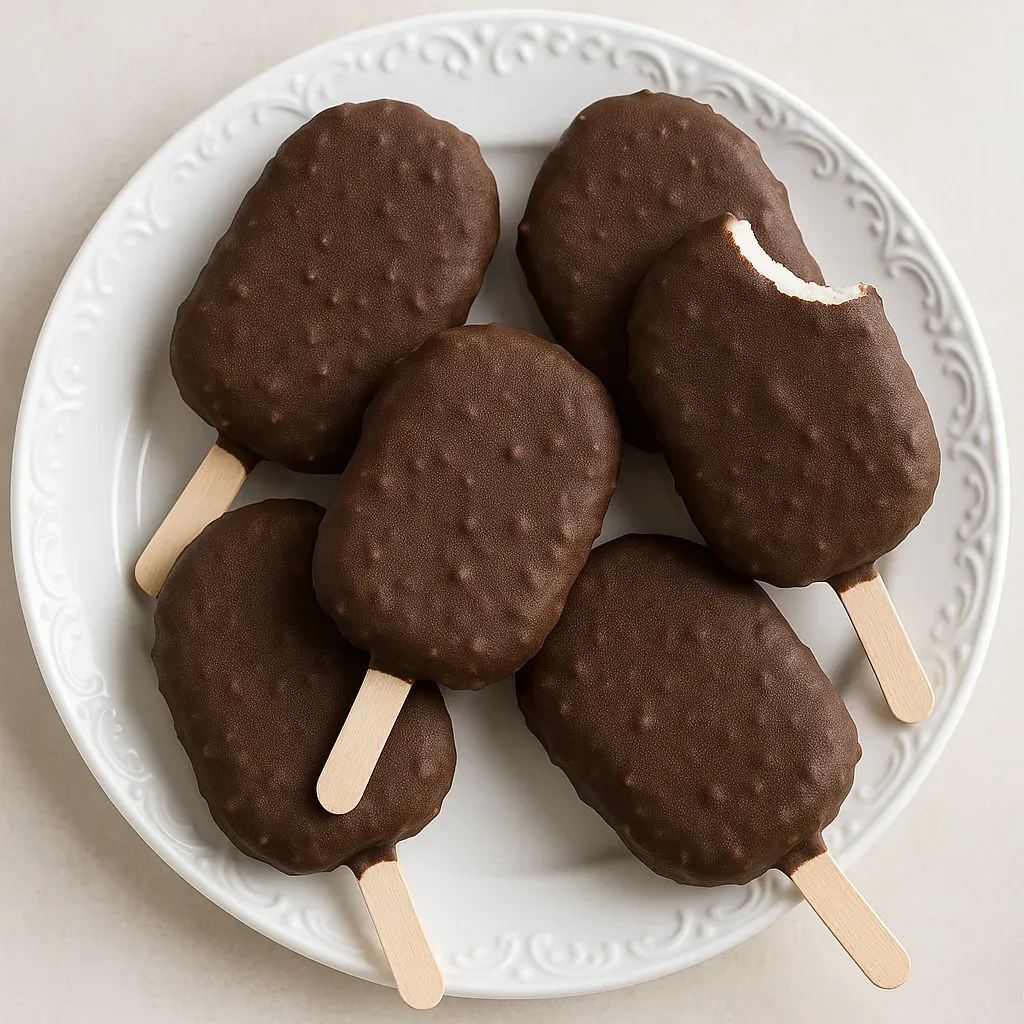
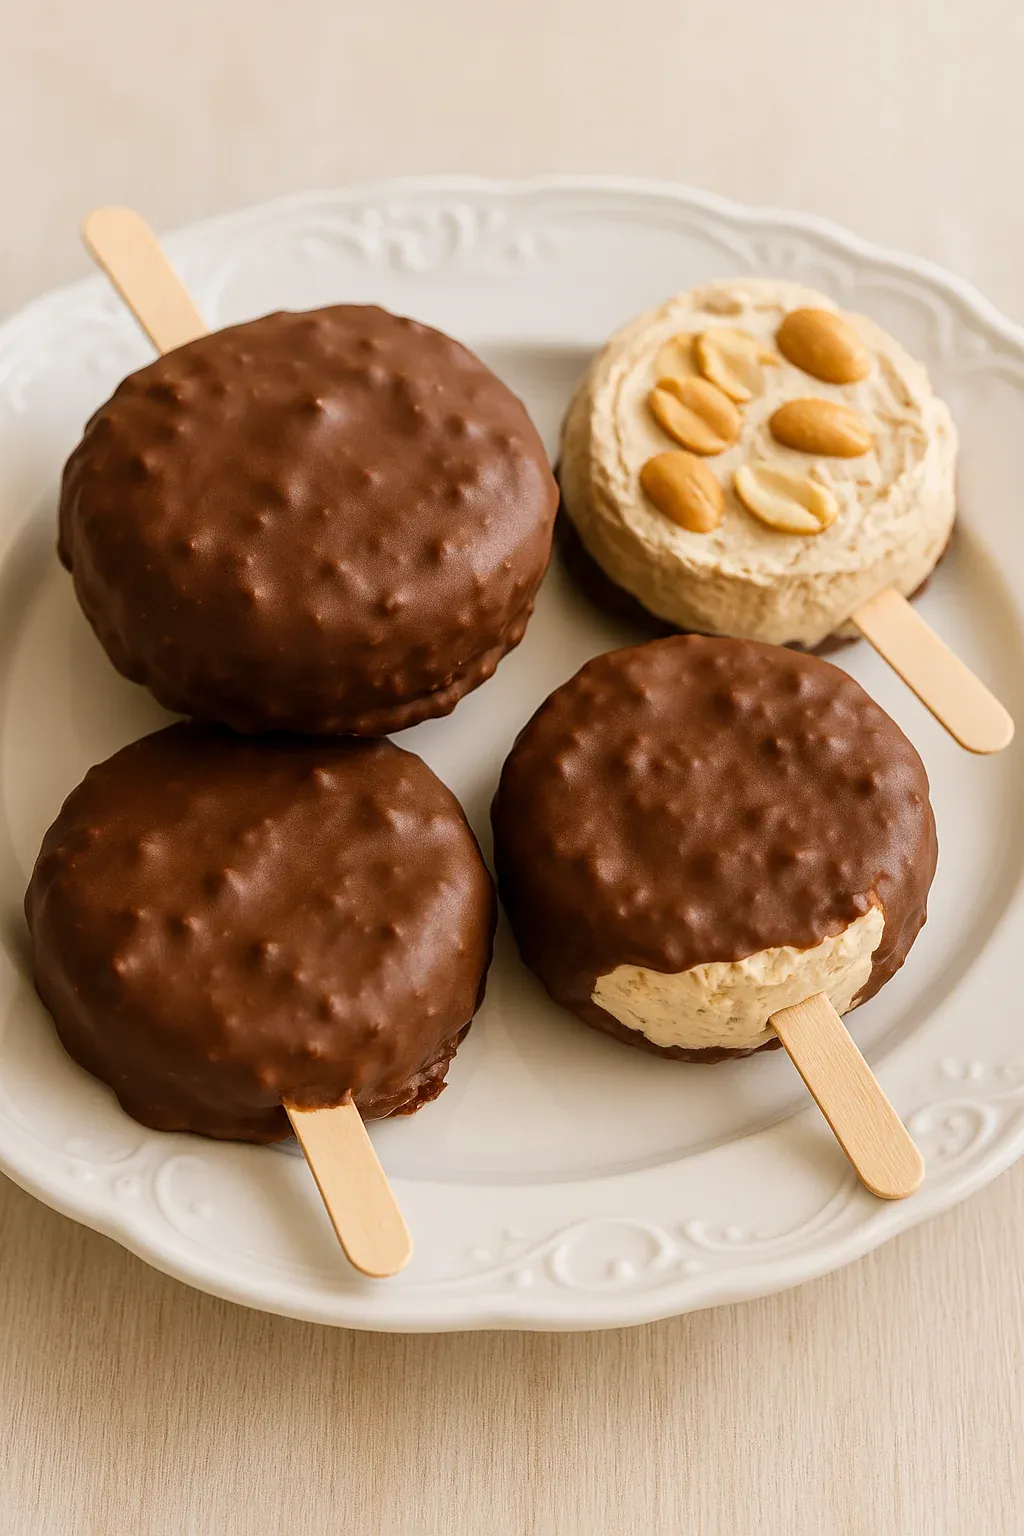
This simple homemade version of Dairy Queen's Buster Bars has been my freezer staple for months now. Each creamy peanut butter bar coated in rich chocolate delivers indulgent flavor with a fraction of the calories and sugar of the original, plus a surprising protein boost.
The first time I made these bars, my kids immediately declared them better than the drive-thru version. Now they regularly help me prepare a batch on Sunday afternoons so we have a week's worth of treats ready to grab.
Ingredients
- Yogurt: Creates the creamy base without excessive calories. Greek yogurt adds extra protein while vanilla yogurt adds natural sweetness.
- Peanut butter: Delivers that signature nutty flavor and creamy texture. Natural or conventional both work perfectly here.
- Sweetener: Balances flavors if using unsweetened yogurt. Honey adds a floral note while maple syrup contributes caramel undertones.
- Chocolate chips: Forms the magical outer shell that cracks satisfyingly when bitten. Higher quality chips melt more smoothly.
- Peanuts: Provides delightful textural contrast and enhances the peanut flavor profile. Lightly toasted nuts offer deeper flavor.
- Coconut oil: Creates a smoother chocolate coating that sets beautifully. Refined oil prevents any coconut flavor interference.
Step-by-Step Instructions
- Prepare the base:
- Thoroughly whip together yogurt, peanut butter, and sweetener until completely smooth and uniform. This creates the protein packed foundation of your bars with no gritty texture.
- Form the bars:
- Drop generous spoonfuls of the mixture onto a parchment lined tray and insert a popsicle stick into each. Take time to smooth the tops and sides with a second spoon for a more professional appearance.
- Add texture:
- Sprinkle chopped peanuts over each bar, gently pressing them in so they adhere well. This adds that authentic Buster Bar crunch that contrasts beautifully with the creamy center.
- Freeze thoroughly:
- Allow bars to freeze completely solid for at least 4 hours or preferably overnight. This patience ensures they will hold their shape when dipped in warm chocolate.
- Prepare the chocolate:
- Melt chocolate chips using short microwave intervals or a double boiler, stirring frequently to prevent scorching. Add oil for a glossier finish that coats more evenly.
- Dip with care:
- Working quickly with one bar at a time, dip each frozen pop into the chocolate, tilting the bowl to coat completely. Allow excess to drip off for a thin, even shell.
- Flash freeze:
- Return dipped bars to the lined tray and immediately place in freezer to set the chocolate before it has time to melt the inner layer. This creates that satisfying crack when bitten.
 Pin it
The coconut oil in the chocolate coating is my secret weapon for these bars. I discovered after multiple batches that this simple addition creates that signature snap when you bite into them, just like the Dairy Queen original that my grandmother would treat us to after softball games during hot summer evenings.
Storage Secrets
These homemade Buster Bars maintain their best quality when stored properly in the freezer. I recommend initially freezing them uncovered on a tray until completely solid, then transferring to an airtight container with parchment between layers to prevent sticking. This method preserves their texture and prevents freezer burn for up to a month. For the best eating experience, let them sit at room temperature for exactly 3 minutes before enjoying to achieve that perfect semi soft texture.
 Pin it
Creative Variations
The basic recipe offers endless possibilities for customization. For a more decadent dessert, substitute cookie butter or Nutella for the peanut butter. Health conscious eaters might prefer using protein enriched Greek yogurt and sugar free chocolate chips to boost nutrition while reducing carbs. My family enjoys a mint chocolate version made with mint extract added to the yogurt base and topped with crushed candy canes during the holidays. For special occasions, try rolling the freshly dipped bars in colorful sprinkles, crushed cookies, or toasted coconut before the chocolate sets.
Serving Suggestions
These homemade Buster Bars make a delightful standalone dessert, but they truly shine as part of a larger spread. Serve them alongside fresh berries for a beautiful color contrast at summer gatherings. For birthday parties, arrange them on a tiered stand with other frozen treats for an impressive dessert bar. My personal favorite way to enjoy them is slightly softened and drizzled with warm homemade caramel sauce, transforming them into an elevated dessert worthy of dinner guests. The bars also make thoughtful homemade gifts when wrapped individually in parchment and packaged in decorative boxes.
Frequently Asked Questions
- → Can I use almond butter instead of peanut butter?
Yes, almond butter is a great substitute. You can also try cashew butter, sunflower seed butter, or macadamia nut butter for a unique flavor.
- → Is it necessary to add sweetener to the bars?
If you use sweetened yogurt or ice cream, you likely won’t need additional sweetener. Otherwise, add your preferred sweetener like sugar, honey, or a sugar-free option.
- → How do I melt chocolate chips properly?
Melt chocolate chips slowly in the microwave or using a double boiler to avoid burning. Stir in coconut oil for a smoother chocolate coating if desired.
- → How should I store the bars?
Store the bars in a covered container in the freezer for up to a month. Let them sit out for a minute or two before enjoying for the best flavor.
- → Can I make these vegan or keto?
Yes! Use dairy-free yogurt and chocolate chips for a vegan version. For keto, opt for sugar-free chocolate chips and low-carb sweeteners.