
 Pin it
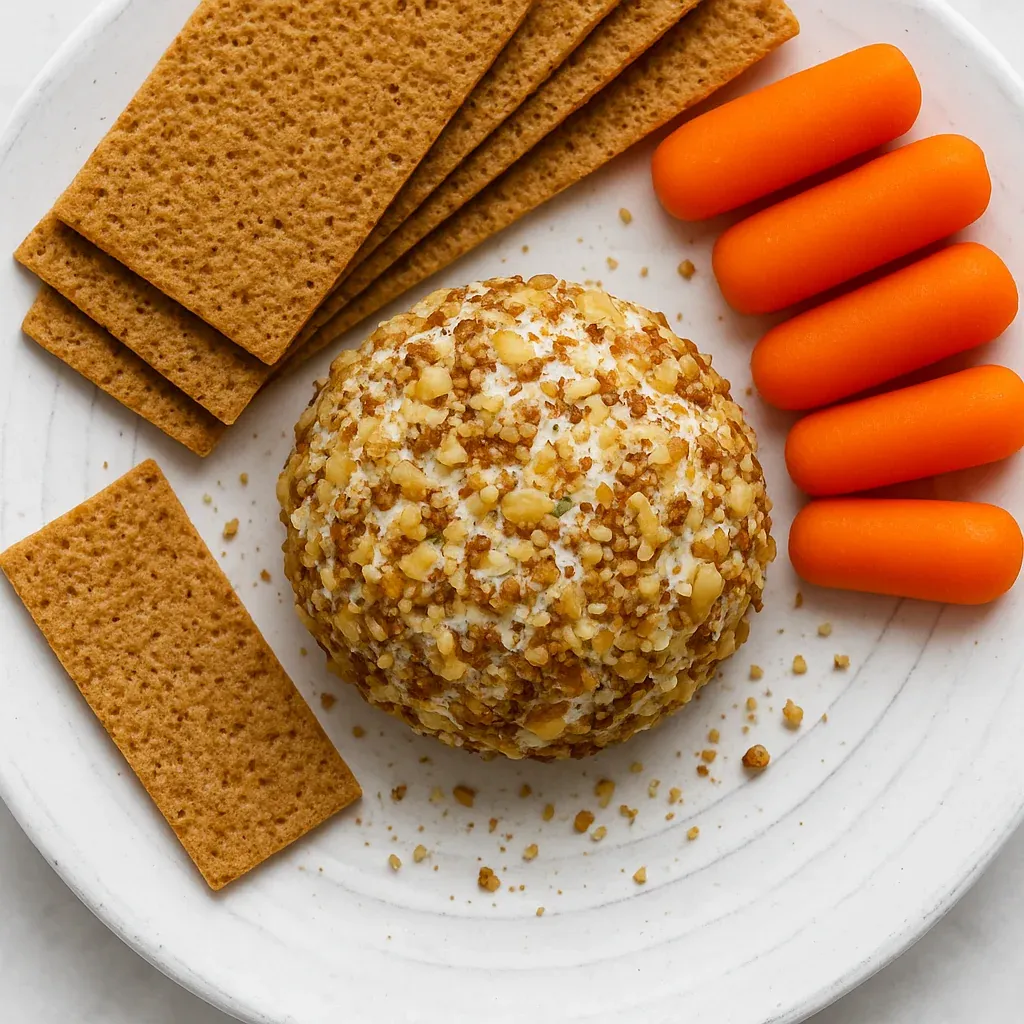
This garlic herb cheese ball has become my go-to party appetizer for gatherings large and small. The creamy texture combined with aromatic herbs creates an impressive centerpiece that guests always gravitate toward first.
I first created this cheese ball for a holiday potluck where I needed something substantial for vegan guests. It disappeared so quickly that I barely got to taste it myself. Now I always make two batches whenever friends come over.
Ingredients
- Vegan cream cheese: Forms the creamy base of our cheese ball. Tofutti works well but Kite Hill offers superior flavor and texture
- Extra virgin olive oil: Adds richness and helps create that perfectly smooth consistency
- Vegan Parmesan shreds: Provide that distinctive aged cheese flavor that makes this ball taste authentic
- Dried Italian herbs: Infuse every bite with Mediterranean flair
- Fresh lemon juice: Brightens the richness and balances the savory elements
- Garlic granules: Deliver aromatic punch without overwhelming the delicate cheese flavors
- Walnuts: Create a beautiful textural contrast and nutty flavor when coating the outside
Step-by-Step Instructions
- Mixing the Base:
- Combine all cheese ball ingredients in a small mixing bowl. Beat thoroughly until the mixture becomes noticeably light and fluffy. The air incorporation makes the texture divine so take your time with this step. Scrape down the sides periodically to ensure even mixing.
- Chilling the Mixture:
- Gather the whipped cheese mixture into a loose ball shape in your bowl. This preliminary shaping helps tremendously later. Place the bowl in your freezer for exactly 15 minutes. This time is crucial as too little won't firm it up enough and too much will make it difficult to shape.
- Preparing the Coating:
- While waiting, finely chop your walnuts to create the perfect outer texture. The pieces should be small enough to adhere well but not so fine that they become powdery. Spread them evenly on a plate for easy rolling.
- Shaping the Cheese Ball:
- Coat your hands with a thin layer of olive oil to prevent sticking. Working quickly, scoop the chilled cheese mixture and gently form into a sphere using light pressure. The oil on your hands creates a smooth exterior while preventing the cheese from warming too quickly.
- Coating Application:
- Roll the formed ball in the prepared walnuts immediately after shaping. Use gentle pressure to help the nuts adhere completely. Cover all sides evenly for the most attractive presentation.
- Final Setting:
- Place the completed cheese ball on your serving plate and return to the freezer for 5 minutes. This final chill helps the ball maintain its shape when served but keeps it perfectly spreadable.
 Pin it
The lemon juice is truly my secret weapon in this recipe. I discovered its importance accidentally when I was out of vinegar one day and needed acid. The brightness it brings cuts through the richness perfectly, creating a balanced flavor profile that keeps people coming back for more.
Perfecting Your Cheese Ball Shape
The most challenging aspect of making any cheese ball is achieving that perfect spherical shape. The key lies in temperature control. If your mixture feels too soft even after initial chilling, place it back in the freezer for another 5 minutes. Conversely, if it's too firm and cracking during shaping, let it warm slightly in your hands before proceeding. Remember that slight imperfections add character and show it's homemade!
Storage Solutions
Your finished cheese ball will keep beautifully in the refrigerator for up to five days when wrapped tightly in plastic wrap. For best results, wait to add the nut coating until the day you plan to serve it. The ball can also be frozen for up to one month but texture may change slightly upon thawing. To serve after freezing, thaw overnight in the refrigerator then let stand at room temperature for 30 minutes before serving.
 Pin it
Ingredient Substitutions
This recipe offers wonderful flexibility based on what you have available. The cream cheese can be any plant-based variety you prefer including cashew-based versions for a more artisanal flavor. The nut coating works beautifully with pecans, almonds, or even a mixture of seeds if accommodating nut allergies. For an herbal variation, substitute fresh herbs at triple the quantity of dried or create a Mediterranean version using sun-dried tomatoes and olives mixed into the cheese base.
Elegant Serving Suggestions
Elevate your cheese ball presentation by surrounding it with concentric circles of different accompaniments. Start with a ring of various crackers, followed by vegetable crudités, then dried fruits. This creates a visually stunning display that encourages exploration of different flavor combinations. For special occasions, consider pressing edible flowers into the exterior before adding the nuts for a show-stopping centerpiece.
Frequently Asked Questions
- → How do I ensure the cheese ball holds its shape?
The key is to chill the cheese mixture thoroughly before rolling it. You can even place it in the freezer for about ten minutes to firm it up. If the mixture feels too soft, fold in more vegan cheese shreds or herbs.
- → What can I use as a coating for the cheese ball?
Chopped walnuts or pecans work perfectly to create a crunchy exterior. For variety, you can try seeds like sesame or crushed crackers.
- → What should I serve with it?
This cheese ball pairs well with crackers, crostini, veggie sticks, dried fruits, or marcona almonds. It can even be part of a fancy cheese platter.
- → Can I make this cheese ball in advance?
Yes! You can prepare it a day ahead. Just chill it in the refrigerator and add the coating right before serving to keep the texture fresh.
- → Can I substitute any ingredients for a non-vegan version?
Absolutely! You can replace vegan cream cheese and Parmesan shreds with their dairy-based counterparts if preferred.
- → How do I adjust the flavor to my liking?
You can customize the seasoning by adding more garlic, herbs, or lemon juice to suit your taste. Getting the balance of zesty and savory is key.