
 Pin it
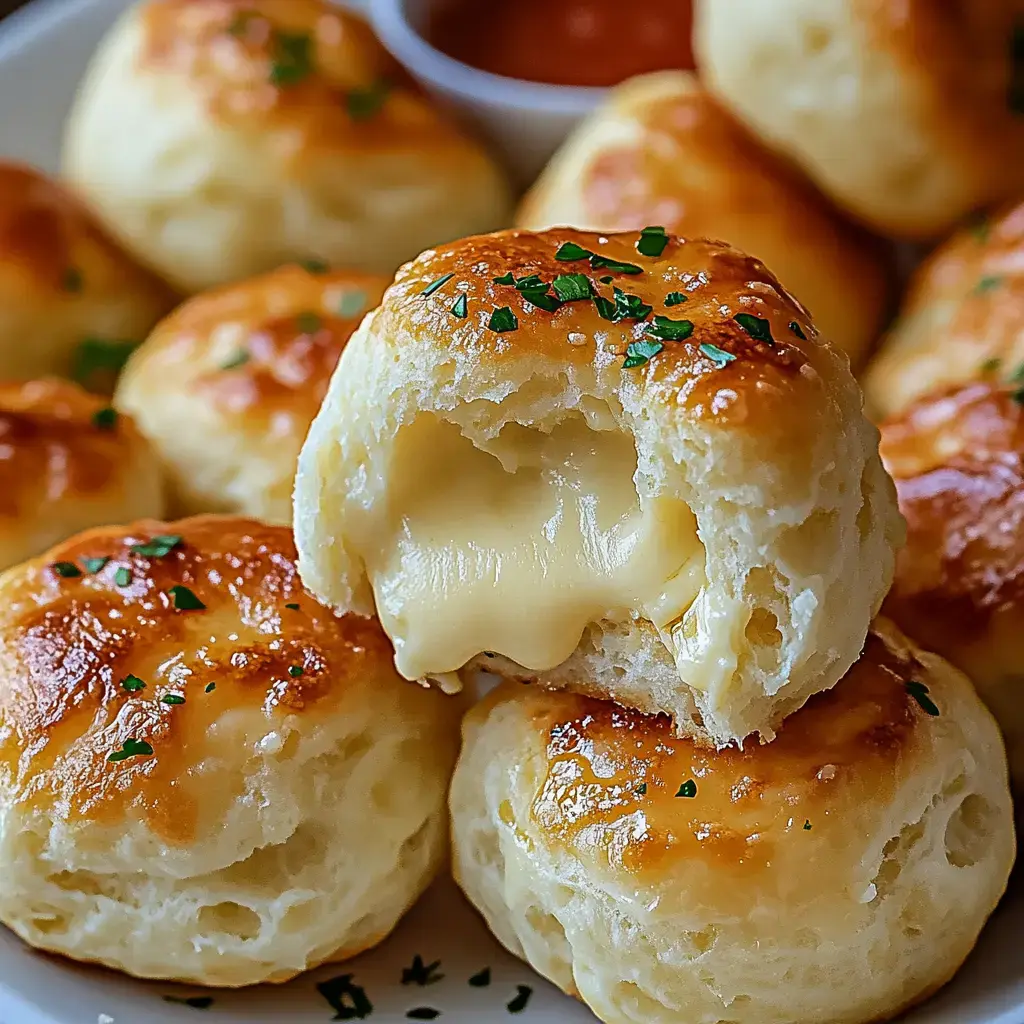
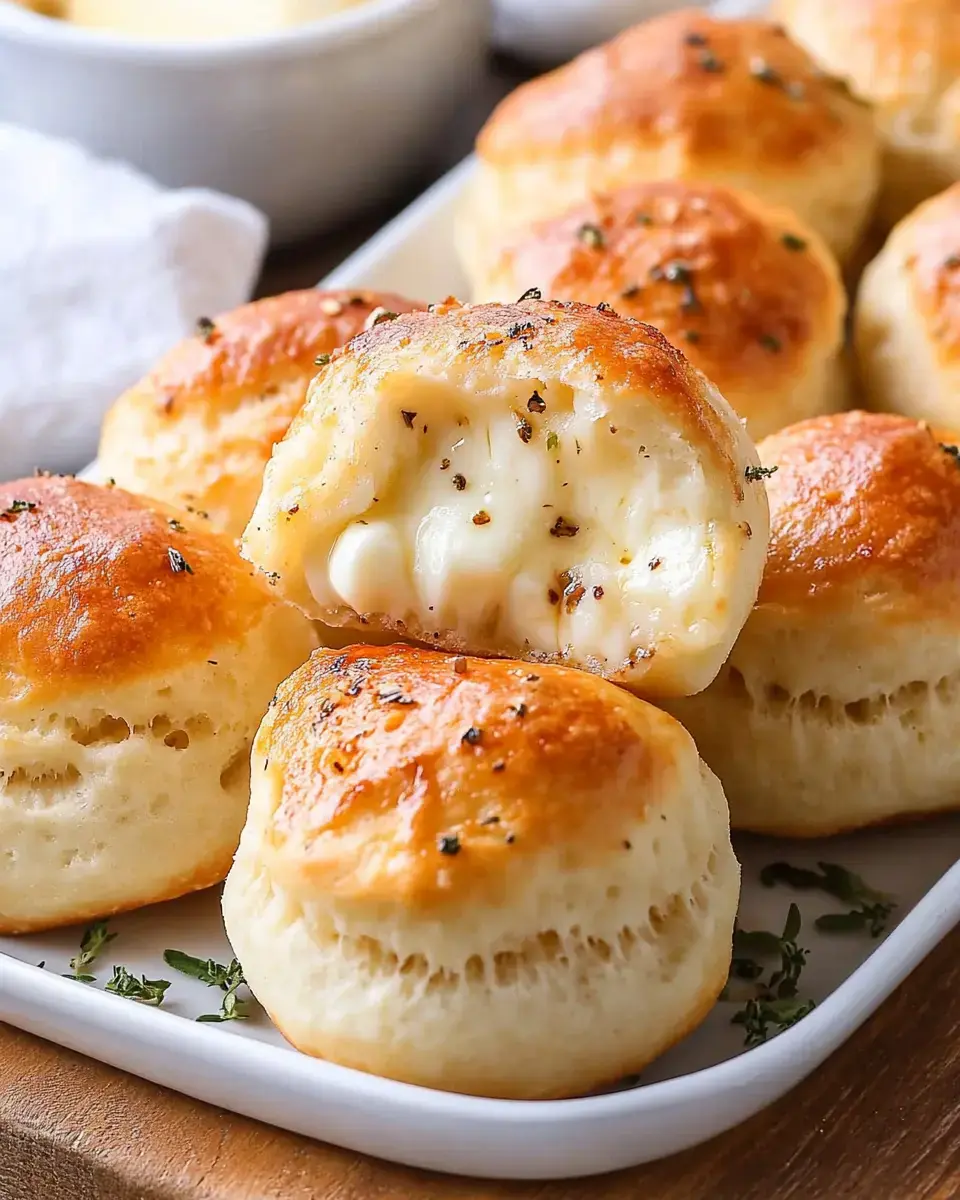
These homemade Garlic & Herb Cheese Bombs are an easy recipe that creates irresistible pull-apart treats. Featuring soft biscuit dough wrapped around gooey mozzarella and brushed with garlic-herb butter, these savory bites are perfect as appetizers, snacks, or alongside your favorite meals. Ready in just minutes, they're guaranteed to become a family favorite!
Why You'll Love These Cheese Bombs
These cheese bombs combine the convenience of ready-made biscuit dough with the indulgent pleasure of melted cheese and aromatic garlic-herb butter. They're incredibly versatile and can be customized with different cheeses and seasonings. Perfect for entertaining, they require minimal prep time but deliver maximum flavor and wow-factor. Best of all, they're nearly foolproof to make!
Ingredients for Cheese Bombs
- For the Bombs:
- 1 can (16.3 oz) refrigerated biscuits
- 8 cubes mozzarella cheese (1-inch each)
- For the Garlic-Herb Butter:
- 4 tablespoons butter, melted
- 2 teaspoons garlic powder
- 1 tablespoon Italian seasoning
- 1/4 teaspoon salt
- Optional Additions:
- Grated Parmesan cheese
- Red pepper flakes
- Fresh parsley for garnish
Step-by-Step Instructions
- Prepare for Baking
- Preheat oven to 400°F (200°C). Line baking sheet with parchment paper. Separate biscuits and cut cheese into cubes.
- Assemble Cheese Bombs
- Flatten each biscuit slightly. Place cheese cube in center. Carefully wrap dough around cheese, pinching edges to seal completely. Place seam-side down on baking sheet.
- Make Garlic Butter
- Combine melted butter, garlic powder, Italian seasoning, and salt in small bowl. Set aside.
- Bake and Finish
- Bake 10-12 minutes until golden brown. Immediately brush with garlic-herb butter. Serve while cheese is hot and melty.
Pro Tips for Success
Seal edges tightly to prevent cheese from leaking. Don't overbake or cheese will become too hard. Let cool slightly before eating to prevent burns. Use cold cheese cubes for easier wrapping. Make garlic butter while bombs bake for perfect timing.
 Pin it
Serving Suggestions
Serve hot with marinara sauce for dipping. Perfect alongside pasta dishes or salads. Excellent appetizer for parties or game day. Add to soup or chili as a side. Sprinkle with extra Parmesan cheese before serving for added flavor.
Storage and Make-Ahead Tips
Best served fresh from oven. Can be assembled ahead and refrigerated up to 4 hours before baking. Store leftovers in airtight container for up to 2 days. Reheat in oven at 350°F for 5 minutes to restore cheese's melty texture. Not recommended for freezing.
Frequently Asked Questions
- → Can I use different types of cheese?
- Yes, you can experiment with different cheeses like cheddar, feta, gorgonzola, or a blend of cheeses for variety.
- → How can I add more flavor?
- You can add red pepper flakes, hot sauce, chopped bacon, sun-dried tomatoes, or caramelized onions to customize the flavor.
- → Can I use fresh herbs instead of dried?
- Yes, fresh herbs can be used instead of dried. Just chop them finely and mix into the garlic butter mixture.
- → Why put cheese bombs seam side down?
- Placing them seam side down helps prevent the cheese from leaking out during baking and ensures the bombs stay sealed.
- → How should these be served?
- Serve warm as an appetizer or snack, or pair with pasta or salad for a meal. They're best enjoyed while the cheese is still melty.