
 Pin it
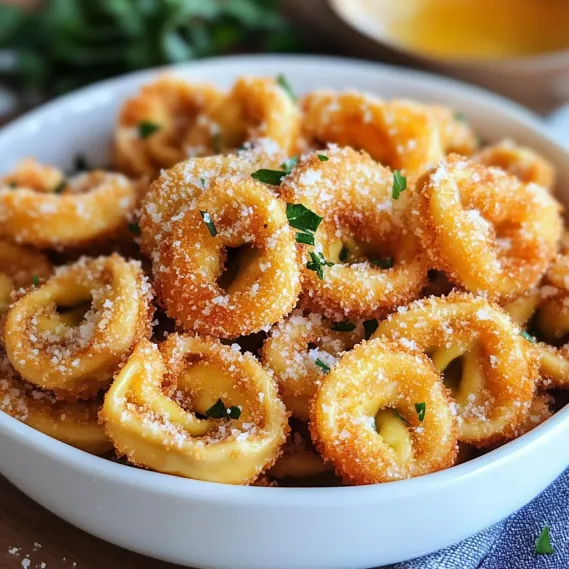
This crispy Parmesan fried tortellini transforms humble refrigerated pasta into an irresistible appetizer that disappears within minutes at any gathering. The contrast between the golden crunchy exterior and soft cheesy filling creates an addictive bite that keeps everyone coming back for more. My family requests these at every movie night, and I've perfected the technique through countless Friday evening cooking sessions.
I first made these when searching for a creative appetizer for a last minute dinner party. Now they've become my signature dish that friends specifically request when visiting. The combination of crunchy coating and cheesy pasta centers never fails to impress.
Ingredients
- Refrigerated tortellini: Package approximately 9 oz. Choose cheese filled for best flavor balance with the coating. Quality matters here.
- Panko breadcrumbs: 1 cup. These Japanese breadcrumbs create the ultimate crispy texture that regular breadcrumbs simply cannot match.
- Parmesan cheese: ½ cup grated. Use freshly grated for best flavor and better adhesion to the tortellini.
- Garlic powder: ½ teaspoon. Adds aromatic depth without burning like fresh garlic would during frying.
- Black pepper: ¼ teaspoon. Provides subtle heat that complements the cheese flavors perfectly.
- Eggs: 2 large. Creates the essential sticky layer that helps the coating adhere properly.
- Flour: ¼ cup. The first dredging layer that ensures the egg wash sticks evenly.
- Olive oil: For frying. Adds flavor beyond what vegetable oil would provide.
- Salt: To taste. Enhances all the flavors after frying.
- Fresh parsley: Chopped for garnish. Adds bright color and fresh herbal notes.
How To Make Crispy Parmesan Fried Tortellini
- Prepare the pasta:
- Bring a large pot of generously salted water to a rolling boil. Cook tortellini according to package instructions just until they float to the surface usually 2 to 3 minutes. Be careful not to overcook as they will become too soft for frying. Drain immediately and spread on a plate to cool slightly and release steam.
- Create your dredging station:
- Set up a three bowl system on your counter in this order flour eggs whisked together panko and Parmesan mixture. This assembly line organization prevents frustration and keeps the process flowing smoothly. Mix the breadcrumbs Parmesan garlic powder and black pepper thoroughly in the third bowl to ensure even distribution of flavors.
- Coat the tortellini:
- Working with about 5 tortellini at a time to prevent crowding roll them in flour ensuring complete coverage but gently tapping off excess. Next dip into beaten eggs allowing extra to drip back into the bowl. Finally place in the breadcrumb mixture pressing gently to adhere the coating all around. Set coated pieces on a clean plate while you finish the batch.
- Fry to golden perfection:
- Heat olive oil in a large skillet over medium heat until shimmering but not smoking. You need enough oil to cover half the height of the tortellini approximately ¼ inch. Test the oil with a few breadcrumbs they should sizzle immediately. Working in batches of 8 to 10 pieces to avoid crowding fry tortellini for 2 to 3 minutes per side until deeply golden brown. Watch carefully as they can darken quickly.
- Drain and season:
- Transfer fried tortellini to a paper towel lined plate using a slotted spoon. While still hot sprinkle lightly with salt which adheres better to warm food. The paper towels absorb excess oil keeping your appetizer crisp rather than greasy.
- Garnish and serve:
- Transfer to a serving platter sprinkle with fresh chopped parsley and serve immediately alongside warm marinara sauce for dipping. The contrast between the crunchy tortellini and smooth tangy sauce creates flavor perfection.
 Pin it
Parmesan cheese is truly the star ingredient in this recipe. I discovered that using freshly grated rather than pre grated makes all the difference in flavor depth and how well it adheres to the tortellini. My grandmother always insisted on using the real block Parmigiano Reggiano rather than the canister version and this recipe proves why her insistence on quality ingredients mattered.
Make Ahead Options
These tortellini can be prepared through the coating stage and refrigerated for up to 24 hours before frying. Simply place them in a single layer on a baking sheet lined with parchment paper and cover lightly with plastic wrap. This make ahead option is perfect for entertaining as you can do the messy prep work well before guests arrive.
For longer storage freeze the coated uncooked tortellini on a baking sheet until solid then transfer to an airtight container. They can be fried directly from frozen just add about 1 minute to the cooking time per side. The texture remains remarkably crisp even when cooked from frozen.
Already fried tortellini can be refrigerated for up to 3 days and reheated in a 350°F oven for 8 to 10 minutes to restore crispness. While not quite as perfect as freshly fried this method works well for planned leftovers or when preparing large batches in advance for gatherings.
Sauce Pairings That Elevate The Dish
While classic marinara is the traditional pairing for these crispy bites experimenting with different dipping options creates entirely new flavor experiences. Try a creamy garlic aioli for richness pesto for herbal notes or even a spicy arrabiata for heat.
For an elegant presentation create a sauce flight with small ramekins of different options allowing guests to sample various flavor combinations. The versatility of the basic fried tortellini means they pair beautifully with everything from tangy to creamy to spicy sauces.
My personal favorite combination is a roasted red pepper cream sauce that balances sweetness acidity and richness. The creamy texture contrasts wonderfully with the crisp exterior of the tortellini creating a sophisticated flavor profile that surprises guests expecting a simple appetizer.
 Pin it
Troubleshooting Common Issues
If your breadcrumb coating falls off during frying this usually indicates the tortellini were too wet after boiling. Be sure to let them cool and dry slightly before starting the dredging process. Additionally pressing the breadcrumb mixture firmly onto each piece helps it adhere properly during cooking.
For tortellini that become too dark before cooking through properly your oil is likely too hot. Maintain medium heat throughout the frying process and adjust as needed if you notice premature browning. Remember that a slightly lower temperature for a longer time produces more evenly cooked results than high heat for a short period.
Should your finished tortellini taste greasy rather than crisp the oil temperature was likely too low. When oil is not hot enough the coating absorbs oil instead of instantly searing. Use a cooking thermometer if available aiming for approximately 350°F for perfect results every time.
Frequently Asked Questions
- → What type of tortellini is best for frying?
Refrigerated cheese or meat-filled tortellini works best as it holds its shape and cooks evenly when fried.
- → Can I bake the tortellini instead of frying?
Yes, bake them at 400°F (200°C) on a greased baking sheet for 15-20 minutes, flipping halfway for even crispiness.
- → What dipping sauces pair well with crispy tortellini?
Marinara sauce is a classic choice, but garlic butter, ranch dressing, or pesto also work wonderfully.
- → How do I reheat leftover fried tortellini?
Reheat in an oven or air fryer at 375°F (190°C) for 5-7 minutes to restore their crispy texture.
- → Can I make this dish gluten-free?
Yes, use gluten-free breadcrumbs and flour for a gluten-free version of this dish.
- → How can I customize the breadcrumb coating?
Add Italian seasoning, paprika, or fresh herbs like basil or oregano to the coating for extra flavor.