
 Pin it
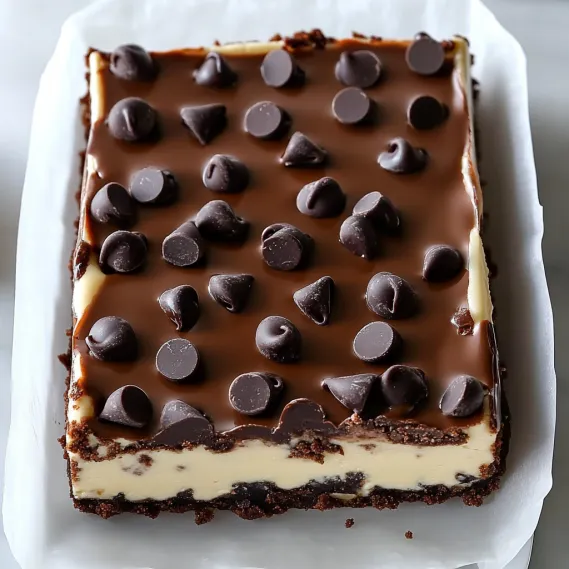
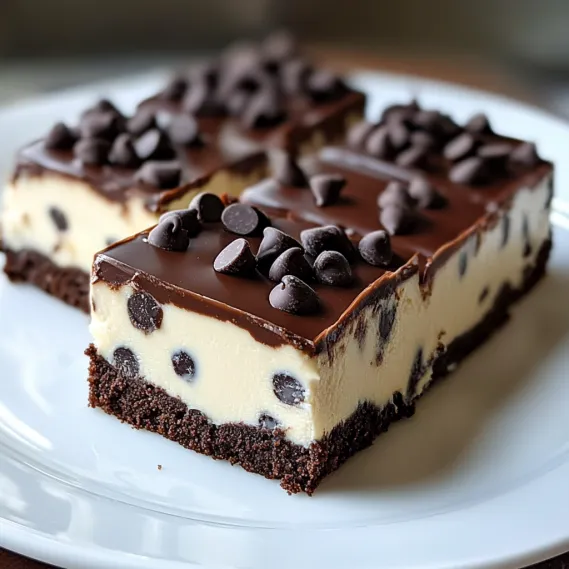
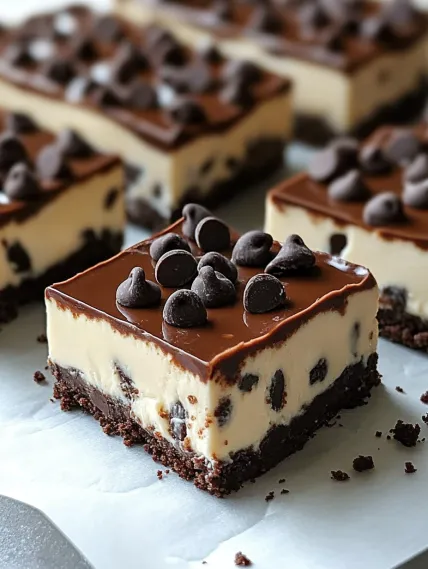
This chocolate chip cheesecake bar recipe combines two beloved desserts into one irresistible treat. The rich chocolate cookie crust topped with creamy cheesecake filling studded with chocolate chips creates the perfect balance of textures and flavors. My family has requested these bars for every special occasion since I first made them.
I first created these when hosting a last minute dinner party in the middle of a heatwave. The no bake aspect was a lifesaver and my guests were so impressed they thought I had purchased them from a bakery. Now they're my signature dessert.
Ingredients
- For the Crust
- Chocolate cookie crumbs: From about 20 cookies providing a rich chocolatey base. Choose cookies with intense flavor like Oreos with filling removed
- Melted butter: Acts as the binding agent. Use unsalted for better flavor control
- For the Cheesecake Layer
- Cream cheese: Forms the creamy base. Full fat works best for richness and proper setting
- Granulated sugar: Adds just enough sweetness without overpowering the chocolate
- Vanilla extract: Enhances the flavor complexity. Use pure extract not imitation for best results
- Mini chocolate chips: Distribute better throughout the filling than regular sized chips
- For the Ganache
- Heavy cream: Gives the ganache its silky texture. Avoid substituting with milk or half and half
- Semisweet chocolate chips: Balance sweetness with chocolate intensity. Choose good quality for smoother melting
How To Make Chocolate Chip Cheesecake Bars
- Prepare the Crust:
- Mix chocolate cookie crumbs with melted butter until every crumb is moistened. The mixture should hold together when pressed between your fingers but still be slightly crumbly. Press firmly and evenly into the bottom of a parchment lined 8×8 pan using the bottom of a measuring cup for a smooth compact layer. Refrigerate for at least 20 minutes to firm up.
- Create the Cheesecake Filling:
- Beat softened cream cheese using an electric mixer until completely smooth with no lumps remaining usually takes about 2 minutes on medium speed. Add sugar and vanilla and continue mixing until fully incorporated and mixture looks creamy and slightly fluffy. Gently fold in 3/4 cup mini chocolate chips using a spatula with a light hand to maintain the air in the mixture. Spread filling over chilled crust using an offset spatula to create an even layer reaching all corners.
- Chill the Cheesecake Layer:
- Cover pan with plastic wrap making sure it doesn't touch the surface of the filling. Refrigerate for minimum 3 hours though overnight is better allowing the filling to set completely. The filling should feel firm to a gentle touch when properly set.
- Make the Chocolate Ganache:
- Heat heavy cream in a small saucepan just until tiny bubbles form around the edges being careful not to boil. Pour over chocolate chips in a heat safe bowl and let sit undisturbed for 2 minutes allowing the chocolate to melt. Stir slowly from the center outward until completely smooth and glossy. Allow to cool for 5 minutes but not longer or it may thicken too much.
- Add Final Touches:
- Pour slightly cooled ganache over the set cheesecake layer tilting the pan gently to create an even covering. Immediately sprinkle remaining mini chocolate chips over the top before the ganache sets. Return to refrigerator for at least 1 hour until ganache is firm.
- Slice and Serve:
- Remove from refrigerator and lift entire dessert out using parchment paper overhang. Let sit at room temperature for 10 minutes so the ganache won't crack when cut. Slice with a sharp knife wiped clean between cuts using a gentle sawing motion for cleanest results.
 Pin it
The mini chocolate chips are my secret weapon in this recipe. I discovered them after making these bars with regular sized chips and finding they were too difficult to slice neatly. The mini chips distribute better throughout the filling and create the perfect chocolate distribution in every bite. My daughter always helps sprinkle the chips on top and says it's like adding the stars to a chocolate sky.
Make Ahead Options
These cheesecake bars are perfect for advance preparation as they actually improve with time. Make them up to two days before serving to allow the flavors to meld together. The texture also becomes more velvety after the first 24 hours in the refrigerator. Simply prepare according to the recipe, but keep them in the refrigerator covered with plastic wrap until ready to serve.
Storage Tips
- Refrigerator Storage: Store leftover bars in an airtight container in the refrigerator for up to 5 days. Place sheets of parchment paper between layers if stacking to prevent them from sticking together. Always return leftovers to the refrigerator promptly as the cream cheese filling softens quickly at room temperature.
- Freezing Instructions: These bars freeze beautifully for longer storage. After slicing, place the bars on a baking sheet and freeze until solid, about 2 hours. Then transfer to a freezer safe container with parchment between layers. They'll keep for up to 3 months. Thaw individual bars in the refrigerator for 3 hours before serving.
 Pin it
Serving Suggestions
These chocolate chip cheesecake bars are delicious on their own, but you can elevate them for special occasions. Try serving with a dollop of lightly sweetened whipped cream, a drizzle of caramel sauce, or fresh berries for color contrast. For an elegant presentation, dust the plate with cocoa powder before placing the bar. These bars pair wonderfully with coffee, especially a rich espresso that complements the chocolate flavors.
Ingredient Substitutions
- For a gluten free version, use gluten free chocolate cookies for the crust maintaining the same measurements
- Try white chocolate chips instead of semisweet for a different flavor profile
- Replace up to half the regular cream cheese with lower fat cream cheese if desired though the texture will be slightly less rich
- For a mint chocolate variation, add 1/4 teaspoon mint extract to the filling and use mint chocolate chips
Frequently Asked Questions
- → Can I use a different type of cookie for the crust?
Yes, you can substitute chocolate cookies with graham crackers, Oreo crumbs, or any preferred cookie crumble for the crust.
- → How long do these bars need to chill?
The crust should chill for 15 minutes, the cheesecake layer for 3-4 hours, and the ganache for an additional 1-2 hours before serving.
- → Can I freeze these bars for later?
Absolutely! Wrap them tightly in plastic wrap, then foil, and store in the freezer for up to 3 months. Thaw overnight in the refrigerator before serving.
- → What can I use instead of mini chocolate chips?
You could use chopped chocolate, chocolate chunks, or even crushed candy pieces for a similar effect.
- → How can I ensure clean slices when cutting the bars?
Use a sharp knife, and wipe it clean between cuts for neat, professional-looking slices. Chilling the bars thoroughly also helps maintain their shape.
- → Can I add other flavors to the cheesecake layer?
Yes, you can mix in other extracts like almond or peppermint or even fold in caramel or fruit purees to customize the flavor.