 Pin it
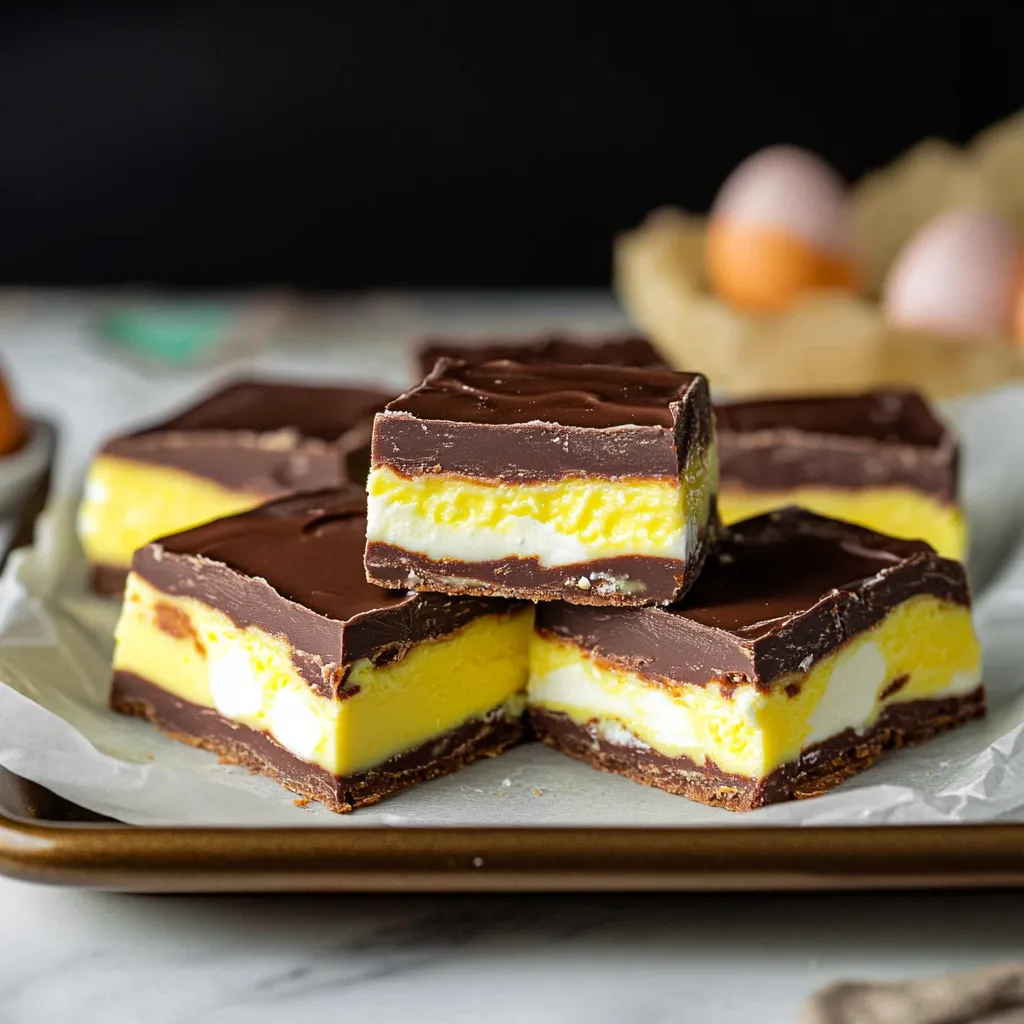
Transform the iconic Easter candy into a rich, layered fudge that captures all the magic of a Cadbury Egg in an easy-to-make treat. With a creamy white and yellow filling sandwiched between layers of milk chocolate, this fudge delivers the beloved candy's flavor without any complicated candy-making techniques. After perfecting this recipe, it's become my most requested Easter dessert.
Last Easter, I brought this to a family gathering, and everyone was amazed that they could enjoy their favorite seasonal candy in fudge form. Even those who find regular Cadbury Eggs too sweet loved these perfectly portioned squares.
Essential Ingredients
- Milk Chocolate: Use quality melting wafers for smooth results
- Light Corn Syrup: Essential for the proper cream filling texture
- Room Temperature Butter: Ensures smooth, creamy filling
- Pure Vanilla Extract: Enhances the classic flavor
- Powdered Sugar: Creates the perfect filling consistency
- Yellow Food Coloring: Gel coloring works best for authentic look
Detailed Cooking Instructions
- Filling Creation:
- Start by whipping softened butter with corn syrup, vanilla, powdered sugar, and milk until perfectly smooth. Remove two-thirds of the mixture to create the white layer. Add yellow food coloring to the remaining third for that signature Cadbury egg look.
- Chocolate Preparation:
- Melt milk chocolate slowly in the microwave, stirring every 20-30 seconds until smooth. Working with the right temperature ensures perfect layers. The chocolate should be completely melted but not too hot.
- Layer Assembly:
- Pour half the melted chocolate into a parchment-lined 9-inch square pan. Let it set slightly. Spread the white filling layer evenly, then carefully add drops of yellow filling. Top with remaining chocolate.
- Setting Process:
- Refrigerate until completely firm, about 30 minutes. The layers should be distinct and the chocolate should have a nice snap when cut.
 Pin it
This recipe was born from the desire to enjoy Cadbury Egg flavor beyond the Easter season. Sometimes the best recipes come from reimagining beloved treats in new forms.
Temperature Control
The success of this fudge depends on proper chocolate temperature. If too hot, it will melt the filling; if too cool, it won't spread properly. Heat in short bursts, stirring between each, until just melted and smooth.
 Pin it
Storage Strategy
Keep this fudge refrigerated in an airtight container for up to two weeks. Layer pieces with parchment paper to prevent sticking. For longer storage, freeze for up to three months - though it rarely lasts that long!
Cutting Tips
For perfect squares, heat your knife in hot water between cuts, wiping clean each time. This creates clean edges without cracking the chocolate. Cut small squares - this fudge is rich and a little goes a long way.
 Pin it
Final Thoughts
This Cadbury Egg Fudge represents the perfect marriage of beloved candy and easy homemade fudge. Each square delivers the iconic taste of Easter's favorite treat in a form that's perfect for sharing. Whether you're an experienced candy maker or just starting out, this recipe proves that sometimes the simplest techniques create the most impressive results.
Frequently Asked Questions
- → Why use a hot knife to cut the fudge?
- A hot knife cuts through the chocolate cleanly without cracking or dragging, giving neat squares.
- → Can I use different chocolate?
- Yes, semi-sweet chocolate works well but milk chocolate gives the most authentic Cadbury taste.
- → How should I store this fudge?
- Store in a covered container in the refrigerator for up to 2 weeks.
- → Is the yellow food coloring necessary?
- No, it's optional and only affects appearance, not taste.
- → Can I freeze this fudge?
- Yes, wrap well and freeze for up to 3 months. Thaw in refrigerator.
