
 Pin it
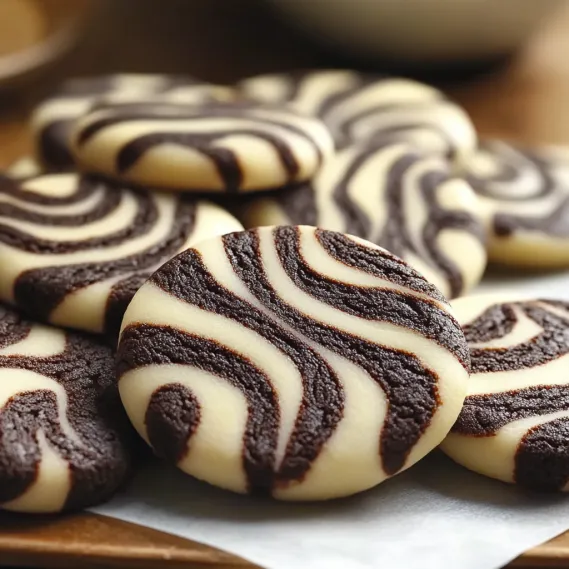
This hearty Zebra Cookie recipe has been my family's weekend baking staple for years. The stunning chocolate and vanilla swirl creates a visual masterpiece that tastes just as amazing as it looks.
I first created these during a rainy weekend when my children were bored and needed an activity. The mesmerizing swirl pattern captivated them immediately, and now these cookies are requested for nearly every special occasion in our home.
Ingredients
- All purpose flour: Provides the perfect structure for these cookies without being too dense
- Unsalted butter: Creates a rich flavor base and allows you to control the salt content
- Granulated sugar: Gives just the right amount of sweetness and helps create those crisp edges
- Large eggs: Bind everything together while adding moisture
- Vanilla extract: Enhances the flavor profile especially in the lighter portions of the cookie
- Unsweetened cocoa powder: Delivers deep chocolate flavor without additional sweetness
- Salt: Balances all the flavors and enhances the sweetness
- Baking powder: Gives a slight rise that creates the perfect texture
Step-by-Step Instructions
- Cream the Butter and Sugar:
- Beat the softened butter and granulated sugar together in a large bowl for a full 3 minutes until the mixture becomes noticeably lighter in color and fluffy in texture. This step incorporates air which creates the perfect cookie structure.
- Add Wet Ingredients:
- Add the eggs one at a time, beating well after each addition until fully incorporated. Pour in the vanilla extract and mix until the mixture is smooth and well combined. Scrape down the sides of the bowl to ensure everything is evenly mixed.
- Incorporate Dry Ingredients:
- Whisk together the flour, salt, and baking powder in a separate bowl. Gradually add this mixture to the wet ingredients, mixing on low speed just until combined. Overmixing at this stage can make the cookies tough.
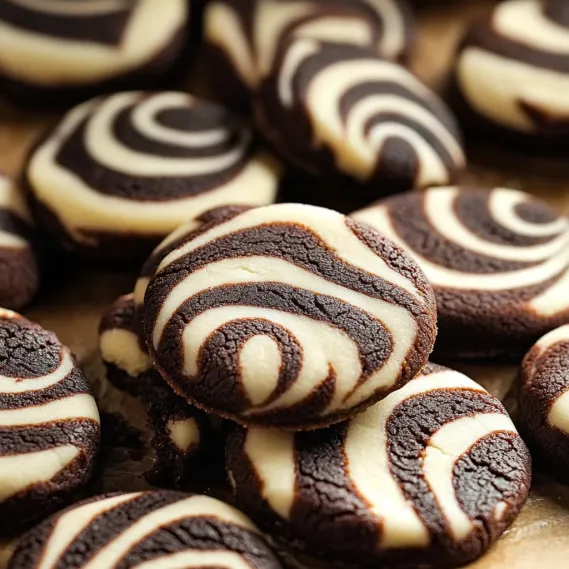
- Create Two Doughs:
- Divide the dough evenly into two portions. Leave one portion as is for your vanilla dough. Add the cocoa powder to the other portion and mix thoroughly until no streaks remain and you have a uniform chocolate dough.
- Form the Zebra Pattern:
- Take small spoonfuls of each dough and alternately place them next to and on top of each other in your baking pan or on a parchment lined surface. Continue building layers of alternating colors until you use all the dough.
- Create the Swirl:
- Using a toothpick or thin knife, gently swirl through the doughs to create the zebra pattern. Avoid overmixing as this will blend the colors too much and diminish the distinct pattern.
- Chill the Dough:
- Wrap the dough tightly in plastic wrap and refrigerate for at least 30 minutes. This crucial step prevents spreading during baking and enhances the flavor development.
- Bake to Perfection:
- Preheat your oven to 350°F. Slice the chilled dough into half inch thick cookies and place them on a parchment lined baking sheet about 2 inches apart. Bake for 10 to 12 minutes until the edges are just set but the centers still look slightly soft.
 Pin it
The cocoa powder is truly the star ingredient in this recipe. I discovered through much experimentation that using a high quality Dutch processed cocoa creates the richest flavor and most dramatic color contrast with the vanilla dough. My grandmother always said baking is an art form, and seeing the unique patterns emerge from each cookie reminds me why I fell in love with baking in the first place.
Storage Tips
These Zebra Cookies maintain their freshness remarkably well. Store them in an airtight container at room temperature for up to 5 days. For the ultimate freshness hack, place a small piece of bread in the container with the cookies. The bread will give up its moisture to the cookies, keeping them soft and delicious for days longer than they would otherwise last.
Make-Ahead Options
The beauty of this recipe lies in its flexibility. You can prepare the dough up to 3 days in advance and keep it refrigerated until ready to bake. For longer storage, form the dough into logs, wrap tightly in plastic wrap, then aluminum foil, and freeze for up to 3 months. When ready to bake, allow the dough to thaw in the refrigerator overnight, then slice and bake as directed.
 Pin it
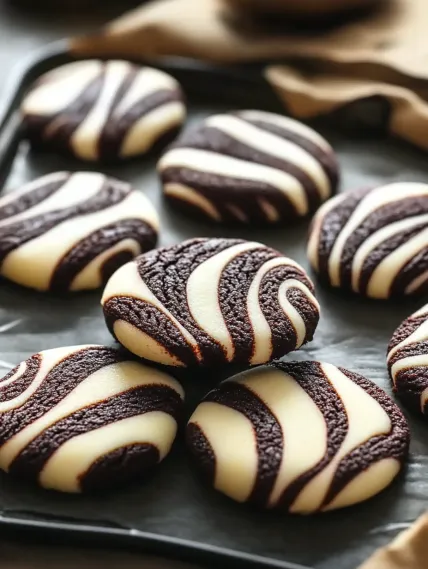
Serving Suggestions
Serve these Zebra Cookies alongside a cold glass of milk for the classic pairing that never disappoints. For an elevated dessert experience, sandwich vanilla ice cream between two cookies for a homemade ice cream sandwich. These cookies also make a stunning addition to any cookie platter or dessert table, especially during holidays when their unique appearance stands out among traditional offerings.
The History Behind Zebra Cookies
Zebra patterns in baking date back to traditional European marble cakes, which have been enjoyed for centuries. This cookie adaptation takes the beloved marbling technique and applies it to a more portable, shareable format. The combination of chocolate and vanilla is timeless, appearing in desserts across virtually every culinary tradition, but the striking visual contrast makes these cookies particularly memorable.
Frequently Asked Questions
- → What makes Zebra Cookies visually unique?
They feature a stunning swirled pattern that alternates between chocolate and vanilla layers, resembling zebra stripes.
- → How do you create the swirled effect?
Alternate placing portions of vanilla and chocolate dough, then use a toothpick or skewer to create swirls for the zebra effect.
- → What are the key ingredients for Zebra Cookies?
The main ingredients include flour, butter, sugar, eggs, vanilla extract, cocoa powder, salt, and baking powder.
- → How long can Zebra Cookies be stored?
They can be stored in an airtight container for up to 5 days. Adding a piece of bread helps maintain their softness.
- → Can I customize Zebra Cookies?
Absolutely! Try adding sea salt, drizzling melted white chocolate, or mixing in chopped nuts for extra flavor and texture.