
 Pin it
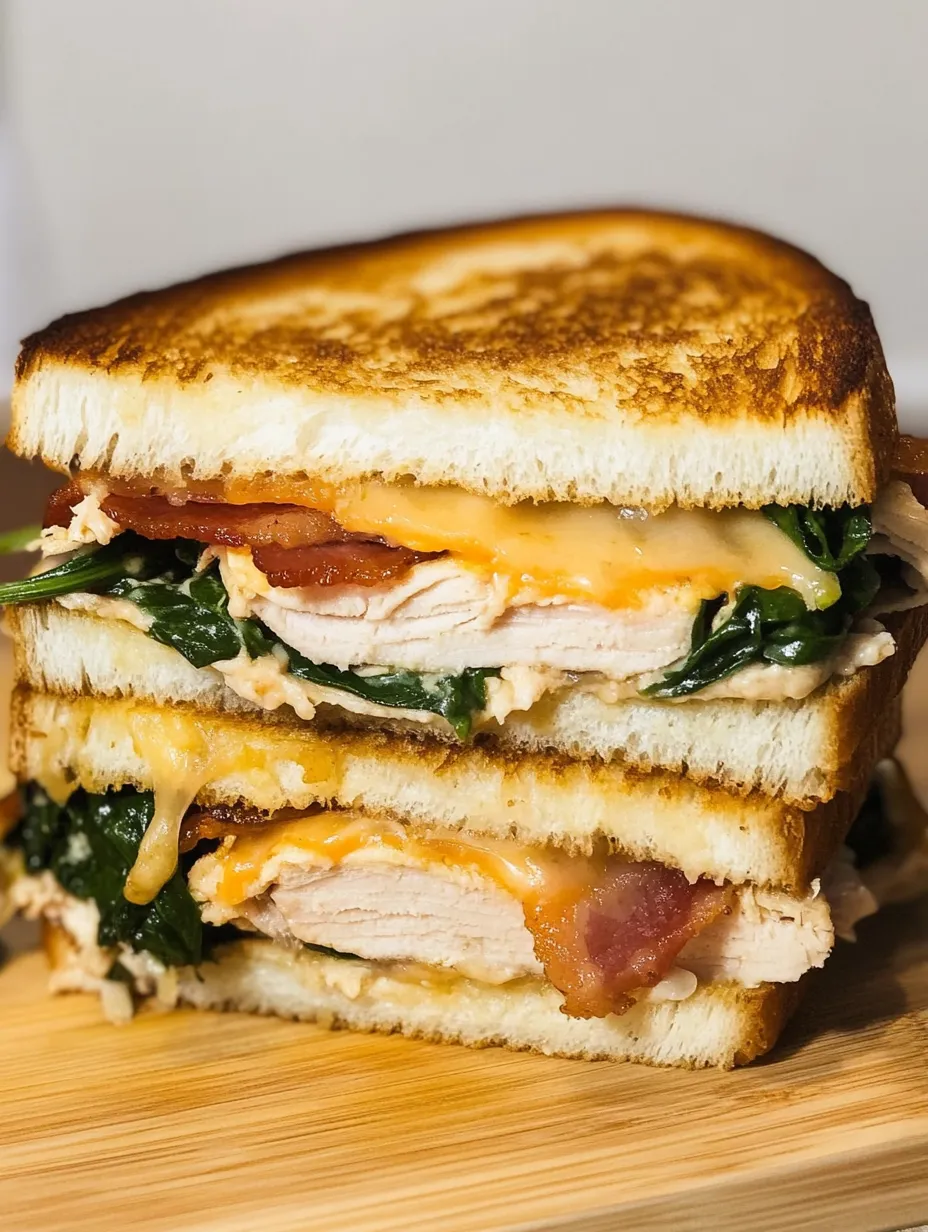
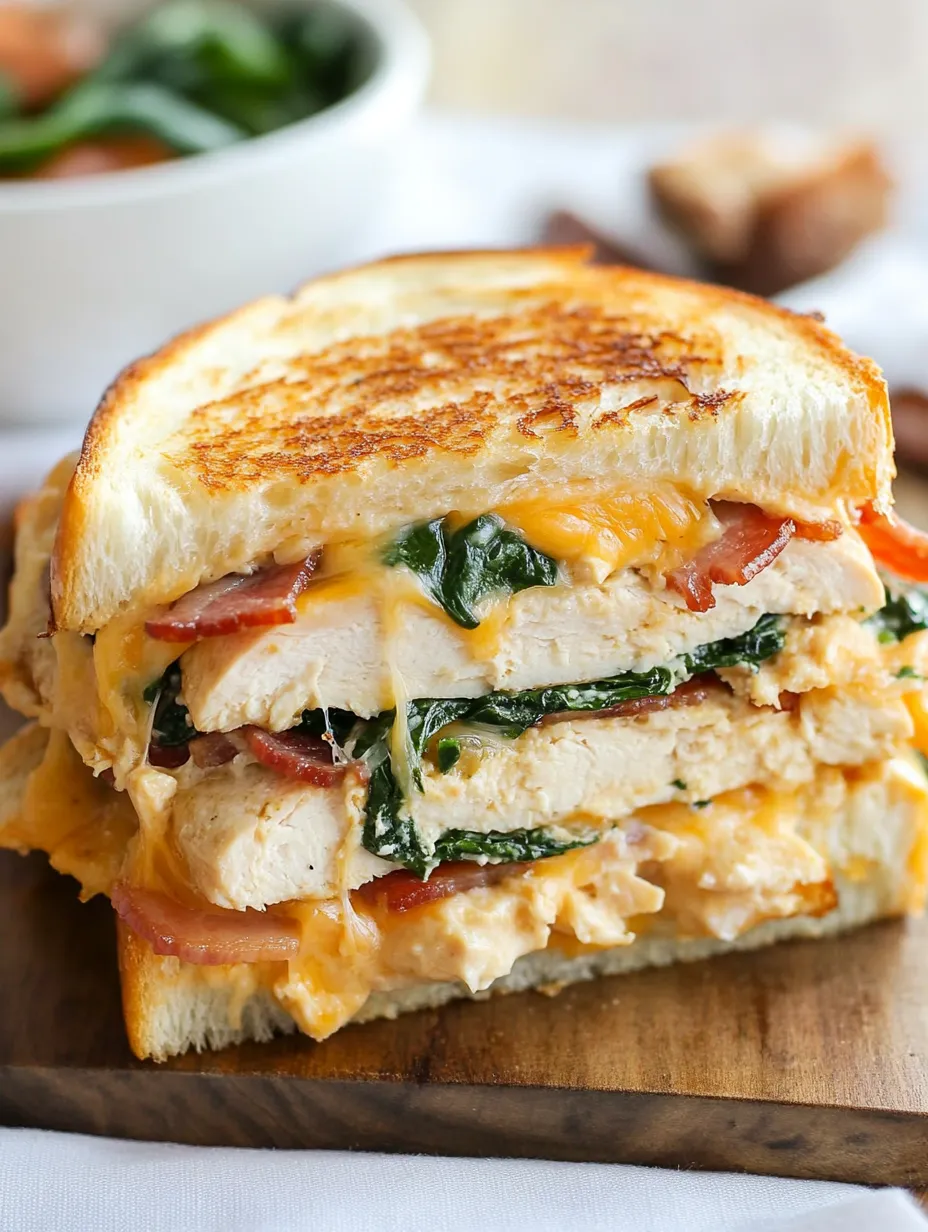
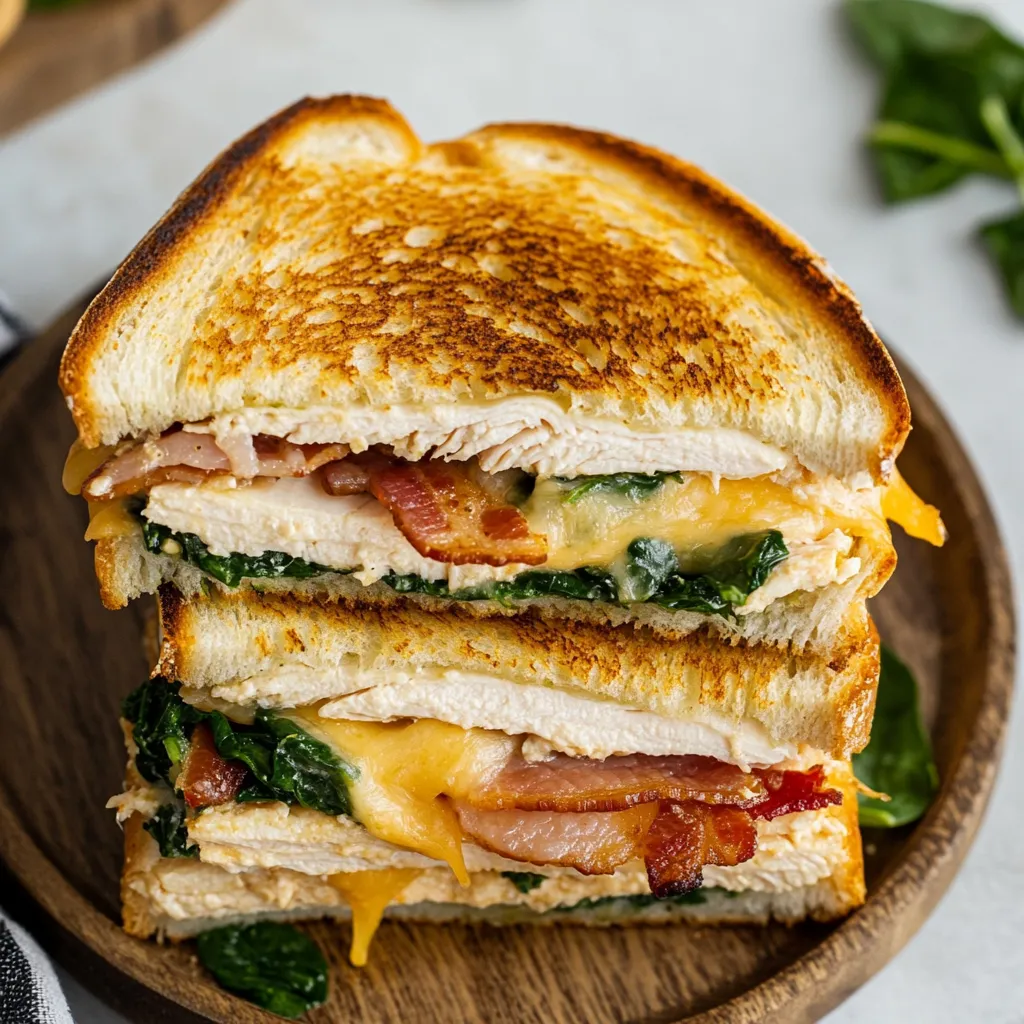
A turkey melt is more than just a sandwich - it's the perfect harmony of crispy, creamy, and savory elements coming together between two perfectly toasted slices of bread. This elevated take on the classic combines quality deli turkey with sharp cheddar, crispy bacon, and fresh vegetables, creating a sandwich that's both comforting and sophisticated.
After years of making turkey melts, I've discovered that the key lies in the layering. Placing cheese on both sides of the filling creates a protective barrier that keeps the bread crispy while ensuring everything stays together perfectly.
Essential Ingredients Selection
- Sourdough Bread: Choose a fresh loaf with a tight crumb for optimal toasting
- Cheddar Cheese: Sharp, aged cheddar provides the best flavor and melt
- Turkey: Look for freshly sliced deli meat or use leftover roasted turkey
- Bacon: Cook until just crispy; it will continue to crisp in the sandwich
- Spinach: Fresh, crisp leaves add nutrition and a pleasant bite
 Pin it
Detailed Assembly Steps
- Perfect Your Base:
- Butter should be truly room temperature for even spreading. Apply even pressure when buttering to avoid tears in the bread. Ensure the entire surface is covered for uniform browning. Let buttered bread sit for a minute to prevent tearing.
- Strategic Layering:
- Start with cheese on both sides to create a seal. Layer turkey in folds rather than flat for better texture. Break bacon into pieces that cover the entire surface. Pat spinach dry to prevent sogginess.
- Mastering the Melt:
- Start with a cold pan for even heating. Press gently but consistently while cooking. Listen for the sizzle - it should be gentle, not aggressive. Watch the edges of the bread for golden-brown color cues.
- Timing and Temperature:
- Allow 3-4 minutes per side for optimal melting. Keep heat at medium-low to prevent burning. Look for cheese starting to drip down the sides. Let rest for 1 minute before cutting.
 Pin it
The Art of Bread Selection
Your choice of bread makes or breaks a turkey melt. Sourdough brings a slight tanginess that complements the savory fillings, while its sturdy structure holds up to the heat and moisture. The key is choosing a loaf that's fresh but not too soft - day-old bread often works best.
Cheese Wisdom
While pre-sliced cheese is convenient, investing in a quality block of cheddar makes a noticeable difference. Fresh-sliced cheese melts more evenly and provides better flavor. I've found that slicing it slightly thinner than deli cheese creates the perfect melt.
Understanding Heat Control
The perfect turkey melt requires patience and careful heat management. Too hot, and you'll burn the bread before the cheese melts; too cool, and you'll end up with a soggy sandwich.
My grandmother's secret was to brush the outside of the bread with mayonnaise instead of butter - it creates an incredibly crispy, golden-brown crust that's unforgettable.
Years of making these melts have taught me that sometimes the simplest foods require the most attention to detail. Each component plays a crucial role in creating that perfect bite.
Creating Perfect Pairings
The right accompaniment can elevate your turkey melt from great to extraordinary:
Pair with roasted tomato soup for a classic combination
Serve alongside a light arugula salad with lemon vinaigrette
Add homemade pickled vegetables for bright acidity
Seasonal Adaptations
I've found that this sandwich can evolve with the seasons:
Spring - Add fresh pea shoots and radish slices
Summer - Layer in heirloom tomatoes and basil
Fall - Include crisp apple slices and sage
Winter - Add roasted red peppers and caramelized onions
Temperature Management
Understanding temperature is crucial for the perfect melt:
Remove cheese from refrigerator 15 minutes before using
Keep assembled sandwiches at room temperature briefly before cooking
Let pan heat gradually for even cooking
Once, during a weekend brunch, I experimented with adding a fried egg to this melt - it created an incredible breakfast version that my family now requests regularly.
Making the Perfect Spread
While honey mustard is delicious, creating your own signature spread can make this sandwich uniquely yours. I love mixing equal parts whole grain mustard and mayo with a touch of honey and fresh herbs.
The beauty of this turkey melt lies in its versatility. Whether you're making it for a quick lunch or serving it at a casual gathering, it's a sandwich that always feels special. The key is treating each ingredient with care and taking the time to execute each step properly.
I've learned that a truly great sandwich isn't just about the ingredients - it's about the love and attention you put into making it. This turkey melt has become more than just a recipe in my kitchen; it's a reminder that even the simplest dishes can be extraordinary when prepared with care and intention.
Remember, the perfect turkey melt is the one that makes you happy. Don't be afraid to experiment with different cheeses, breads, or additions until you find your ideal combination. After all, cooking is about making food that brings joy to those we share it with.
Mastering the Art of Melting Cheese
The key to achieving that Instagram-worthy cheese pull lies in technique:
Start with room temperature cheese for even melting
Layer cheese closest to the bread for proper bonding
Create air pockets between layers for better heat distribution
Consider mixing cheese varieties for complex flavor profiles
Building Better Bacon
Bacon preparation can make or break your melt:
Cook bacon until just before your preferred crispness
Drain on paper towels and pat completely dry
Break into pieces that cover the full surface area
Consider saving some bacon fat for bread toasting
Storage Solutions for Prep-Ahead
While best served fresh, components can be prepared ahead:
Cook bacon and store in paper towel-lined container
Slice cheese and store between wax paper sheets
Prep vegetables and store in paper towel-lined containers
Mix spread and store in an airtight container
 Pin it
My most memorable experience with this sandwich was during a power outage - I made it on a camping stove, and somehow, that subtle smokiness made it even better. Sometimes the best cooking moments come from unexpected situations.
The Evolution of a Classic
This turkey melt represents how classic sandwiches can evolve while maintaining their comforting essence. Each time I make it, I'm reminded that good food doesn't need to be complicated - it just needs to be thoughtfully prepared. Whether you're making it for yourself or sharing it with others, this sandwich has a way of making any meal feel special.
Food memories often center around simple dishes made with care. This turkey melt has become one of those memory-making meals in my kitchen. It's the kind of recipe that gets passed down, each generation adding their own touch while keeping the core elements that make it so satisfying.
Remember, a great sandwich is about balance - not just of flavors and textures, but of technique and intuition. Trust your instincts, pay attention to the details, and most importantly, enjoy the process of creating something delicious.
Frequently Asked Questions
- → Can I make this sandwich ahead of time?
- You can prep the ingredients ahead, but it's best to assemble and grill just before eating for the perfect melty cheese and crispy bread.
- → What's the best bread to use?
- Sourdough works great, but any thick, crusty bread will do. Just make sure it's sturdy enough to hold the fillings.
- → Can I make this dairy-free?
- Yes, just substitute the cheddar and butter with your favorite dairy-free alternatives.
- → What can I serve with this sandwich?
- It pairs perfectly with tomato soup, potato chips, or a simple green salad.
- → How do I get the perfect grilled cheese texture?
- Use softened butter, medium heat, and cook slowly (3-4 minutes per side) until golden brown and cheese melts completely.