
 Pin it
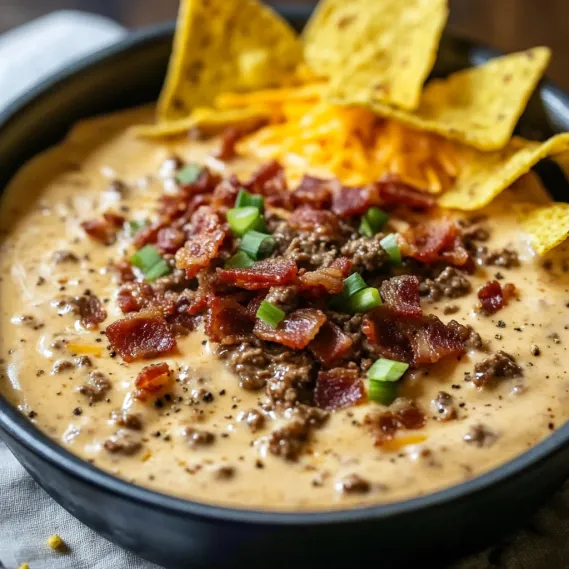
This cheeseburger queso dip transforms America's favorite sandwich into a decadent, creamy dip that's perfect for game days or casual gatherings. The combination of seasoned ground beef, crispy bacon, and melty cheese creates an irresistible flavor that keeps everyone coming back for more.
I first made this dip for a Super Bowl party when I needed something hearty that would please everyone. Now it's requested at every gathering. My nephew even asked for it instead of cake at his birthday party last year.
- Bacon: Provides a smoky crunch and that unmistakable bacon flavor that makes everything better. Choose thick cut for the best texture.
- Ground beef: Creates the classic burger base. Opt for 80/20 lean to fat ratio for the best flavor without excessive grease.
- Onion and garlic: Form an aromatic foundation. Fresh is always better than powdered here.
- Worcestershire sauce: Adds that umami depth that makes burgers taste like burgers. Just a little goes a long way.
- Paprika: Brings a subtle smokiness and beautiful color to the dip.
- Diced tomatoes with green chilies: Add brightness and a gentle kick. The Rotel brand is perfect for this.
- Heavy cream: Creates the luxurious texture and helps prevent the cheese from separating.
- Processed cheese: Melts perfectly smooth without breaking. Velveeta is the classic choice for reliable creaminess.
- Sharp cheddar cheese: Provides authentic cheeseburger flavor and balances the processed cheese.
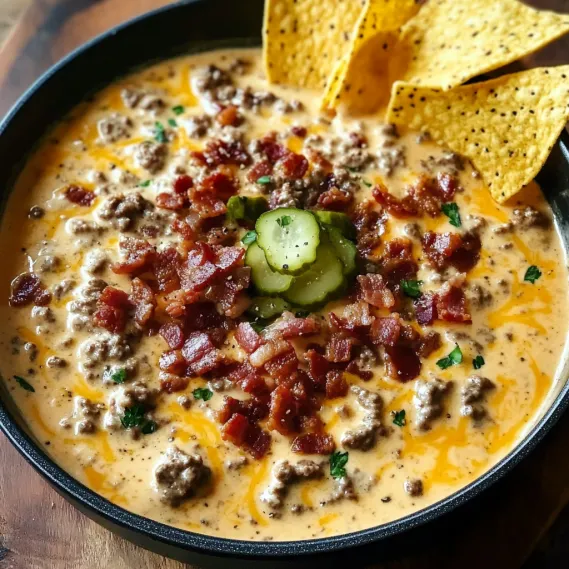
- Pickles: For garnish add that classic burger tanginess and a pleasant texture contrast.
- Sesame seeds: As garnish cleverly mimic a burger bun topping.
How To Make Sizzling Bacon Cheeseburger Queso Dip
- Cook the Bacon:
- Start by crisping the chopped bacon in a large skillet over medium heat until each piece is perfectly rendered and crunchy. This takes about 5 minutes with regular stirring. Remove the bacon but keep a tablespoon of the flavorful grease in the pan as the foundation for the rest of the dish.
- Brown the Beef:
- Add the ground beef to the bacon drippings, breaking it into small crumbles as it cooks. Once it begins to brown after about 4 minutes, add the diced onion and minced garlic. The moisture from the onions will help loosen any flavorful bits stuck to the pan. Continue cooking until the onions become translucent and the beef is fully browned.
- Season the Mixture:
- Sprinkle in the Worcestershire sauce, paprika, black pepper, and salt. This combination creates that classic burger taste. Let these seasonings toast slightly for about a minute to release their full flavors before moving to the next step. If there's excessive fat, now is the time to drain it off.
- Create the Cheese Base:
- Reduce your heat to low to prevent the dairy from curdling or separating. Add the drained diced tomatoes with green chilies and pour in the heavy cream, stirring to combine. Then add both cheeses, starting with the processed cheese cubes. Stir constantly in a figure eight motion to ensure even melting and prevent scorching on the bottom of the pan.
- Finish and Garnish:
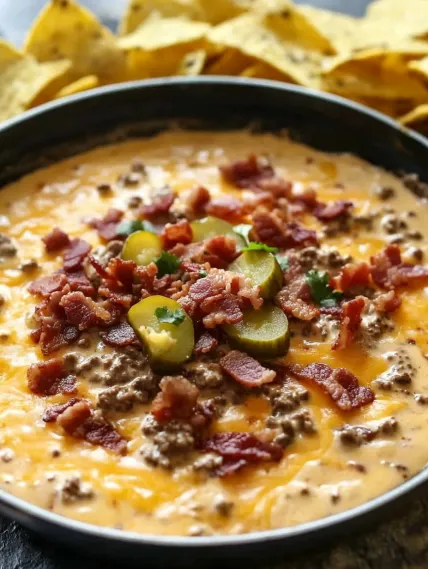
- Once your cheeses are completely melted and the mixture is smooth, fold in half of your crispy bacon pieces. Transfer to a serving dish if desired, or serve right in the skillet for a rustic presentation. Top with remaining bacon, diced pickles, chopped green onions, and a sprinkle of sesame seeds to create that burger aesthetic.
 Pin it
The smoked paprika is my secret weapon in this recipe. I discovered its transformative power when I accidentally used it instead of regular paprika one time. The subtle smokiness made everyone ask what my secret ingredient was, and I've never gone back to regular paprika since.
Make Ahead and Storage
This dip reheats beautifully, making it perfect for busy hosts. Prepare it up to two days ahead and store in an airtight container in the refrigerator. When ready to serve, reheat in a skillet over low heat, stirring frequently and adding a splash of milk to restore the creamy consistency. For longer storage, freeze in portions for up to 3 months. Thaw overnight in the refrigerator before reheating.
 Pin it
Serving Suggestions
Think beyond basic tortilla chips. This versatile dip pairs wonderfully with pretzel bites, toasted baguette slices, or even slider buns for mini cheeseburger dip sandwiches. For a lower carb option, serve with bell pepper wedges, celery sticks, or cucumber rounds. At parties, I create a dipping station with various options so guests can customize their experience. My favorite way to serve it is in a cast iron skillet surrounded by a wreath of different dippers.
Variations to Try
The beauty of this dip is its adaptability to different flavor profiles. For a spicier version, add diced jalapeños or a dash of hot sauce. Create a mushroom Swiss version by sautéing mushrooms with the beef and substituting some of the cheddar with Swiss cheese. For a BBQ twist, stir in a few tablespoons of your favorite barbecue sauce. My family loves the breakfast version made with breakfast sausage instead of beef and topped with a few scrambled eggs.
Frequently Asked Questions
- → How do I make the dip creamier?
If the dip feels too thick, you can gradually add milk, 1 tablespoon at a time, until it reaches your desired consistency. Stir well to blend.
- → What can I serve with this dip?
Serve this dip with tortilla chips, crackers, veggie sticks, or even slider buns for a delicious twist.
- → Can I prepare this ahead of time?
Yes, you can make the dip ahead, refrigerate it, and reheat it gently on the stove before serving. Add a splash of milk if needed to loosen the texture.
- → Can I substitute ingredients in the recipe?
Yes, you can use diced fresh tomatoes instead of canned ones, ground turkey instead of beef, or your choice of shredded cheese instead of the suggested cheddar.
- → How do I keep the dip warm for a party?
Keep the dip warm by serving it in a small slow cooker or a warming dish to maintain its creamy texture throughout the event.