
 Pin it
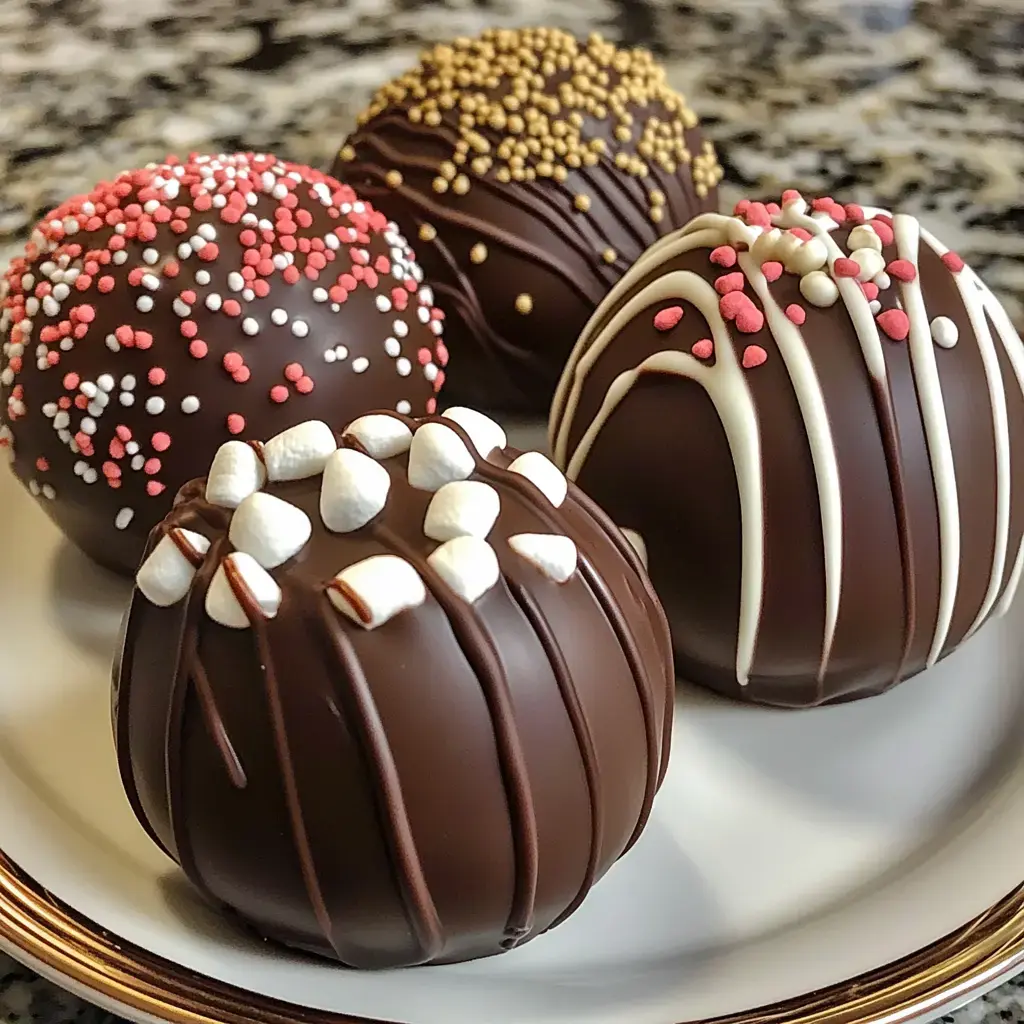
These homemade Hot Chocolate Bombs are an easy recipe that creates magical spheres of chocolate filled with cocoa mix and marshmallows. When hot milk is poured over them, they create a mesmerizing display as they melt and release their sweet contents. Perfect for gifting or enjoying on cozy winter evenings, these chocolate bombs transform ordinary hot cocoa into an enchanting experience.
Why You'll Love These Chocolate Bombs
These hot chocolate bombs combine the fun of a surprise with the comfort of traditional hot cocoa. The tempering process creates a beautiful shine and satisfying snap, while proper molding ensures perfect spheres every time. They're completely customizable with different chocolates and fillings, making them perfect for personalized gifts or special occasions.
Ingredients and Tools
- For the Shells:
- 24 oz high-quality semi-sweet chocolate
- Food thermometer
- Silicone or acrylic sphere molds (2½ inch)
- Paintbrush for chocolate
- Bench scraper
- Parchment paper
- For the Filling:
- Hot chocolate mix
- Mini marshmallows
- Optional decorations (sprinkles, edible glitter)
- Temperature Guidelines:
- Semi-sweet chocolate: 90°F maximum
- Milk chocolate: 86°F maximum
- White chocolate: 84°F maximum
Step-by-Step Instructions
- Temper the Chocolate
- Chop chocolate finely. Melt two-thirds in microwave using 30-second intervals. Stir until smooth, maintaining proper temperature. Add remaining chocolate gradually until tempered.
- Mold the Spheres
- For silicone molds: Paint thin layers of chocolate, chilling between coats. For acrylic molds: Fill completely, tap out bubbles, drain excess, and chill. Release carefully when set.
- Fill the Bombs
- Add hot chocolate mix and marshmallows to one half-sphere. Pipe melted chocolate around rim. Press second half gently to seal.
- Decorate and Finish
- Smooth seams with gloved finger. Add optional decorations like sprinkles or drizzled chocolate. Let set completely before packaging.
Pro Tips for Success
Maintain precise temperatures during tempering for proper shine. Clean molds thoroughly for spotless finish. Work in a cool room to prevent chocolate from setting too quickly. Keep spheres uniform in thickness for even melting. Test temper by spreading small amount on parchment - should set quickly and shiny.
 Pin it
Serving and Gifting Ideas
Place bomb in mug and pour 14 oz hot milk over top. Watch spheres open dramatically. Stir to combine thoroughly. Package individually in clear bags with ribbons for gifts. Include instruction cards for proper use. Consider creating variety packs with different flavors and decorations.
Storage and Make-Ahead Tips
Store finished bombs in airtight container at room temperature up to 2 weeks. Avoid refrigeration to prevent condensation and blooming. Can be made several days ahead for events or gifting. Keep away from heat sources and direct sunlight. Transport carefully to prevent cracking or damage.
Frequently Asked Questions
- → Why is chocolate temperature so important?
- Maintaining chocolate below 90°F during melting is crucial for proper tempering, which gives the bombs their shine and snap, and allows them to release from molds.
- → What's the difference between silicone and acrylic molds?
- Silicone molds are easier to use but take longer, while acrylic molds are more complex but allow for making more bombs at once.
- → Why use couverture chocolate?
- Couverture or high-quality bar chocolate gives better taste and temper than candy melts or chocolate chips, resulting in shinier, more professional-looking bombs.
- → How do I know if my chocolate is properly tempered?
- Properly tempered chocolate will contract and pull away from the mold when chilled, and will have a shiny finish when set.
- → What if my chocolate gets too hot?
- If chocolate goes above 90°F, it will need to be re-tempered using the seeding method to achieve proper crystallization.