
 Pin it
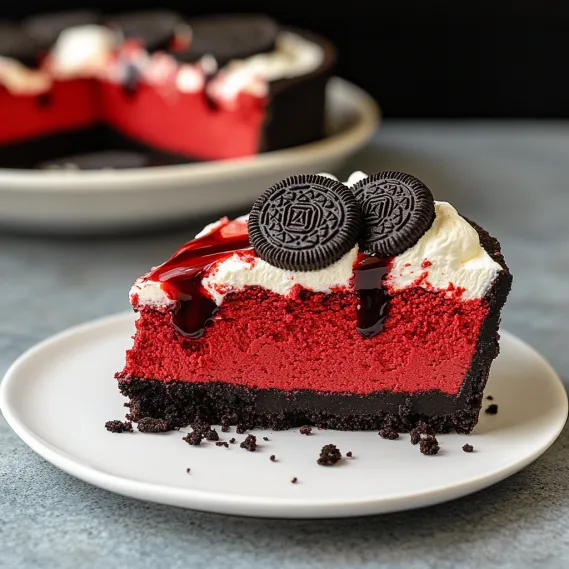
This red velvet Oreo cheesecake combines two beloved desserts into one incredible treat that will have everyone asking for seconds. The creamy red velvet cheesecake studded with Oreo chunks sits atop a buttery Oreo crust for a show-stopping dessert that's perfect for special occasions.
I first made this for my sister's birthday when she couldn't decide between red velvet cake and cheesecake. Now it's become our family's most requested celebration dessert, with everyone fighting over the last slice.
Ingredients
- Oreo cookies: Form both the crust and filling, adding wonderful texture and that distinctive cocoa flavor
- Cream cheese: Provides that signature tangy base. Be sure to use full-fat for the best texture and flavor
- Red gel food coloring: Creates that dramatic color without affecting texture. Liquid coloring would require too much volume
- Sour cream: Adds moisture and a subtle tang that balances the sweetness perfectly
- Heavy cream: Creates a velvety smooth consistency that melts in your mouth
- Cornstarch: Helps stabilize the cheesecake, preventing cracks without needing a water bath
How To Make Red Velvet Oreo Cheesecake
- Prepare the crust:
- Process Oreo cookies with centers intact until finely ground, then mix with melted butter and sugar until moistened. Press firmly into springform pan, creating an even layer on bottom and partway up sides. Bake for 9-10 minutes until set and slightly fragrant.
- Beat the cream cheese:
- Beat room temperature cream cheese for a full 4-5 minutes until completely smooth and creamy. This step is crucial for eliminating lumps and creating the perfect texture. Scrape the bowl several times during mixing to catch any hidden pockets of unmixed cream cheese.
- Create the red velvet flavor:
- Add sugar, sour cream, vanilla, heavy cream, cornstarch, and red food coloring. Mix until just combined, being careful not to overmix. The batter should be vibrant red and completely smooth.
- Add eggs properly:
- Mix eggs separately before adding to prevent overbeating the batter. Incorporate eggs on low speed just until combined, then finish mixing by hand. Overbeating introduces air bubbles that can cause cracks.
- Layer and bake:
- Pour half the batter over cooled crust, sprinkle with chopped Oreos, then add remaining batter. Bake using a slow temperature reduction method that prevents cracks without a water bath. Begin at 300°F for 12 minutes, then reduce to 225°F for almost 2 hours.
- Cool gradually:
- Follow the specific cooling instructions exactly. The gradual temperature reduction prevents the cheesecake from contracting too quickly and cracking. This includes cooling in the turned-off oven, then with door cracked, then at room temperature, and finally in the refrigerator.
 Pin it
The first time I served this cheesecake at a family gathering, my uncle who claimed to dislike both red velvet and cheesecake ended up eating two slices. The Oreos are my favorite element because they add texture and depth that takes this from a standard cheesecake to something truly memorable.
Room Temperature Ingredients Matter
Using truly room temperature ingredients is non-negotiable for this recipe. Cold cream cheese will create lumps that are impossible to remove once eggs are added. Set cream cheese, eggs, and sour cream out at least 2 hours before beginning. If you're in a hurry, place cream cheese blocks in their foil on a metal sheet pan for faster warming, but never microwave them.
 Pin it
Serving Suggestions
This cheesecake is rich enough to stand alone, but I love serving it with a few accompaniments. A small scoop of vanilla bean ice cream provides temperature contrast, while fresh berries like raspberries or strawberries add brightness. For chocolate lovers, serve with additional warm chocolate sauce for drizzling. Cut small slices as this is quite rich and filling.
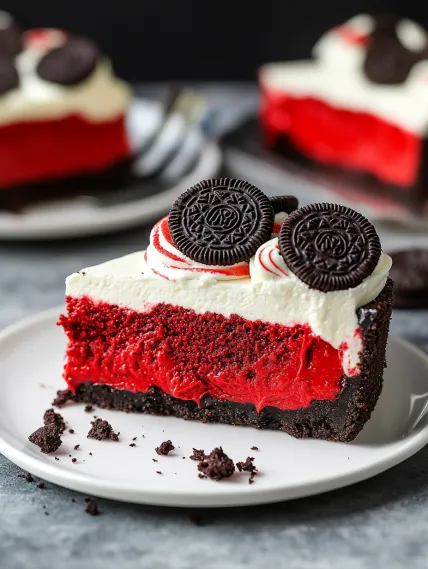
Troubleshooting Tips
If your cheesecake develops cracks despite following directions, don't worry. Cover them with whipped cream rosettes and chopped Oreos. Nobody will know the difference. If your crust seems too crumbly when cutting, you may have needed a bit more butter. For easier slicing, dip your knife in hot water and wipe clean between each cut.
Storage Information
Store leftovers in an airtight container in the refrigerator for up to 5 days. For longer storage, freeze individual slices by wrapping each in plastic wrap, then aluminum foil, and placing in a freezer bag. Thaw overnight in the refrigerator before serving. The texture remains nearly perfect even after freezing.
Frequently Asked Questions
- → How is the Oreo crust prepared?
The Oreo crust is made by blending Oreos into fine crumbs, combining them with melted butter and sugar, then pressing the mixture into a springform pan.
- → What makes the cheesecake red velvet?
The addition of red gel food coloring and a hint of vanilla creates the signature red velvet color and flavor in the cheesecake.
- → Do I need a water bath for this cheesecake?
No, this recipe uses a low and slow baking method to achieve crack-free results without the need for a water bath.
- → How can I ensure the cheesecake doesn't crack?
To prevent cracking, mix the batter gently to avoid over-incorporating air, bang the bowl to release trapped air bubbles, and cool the cheesecake gradually in the oven.
- → How should leftovers be stored?
Leftover cheesecake can be stored in an airtight container in the fridge for up to 5 days.
- → Can I make this cheesecake ahead of time?
Yes, you can prepare it a day in advance and refrigerate it overnight to allow the flavors to develop fully.