
 Pin it
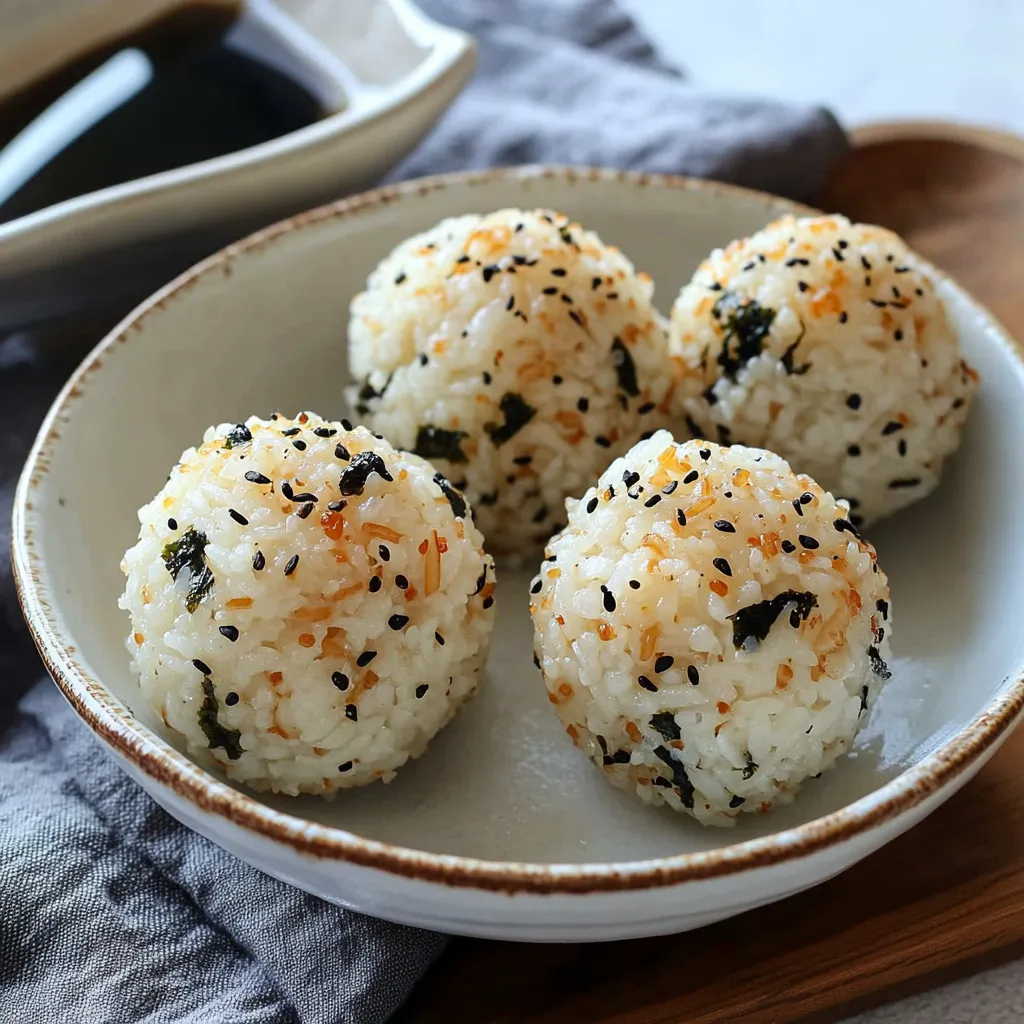
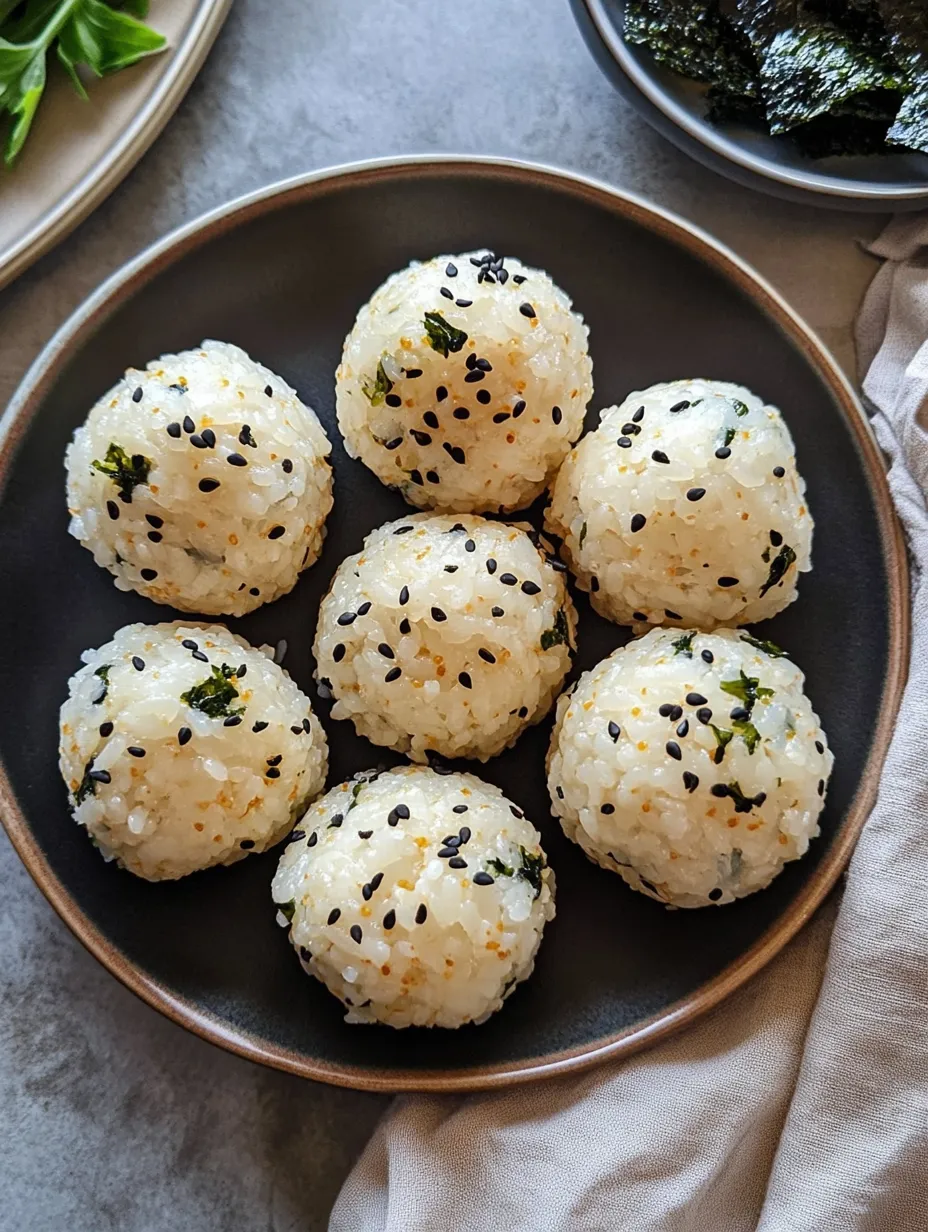
Korean rice balls, known as Jumeokbap, transform simple ingredients into delightful handheld treasures that bring comfort with every bite. These perfectly seasoned spheres of joy combine fluffy rice with savory fillings, creating an ideal balance of flavors that makes them impossible to resist, whether as a quick lunch or satisfying snack.
The first time I made these with my daughter, we turned it into a playful assembly line. She loved choosing different fillings and watching the rice balls take shape in her little hands. Now it's become our special weekend cooking tradition, with each of us experimenting with new flavor combinations.
Essential Ingredients Selection
- Short-grain Rice: Choose Japanese or Korean varieties for the perfect sticky texture - regular long-grain won't hold together properly
- Furikake Seasoning: This Japanese rice seasoning adds umami depth and subtle nuttiness - look for versions with nori and sesame seeds
- Kewpie Mayo: Its rich, creamy texture and tangy flavor elevates the filling - regular mayonnaise won't provide the same authentic taste
- Sesame Oil: Always use toasted sesame oil for that distinctive nutty aroma - a little goes a long way
- Tuna: Premium canned tuna in water works best, ensuring the filling stays moist without being too oily
 Pin it
Detailed Instructions
- Preparing the Perfect Rice Base
- Rinse the rice thoroughly until water runs clear
- Use slightly less water than usual when cooking to achieve ideal stickiness
- Let rice cool until just warm to touch, stirring occasionally to release steam
- Gently fold in seasonings using a cutting motion to avoid mashing the grains
- Crafting the Filling
- Drain tuna extremely well to prevent soggy rice balls
- Mix filling ingredients gradually, tasting as you go
- Ensure filling is well-seasoned but not overly wet
- Chill slightly if mixture seems too soft
- Shaping Your Rice Balls
- Wet hands lightly with water to prevent sticking
- Cup palms to create natural sphere shape
- Apply gentle, even pressure while rolling
- Rotate ball continuously for uniform shape
 Pin it
Growing up, my grandmother would pack these for our family picnics. She always said the secret was in how you handle the rice - gentle but firm, like holding a small bird. That memory inspires me every time I make these with my own family.
Creating the Perfect Balance
Mastering the ratio of rice to filling takes practice, but once you get it right, you'll be making these in your sleep. I often prepare extra rice just to have it ready for impromptu Jumeokbap sessions.
Exploring Global Flavors
While traditional fillings are delicious, I've found these rice balls are perfect for fusion experiments. Sometimes I'll add Mediterranean-inspired fillings like feta and olives, or give them a Mexican twist with beans and cheese.
Making Ahead Tips
I've discovered these actually develop more flavor when made a few hours ahead. The rice has time to fully absorb the seasonings, creating an even more delightful taste experience.
After years of making Jumeokbap, I've come to appreciate how this humble snack brings people together. Whether it's a quiet afternoon snack or part of a larger meal, these rice balls carry the warmth of home in every bite.
Storage and Serving Insights
These little gems of flavor are surprisingly adaptable when it comes to storage. While they're best enjoyed fresh, I've discovered they maintain their quality remarkably well when properly stored. Wrap each ball individually in plastic wrap and store them in an airtight container - this prevents them from drying out while keeping their shape intact.
Temperature Matters
One crucial lesson I learned through trial and error is about serving temperature. While refrigeration is necessary for storage, Jumeokbap tastes best at room temperature when the rice is soft and chewy. If you're pulling them from the fridge, let them sit out for about 15-20 minutes before serving.
Pack-Lunch Perfect
As a busy mom, I've made these part of our regular lunch rotation. The key is to wrap them while slightly warm and let them cool completely before packing. This traps just enough moisture to keep them fresh without becoming soggy. My kids love finding these in their lunchboxes, especially when I shape them into fun triangles or hearts.
Building Your Flavor Foundation
The beauty of Jumeokbap lies in its versatility. Start with the basic seasoned rice recipe, then let your creativity shine. I keep a "rice ball station" in my pantry with different furikake varieties, seasonings, and dried ingredients ready to go.
 Pin it
The Art of Rice Selection
Through countless batches, I've learned that the type of rice you use makes all the difference. Short-grain rice, particularly Japanese or Korean varieties, contains the perfect amount of starch to create that signature sticky texture without becoming mushy.
Coming full circle with this recipe reminds me why Korean comfort food holds such a special place in my heart. These rice balls aren't just food - they're little bundles of love that carry stories, traditions, and the joy of sharing. Whether you're making them for a quiet lunch or a festive gathering, each Jumeokbap is an opportunity to create your own food memories. Remember, the best rice balls are the ones made with patience, care, and a sprinkle of creativity.
Let the simplicity of this recipe guide you, but don't be afraid to make it your own. After all, the most memorable dishes are often the ones that come with a personal touch. Happy rolling! 🍙
Frequently Asked Questions
- → Why must the rice be cooled?
- Hot rice will make the balls fall apart. Cooled rice helps them hold their shape better.
- → What is furikake seasoning?
- Furikake is a Japanese seasoning mix typically containing seaweed, sesame seeds, and other dried ingredients.
- → Can I use different fillings?
- Yes, you can substitute tuna with other proteins like chicken, spam, or even vegetables.
- → What type of rice works best?
- Short-grain Japanese or Korean rice works best as it's stickier and holds shape better.
- → How long do they keep?
- Best eaten fresh but can be stored in an airtight container for up to 24 hours in the fridge.