
 Pin it
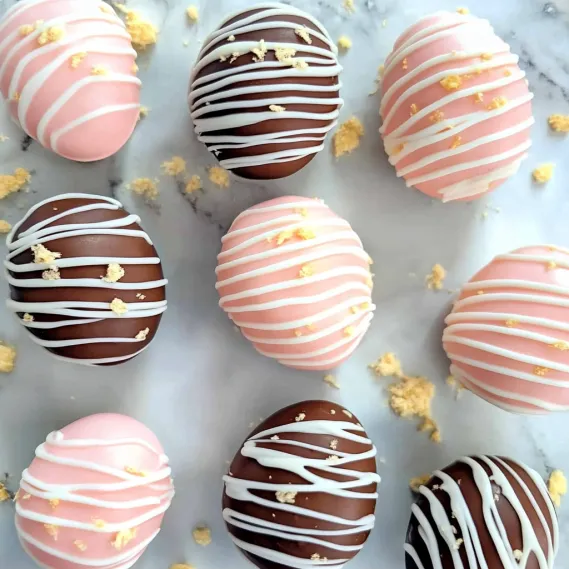
These homemade marshmallow Easter eggs covered in rich chocolate may just be one of the most impressive treats I've ever created in my kitchen. The first time I made them, I couldn't believe how something so spectacular could come from such simple ingredients. The pillowy, cloud-like texture of fresh marshmallows paired with a shell of quality chocolate creates an Easter candy that's leagues beyond anything store-bought.
Last Easter, I brought a box of these to my sister's family gathering. My brother-in-law, who normally passes on sweets, ate three in succession and then quietly asked if he could take a few home. My niece declared them "way better than Peeps" and insisted on helping make them this year. There's something magical about the combination of that light, airy marshmallow and the snap of good chocolate that makes them irresistible.
Essential Ingredients and Selection Tips
- Unflavored Gelatin: The foundation of marshmallows; make sure it's fresh for proper setting.
- Granulated Sugar: Creates the structure and sweetness; regular white sugar works perfectly.
- Light Corn Syrup: Essential for preventing crystallization and creating that smooth texture.
- Vanilla Extract: Use pure, not imitation, for the best flavor; consider clear vanilla to keep marshmallows white.
- All-Purpose Flour: Creates the molds for shaping; you won't eat this, so any type works.
- Quality Chocolate: Splurge on good chocolate like Ghirardelli bittersweet for dipping; it makes all the difference.
- Confectioners' Sugar: Prevents sticking and adds a subtle sweetness to the exterior.
The first time I attempted these, I was nervous about working with boiling sugar syrup, but I quickly discovered it's much more approachable than it sounds. My Aunt Laurie, who makes hundreds of these each year, shared her foolproof technique, and I've never looked back. The joy on my children's faces when they bit into these fluffy homemade treats made any mess or effort completely worthwhile.
Detailed Cooking Instructions
- Step 1: Prepare Your Egg Molds
- Start by filling a 9x13-inch baking dish with all-purpose flour, smoothing the top with a ruler or spatula. Press clean plastic Easter eggs halfway into the flour to create perfect egg-shaped depressions.
- Step 2: Create the Marshmallow Base
- In the bowl of a stand mixer fitted with the whisk attachment, sprinkle 3 tablespoons of unflavored gelatin over ½ cup of cold water. Let this stand while you prepare the syrup.
- Step 3: Prepare the Sugar Syrup
- In a medium saucepan, combine 2 cups granulated sugar, ¾ cup water, ¾ cup light corn syrup, and ¼ teaspoon salt. Cook over medium heat, stirring until the sugar dissolves completely.
- Step 4: Whip to Perfection
- With your mixer on low speed, carefully pour the hot syrup into the gelatin mixture in a thin, steady stream. Once all the syrup is incorporated, gradually increase the speed to high.
- Step 5: Fill Your Molds
- Working quickly before the marshmallow sets, transfer the mixture to a large piping bag or use two spoons to fill your flour molds. Fill them just slightly above the surface of the flour for perfectly shaped eggs.
 Pin it
When I first tried this recipe, I was intimidated by the idea of making homemade marshmallows, but I quickly discovered it's much more forgiving than it seems. The key is preparing everything before you start so you can work efficiently once the marshmallow is ready. My daughter accidentally dropped one of our first eggs back into the flour, and we learned that a quick dusting off and a little patience resulted in a perfectly usable treat - these are surprisingly resilient!
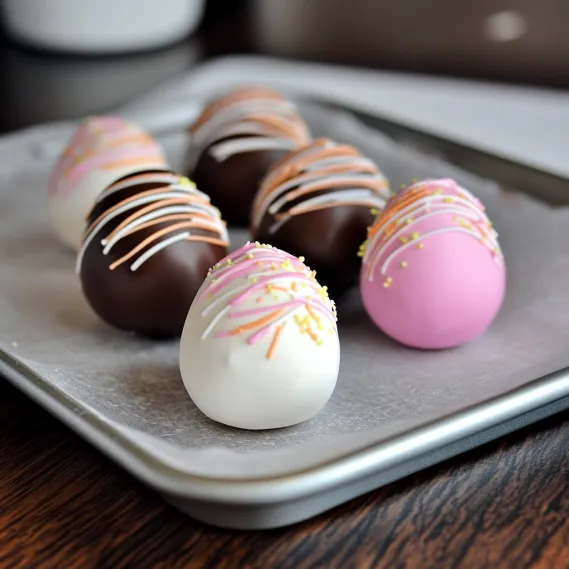
Creating Family Traditions
What started as a curious kitchen experiment has become one of our most cherished Easter traditions. My children now begin asking about "marshmallow egg day" weeks before Easter. We've expanded our decorating techniques each year, adding pastel-colored white chocolate drizzles, edible luster dust, and even custom designs using colored chocolate in piping bags. The kids invite friends over for what has become an annual marshmallow egg decorating party, complete with various toppings and accessories. It's become less about the candy itself and more about the memories we create together in the kitchen.
 Pin it
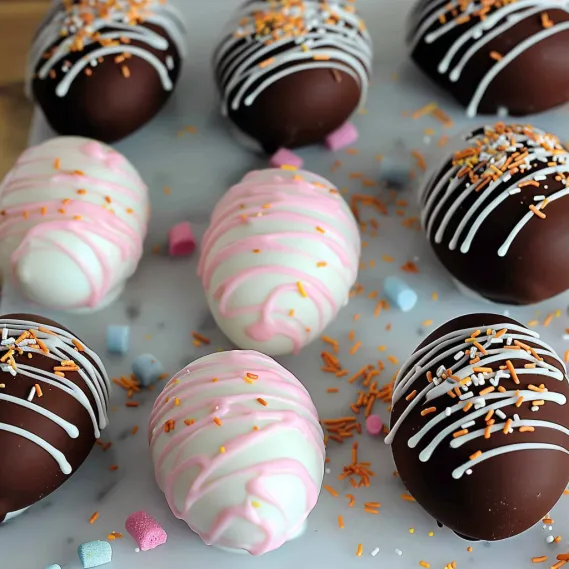
Gift-Giving Magic
These eggs have become my signature homemade gift each Easter. I've learned that presentation makes all the difference - wrapping each egg in colorful cellophane or placing them in small Easter baskets with natural excelsior grass elevates them from treats to treasures. My children's teachers now expect their annual gift of marshmallow eggs, and my husband's coworkers start dropping hints weeks before Easter. There's something immensely satisfying about sharing something made with such care, especially when the recipients are genuinely impressed that these professional-looking confections are homemade.
Troubleshooting Tips
Through years of making these eggs, I've encountered and solved most common issues. If your marshmallow doesn't whip to stiff peaks, the syrup likely didn't reach the proper temperature. If the eggs are too soft to handle, they need more setting time - patience is key. For chocolate coating that cracks, the temperature differential between the marshmallow and chocolate was likely too great - allow melted chocolate to cool slightly before dipping. These insights came from trial and error, proving that even "mistakes" in the kitchen can lead to greater expertise and confidence with each batch.
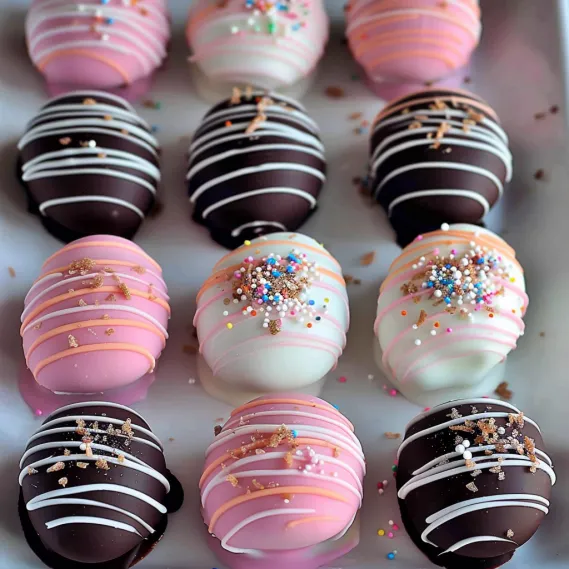
The Joy of Homemade
What continues to amaze me about these marshmallow eggs is the stark difference between homemade and store-bought marshmallows. The texture is incomparable - light, pillowy, and with a melt-in-your-mouth quality that commercial versions simply can't match. While the process requires time and attention, the actual hands-on work is minimal compared to the impressive results. My husband, who once questioned why anyone would make marshmallows from scratch, now requests these eggs year-round, suggesting we try different shapes for various holidays.
 Pin it
I've been making these homemade marshmallow Easter eggs for several years now, and each spring I fall in love with the process all over again. There's something deeply satisfying about transforming simple ingredients into something so delightful and unexpected. When people bite into these eggs for the first time, their eyes widen with surprise at the contrast between the light, airy interior and the snap of the chocolate coating. It's this moment of pure joy that makes all the effort worthwhile and keeps me coming back to this recipe year after year.
Frequently Asked Questions
- → Can I use a different flavoring instead of vanilla?
- Absolutely! You can substitute the vanilla extract with other flavors like almond, mint, orange, or strawberry extract. Just use the same amount (1 tablespoon) as called for in the recipe. You could also try adding a few drops of food coloring to the marshmallow mixture for pastel-colored eggs. Add the coloring at the same time as the flavoring extract.
- → Is there an alternative to corn syrup for this recipe?
- While corn syrup helps create the right texture and prevents crystallization, some alternatives that might work include honey, maple syrup, or agave nectar. Keep in mind that these substitutes will add their own flavors to the marshmallows and may slightly alter the texture. If using any of these alternatives, you might need to cook the sugar mixture to 242-245°F instead of 240°F to account for their different water content.
- → What if I don't have a candy thermometer?
- If you don't have a candy thermometer, you can use the cold water test. Drop a small amount of the hot sugar syrup into a cup of very cold water. It should form a soft ball that flattens when removed from the water and held in your hand. This is known as the 'soft ball stage' which is approximately 235-240°F. However, for the most reliable results, a candy thermometer is recommended.
- → Can I use dark or white chocolate for dipping?
- Yes, you can use any type of chocolate you prefer - milk, dark, semi-sweet, or white chocolate all work well. For white chocolate, consider adding a bit of oil-based food coloring to create pastel-colored eggs. If using chocolate melting wafers or candy melts, you won't need to temper the chocolate as described in the recipe.
- → Why did my marshmallows turn out too sticky?
- If your marshmallows are too sticky, there are a few possible causes: The sugar syrup may not have reached the correct temperature (240°F), the mixture may not have been whipped long enough, or there might be too much humidity in your kitchen. Make sure to measure ingredients precisely and whip the mixture until it's thick and fluffy. If they're still sticky after setting, you can always dust them with more flour before dipping in chocolate.
- → Can I make these marshmallow eggs without a stand mixer?
- Yes, but you'll need a powerful handheld electric mixer that won't burn out after 10-13 minutes of continuous mixing. The whipping process is crucial for incorporating air and creating the proper marshmallow texture. Unfortunately, this recipe cannot be made by hand as it requires vigorous, consistent beating that cannot be achieved manually.