
 Pin it
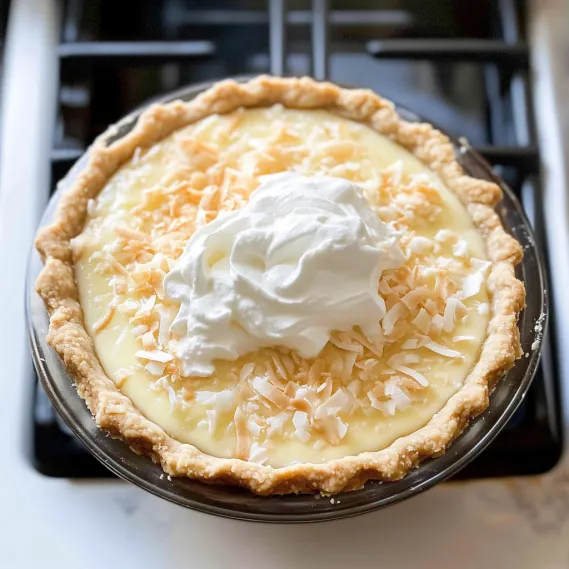
This coconut cream pie delivers pure bliss in every bite—a crisp, flaky homemade crust filled with luxuriously thick coconut custard and topped with clouds of fresh whipped cream. What makes this version truly special is the rich coconut flavor that permeates every layer, achieved by using real coconut milk and sweetened shredded coconut in the filling. The contrast between the buttery crust, silky filling, and airy whipped cream creates the perfect textural experience. While it requires a few distinct steps, the result is a showstopping dessert that will convert even coconut skeptics into devoted fans.
I first made this pie for an Easter gathering after years of disappointment with bakery versions that always seemed to lack real coconut flavor. The moment my father-in-law—who typically passes on dessert—asked for seconds, I knew I had created something special. Now it's requested for nearly every family celebration, with everyone willing to save room for "just a small slice" no matter how filling the main course!
Essential Ingredients and Selection Tips
- Canned Coconut Milk: Use full-fat, not light, and choose cooking coconut milk in cans, not the beverage version in cartons. The thick, rich consistency is crucial for proper texture.
- Half-and-Half: Creates the perfect balance between richness and lightness in the filling. Whole milk is too thin while heavy cream makes the filling too dense.
- Sweetened Shredded Coconut: Adds authentic flavor and pleasant texture throughout the filling. The sweetened variety contributes to the overall sweetness and stays soft in the custard.
- Egg Yolks: Provide richness and thickening power. Save the whites for another use, like meringue or macaroons.
- Cornstarch: Essential for creating a sliceable pie that holds its shape without being rubbery.
I've discovered that the type of coconut milk makes a significant difference in this recipe. After experimenting with several brands, I found that Thai Kitchen and Chaokoh produce the creamiest, most flavorful results. The bargain brands often contain additives that can give the filling an artificial taste.
Detailed Cooking Instructions
- Step 1: Prepare The Perfect Crust
- Make pie dough using your favorite recipe or mine, then chill for at least 2 hours. Roll dough to 1/8-inch thickness and fit into a 9-inch pie dish. Crimp edges decoratively, then chill shaped crust for 30 minutes. Line with parchment paper, fill with pie weights, and blind bake at 375°F for 15 minutes until edges are set.
- Step 2: Finish Blind Baking Process
- Remove pie weights and parchment paper, then prick bottom of crust all over with a fork to prevent bubbling. Return to oven for another 15-20 minutes until entire crust is golden brown. Cool completely before filling—this is crucial for maintaining crispness.
- Step 3: Create Luscious Coconut Filling
- Whisk egg yolks with cornstarch in a bowl until smooth. In a saucepan, bring coconut milk, half-and-half, sugar, and salt to a gentle boil. Temper egg yolks by slowly adding 1 cup of hot mixture while whisking constantly, then pour tempered yolks back into saucepan and cook until thickened.
- Step 4: Perfect The Filling Consistency
- Once filling is thickened and bubbling, remove from heat and stir in butter, vanilla extract, coconut extract (if using), and sweetened shredded coconut. Continue stirring until completely smooth with no lumps. Pour into cooled pie shell and press plastic wrap directly onto surface to prevent skin formation.
- Step 5: Finish With Whipped Cream
- After filling has chilled and set for at least 3 hours, whip heavy cream with sugar and vanilla until medium peaks form. Spread or pipe decoratively over pie and sprinkle with additional toasted coconut for garnish. Serve cold for the perfect creamy consistency.
 Pin it
I learned the importance of proper blind baking through trial and error. My first attempt resulted in the dreaded "soggy bottom" because I rushed the process. Now I ensure my crust is thoroughly golden before filling, which creates the perfect contrast to the creamy filling.
The Secret To Perfect Wok Technique
High heat is essential for authentic fried rice. My grandmother taught me to heat the wok until smoking before adding oil. Keep ingredients moving constantly to achieve that elusive "wok hei" flavor. Never overcrowd the pan—cook in batches instead. This technique transformed my fried rice into restaurant-quality perfection.
 Pin it
Making The Most Of Leftovers
This dish excels at transforming leftovers into something exciting. I've used roast chicken, holiday ham, and even Thanksgiving turkey with great success. Cut meat into uniform pieces that distribute evenly throughout. Leftover grilled steak adds incredible depth with its smoky edges. Even roasted vegetables bring delightful caramelized sweetness.
Balancing Flavors And Textures
Special fried rice succeeds through balanced components. Char siu provides richness, prawns add sweetness, eggs contribute silkiness, while vegetables offer freshness. The sequence matters—aromatics first build flavor, eggs midway remain distinct, vegetables maintain crispness. Adding spring onions last preserves their brightness for that authentic restaurant finish.
Customization For Dietary Needs
This dish adapts easily to dietary restrictions. For vegetarians, I omit meat, double eggs and add extra vegetables. Low-carb diners enjoy my cauliflower rice version that carries flavors beautifully. For gluten-sensitive guests, tamari replaces soy sauce while ensuring chicken powder is certified gluten-free. Everyone enjoys this beloved dish regardless of restrictions.
Mastering The Coconut Filling
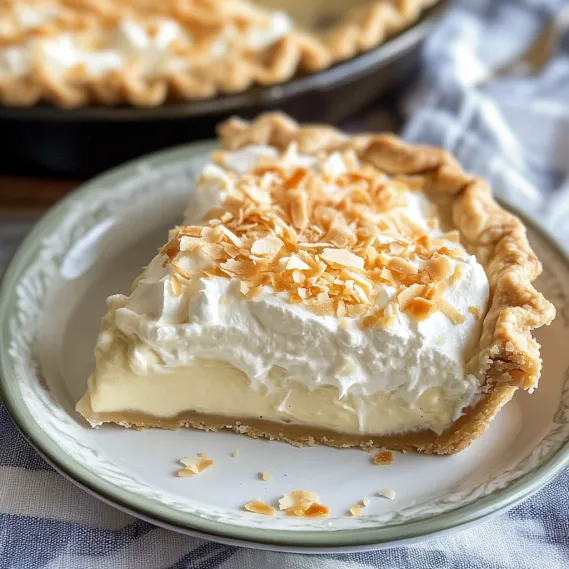
The filling is truly the heart of this pie, and achieving the perfect consistency requires attention to detail. I've found that cooking the filling until you see large bubbles breaking the surface ensures the cornstarch is fully activated. When properly cooked, the filling should coat the back of a spoon and when you run your finger through it, the line should remain clean and distinct. If your filling seems lumpy at any point, simply pass it through a fine-mesh sieve before adding the coconut. The filling will continue to thicken as it cools, so don't panic if it seems slightly loose when hot – this is normal and will result in the perfect sliceable but creamy texture once chilled.
Make-Ahead And Storage Strategies
This pie is perfect for entertaining because nearly every component can be prepared in advance. I often make the crust up to three days ahead, storing it tightly wrapped at room temperature. The filling can be made a day before assembly and kept refrigerated with plastic wrap pressed directly on the surface. On serving day, I simply pour the filling into the crust and refrigerate until set. The whipped cream is best made shortly before serving, though stabilized versions (with a bit of gelatin or cornstarch) can hold up for several hours. Leftover pie keeps well in the refrigerator for up to 3 days, though the crust will gradually soften. I've never had a problem with leftovers, however, as this pie mysteriously disappears within 24 hours in my household!
Troubleshooting Common Issues
Through years of making this recipe, I've encountered and solved several common problems. If your filling is too thin, it likely needs more cooking time to activate the cornstarch – return it to the heat and continue stirring until it noticeably thickens. If your filling has lumps, strain it through a fine-mesh sieve before adding the coconut. For a crust that shrinks during blind baking, ensure the dough is thoroughly chilled before baking and use enough pie weights to hold the sides in place. If your whipped cream begins to weep or deflate, you may have overbeaten it – fold in a bit more unwhipped cream and gently mix to stabilize. These simple fixes have helped me achieve a picture-perfect pie every time, even when entertaining a crowd.
 Pin it
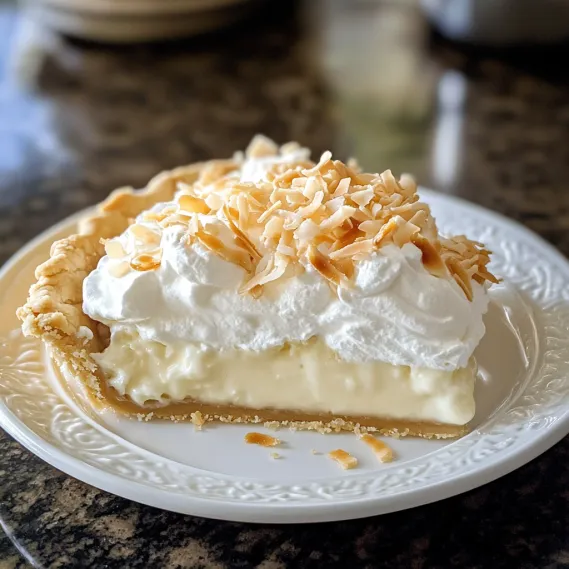
This coconut cream pie has become my signature dessert, the one friends and family request for special occasions or "just because." The combination of crisp crust, silky filling, and cloudlike topping creates a dessert that feels both nostalgic and special. While it requires some time and attention, the process itself is straightforward and the results are consistently spectacular. Each creamy, coconut-infused bite offers a moment of pure dessert bliss that makes every step worthwhile.
Frequently Asked Questions
- → Why is my coconut cream pie filling runny?
- A runny filling typically means the pudding wasn't cooked long enough to activate the cornstarch properly. Make sure to bring the mixture to a full boil and cook for the specified time (1 minute and 30 seconds after adding the egg mixture). Also, ensure you're using the correct amount of cornstarch and that the pie has chilled for at least 3 hours to set completely. Using full-fat coconut milk rather than light versions is also important for proper thickness.
- → Can I use a store-bought pie crust instead of making it from scratch?
- Yes, you can definitely use a store-bought pie crust to save time. Just follow the package instructions for blind baking (pre-baking) the crust before adding the filling. Most frozen pie crusts come in their own aluminum pie plate - just unpackage, thaw according to package directions, prick the bottom with a fork, line with parchment paper, add pie weights, and bake until golden.
- → What's the difference between coconut cream pie and coconut custard pie?
- Though they sound similar, they're quite different desserts. Coconut cream pie has a pudding-like filling that's cooked on the stovetop and chilled in a pre-baked crust. Coconut custard pie has an egg-based filling that's poured into an unbaked crust and baked together until set. Cream pie is chilled and topped with whipped cream, while custard pie is often served slightly warm or at room temperature without additional toppings.
- → How do I prevent my whipped cream from deflating or weeping?
- For stable whipped cream: 1) Start with very cold cream and chilled mixing bowls/beaters, 2) Whip to medium peaks - not too soft or too stiff, 3) Add the sugar toward the end of whipping, and 4) If making ahead, stabilize the whipped cream by adding 1 tablespoon of instant vanilla pudding mix or 2 tablespoons of softened cream cheese per cup of cream before whipping. You can also prepare and add the whipped cream just before serving to ensure it looks fresh.
- → Can I make this pie without coconut milk?
- While canned coconut milk provides the most authentic flavor, you can substitute it with 1 cup of whole milk or half-and-half plus 1 teaspoon of coconut extract for flavor. The texture might be slightly less rich, but it will still be delicious. In this case, I would definitely recommend using the optional coconut extract to enhance the coconut flavor since you're removing one of the primary coconut components.
- → How far in advance can I make this pie?
- This pie is great for making ahead: 1) The pie crust can be blind baked up to 3 days ahead and stored covered at room temperature, 2) The filled pie (without whipped cream) can be refrigerated for up to 24 hours, 3) The completely finished pie can be refrigerated for up to 5 days, though the whipped cream looks best within the first 24 hours. You can also freeze the filled pie (without whipped cream) for up to 3 months - thaw overnight in the refrigerator before topping with fresh whipped cream.