
 Pin it
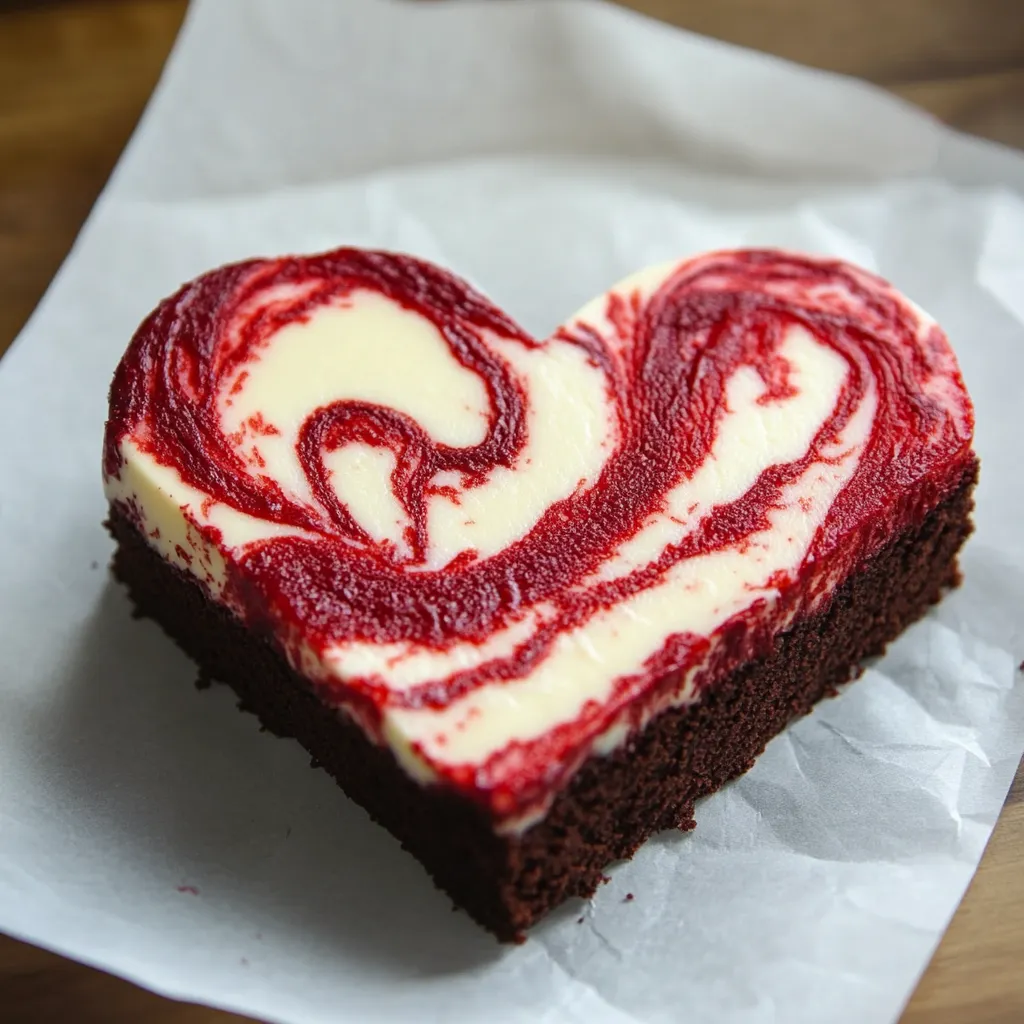
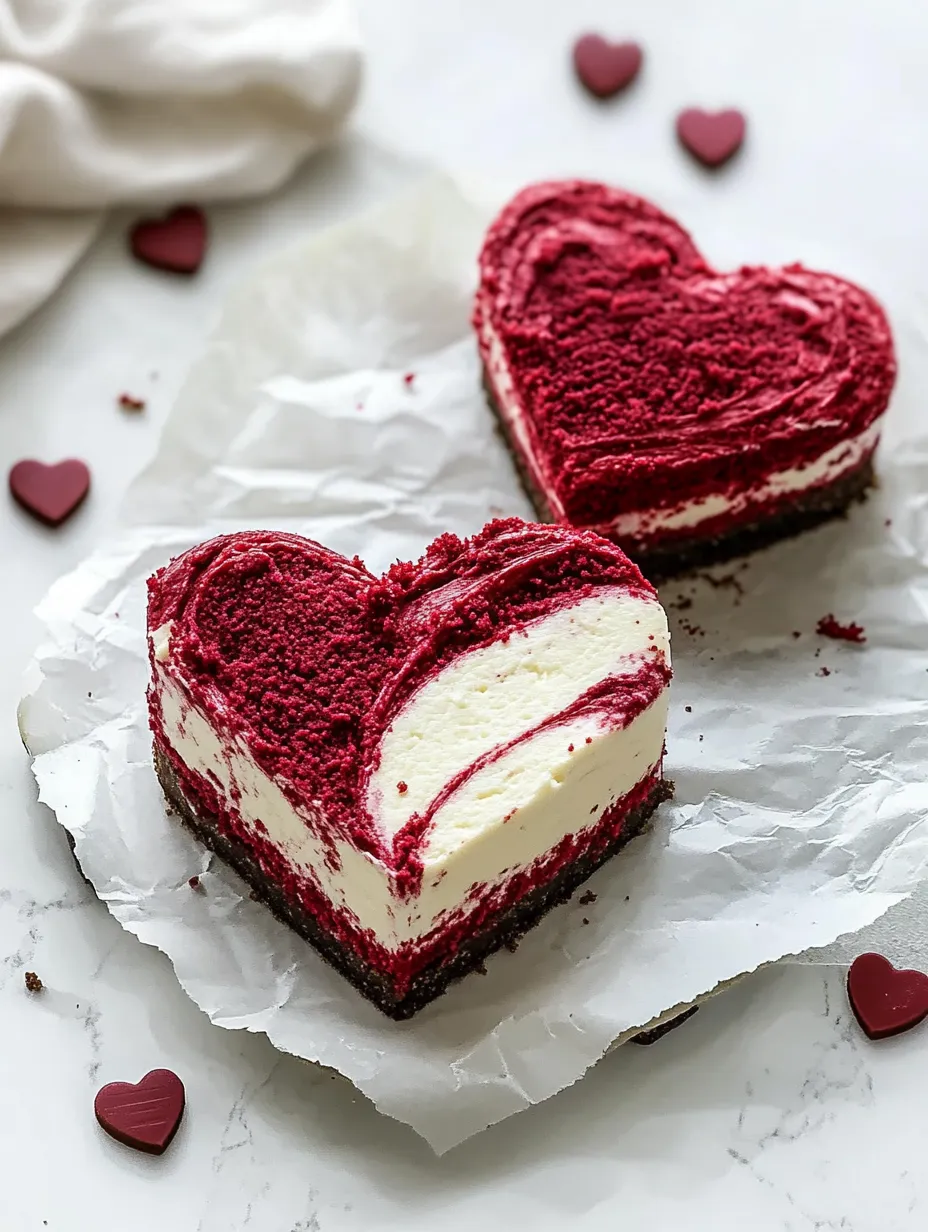
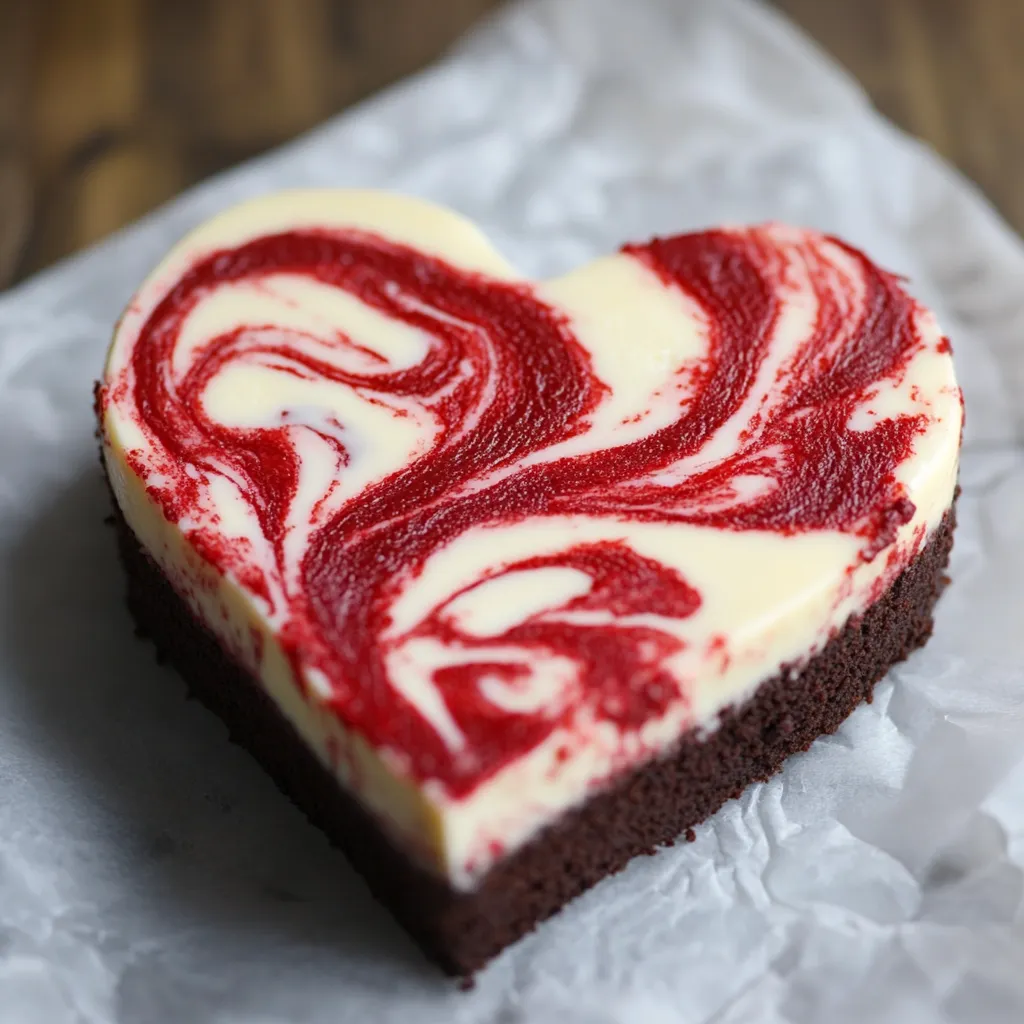
A stunning Heart-Shaped Red Velvet Cheesecake that combines two beloved desserts into one showstopping creation. Each slice reveals perfect layers - a rich red velvet base crowned with silky cheesecake, creating a romantic dessert that's as beautiful as it is delicious.
The first time I made this for Valentine's Day, my husband's face lit up at the perfect heart shape. Now it's become our annual tradition, with each year bringing small refinements to make it even more special.
Essential Ingredients
- Cream Cheese: Full-fat, room temperature for perfectly smooth texture
- Unsalted Butter: High quality for both layers
- Large Eggs: Room temperature for better incorporation
- Semi-sweet Chocolate: Finely chopped premium chocolate
- All-Purpose Flour: Spooned and leveled for accuracy
- Red Gel Food Coloring: For vibrant color without excess liquid
- Greek Yogurt (Full-fat): Adds tang and moisture
- Pure Vanilla Extract: Never imitation for best flavor
STEP-BY-STEP PREPARATION
- 1. Initial Setup:
- Preheat oven to 325°F. Prepare 9-inch springform pan by generously greasing and lining bottom and sides with parchment. Double-wrap outside with heavy-duty foil. Have all ingredients at room temperature. Prepare water bath pan.
- 2. Red Velvet Base:
- Create a double boiler, ensuring bowl doesn't touch water. Gently melt chocolate and butter, stirring occasionally until smooth. Let cool slightly. In separate bowl, whisk flour, cocoa powder, and salt until well combined.
- 3. Base Batter Creation:
- Beat butter and sugar until light and fluffy, about 3-4 minutes. Add eggs one at a time, scraping bowl between additions. Mix in vanilla and food coloring. Gradually add dry ingredients, mixing just until combined - overmixing leads to tough cake.
- 4. Cheesecake Layer:
- Beat cream cheese until completely smooth and lump-free, about 3-4 minutes. Gradually add sugar, then incorporate eggs one at a time. Add vanilla and Greek yogurt, mixing until just combined. Texture should be silky smooth without overmixing.
- 5. Assembly Process:
- Pour red velvet batter into prepared pan, smoothing top. Carefully layer cheesecake mixture over red velvet base. Place springform pan in larger roasting pan, fill halfway with hot water. Tap gently to remove air bubbles.
 Pin it
You Must Know
- Room temperature ingredients are non-negotiable
- Never open oven door during baking
- Water bath is crucial for even baking
- Gentle cooling prevents cracks
- Clean cuts require chilled cheesecake
My passion for this recipe grew from years of Valentine's Day celebrations. Each time I make it, I'm reminded of the joy on my children's faces when they help cut out the hearts. Even the "leftover" pieces become treasured treats.
Chef's Helpful Tips
- Freeze heart cutter for cleaner cuts
- Use dental floss for perfect slices
- Keep a spare vanilla bean in your sugar container
- Test doneness from edge to center
- Chill knife between cuts
 Pin it
The Art of Perfect Texture
Understanding cheesecake texture is crucial for this recipe. Through countless trials, I've learned that proper mixing creates that dreamy, silky-smooth consistency. Beat the cream cheese until absolutely smooth before adding other ingredients, but once eggs are incorporated, mix just enough to combine. This method ensures your cheesecake has that perfect New York-style density without becoming heavy.
Color Balance Magic
Creating the perfect red velvet shade took practice. Too much food coloring can make the cake taste bitter, while too little results in a disappointing brownish hue. I discovered that adding the coloring gradually, while incorporating a tablespoon of cocoa powder, creates that stunning deep red that makes everyone gasp when they cut into it.
Temperature Control Wisdom
The water bath isn't just tradition - it's science in action. Every time I make this cheesecake, I'm reminded of my first attempt without one, which cracked like the Grand Canyon. Now, I ensure the water comes halfway up the pan sides and never skips the foil wrapping. This attention to detail results in that perfectly smooth, crack-free surface.
Seasonal Adaptations
While originally created for Valentine's Day, I've adapted this recipe for every season. Summer brings fresh berry toppings, fall calls for caramel drizzle, and winter celebrations shine with white chocolate snowflakes. Each variation maintains the recipe's elegance while offering a new experience.
 Pin it
Make-Ahead Mastery
The beauty of this cheesecake lies in its make-ahead potential. I've learned that making it 2-3 days before an event actually improves the flavor, as the red velvet base melds perfectly with the cheesecake layer. Just keep it covered in the refrigerator, and garnish right before serving.
Frequently Asked Questions
- → How long does it take to prepare this dessert?
- The preparation takes about 30 minutes, plus baking and chilling time.
- → Can I make this without a heart-shaped cookie cutter?
- Yes, you can cut it into squares or circles if you don’t have one.
- → What can I use instead of red food coloring?
- Beetroot powder or natural red dye works well for a healthier option.
- → Is this recipe suitable for vegans?
- No, it contains dairy and eggs, but you can try vegan alternatives.
- → How should I store the leftover brownies?
- Keep them in an airtight container in the fridge for up to 3 days.