
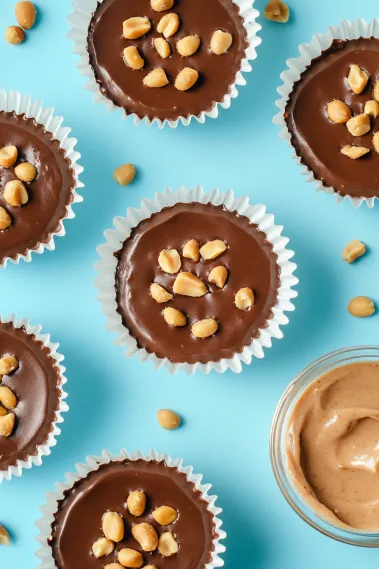
 Pin it
Rich, decadent dark chocolate encases a creamy nut butter filling that's perfectly balanced with just a touch of sweetness and a hint of sea salt. These Better-for-you Chocolate Nut Cups deliver all the satisfaction of your favorite store-bought treat but with significantly less sugar and more nutritional benefits. The combination of high-quality dark chocolate and protein-rich nut butter creates a treat that not only satisfies intense chocolate cravings but also provides lasting satiety. Each bite offers that perfect contrast between the snap of dark chocolate and the smooth, nutty center – a delicious harmony of textures and flavors that makes these cups irresistible.
I started making these chocolate cups years ago when looking for sweet treats that wouldn't cause dramatic blood sugar fluctuations with my Type 1 diabetes. What began as a health-conscious alternative quickly became a family favorite that everyone prefers to the sugar-laden commercial versions. The rich chocolate paired with creamy nut butter and that perfect pinch of sea salt creates a flavor profile that's actually more complex and satisfying than the overly sweet originals.
Essential Ingredients and Selection Tips
- Dark Chocolate: Opt for 85% dark chocolate or higher for the lowest sugar content and richest flavor. The intense chocolate taste means you'll need less sweetener overall.
- Cashew Butter: Creates the smoothest, creamiest filling with a mild flavor that complements the dark chocolate. Choose a natural version without added sugars or oils.
- Sea Salt: Don't skip this crucial ingredient! A small pinch elevates both the chocolate and the nut flavors while creating that irresistible sweet-salty balance.
- Chopped Nuts: Adding texture to the filling transforms these cups from good to extraordinary. Mix and match your favorites for varied crunch and flavor.
The quality of your ingredients truly matters in a recipe with so few components. When I upgraded from standard chocolate chips to a high-quality dark chocolate bar, the improvement was remarkable – deeper flavor, better texture, and a much more satisfying experience overall.
Detailed Cooking Instructions
- Step 1: Prepare the Chocolate Base
- Begin by melting two-thirds of your dark chocolate using a double boiler or microwave in 30-second increments, stirring between each heating until smooth. Remove from heat and add the remaining third of chopped chocolate, stirring until completely melted and glossy. This simple tempering method helps achieve a chocolate that sets properly with a nice snap. Line a mini muffin tin with paper liners and spoon about a teaspoon of melted chocolate into each cup, using the back of the spoon to push the chocolate slightly up the sides.
- Step 2: Create the Filling
- In a small bowl, combine cashew butter (or your preferred nut butter) with a pinch of sea salt and stir until smooth. For texture, fold in finely chopped nuts like almonds, pecans, or walnuts. The filling should be thick enough to hold its shape but still easily spoonable. If your nut butter is particularly runny, refrigerate the mixture for 10-15 minutes before assembling the cups. For slight sweetness, you can add a small amount of honey or maple syrup to taste, but many find the natural sweetness of the nut butter sufficient alongside the dark chocolate.
- Step 3: Assemble the Cups
- Once the chocolate bases have set slightly (about 5 minutes in the refrigerator), add a small spoonful of the nut butter mixture to each cup, being careful not to overfill. Leave enough room around the edges and top for the final chocolate layer. Gently press the filling down slightly to create a flat surface and eliminate any air pockets. If the filling is too soft, refrigerate for another 5-10 minutes before proceeding to the next step.
- Step 4: Add the Chocolate Topping
- Spoon the remaining melted chocolate over each cup, completely covering the filling. Ensure the chocolate reaches the edges to seal in the filling completely. If the chocolate has begun to set, gently rewarm it before using. For the smoothest finish, lightly tap the muffin tin on the counter a few times to help the chocolate settle into an even layer, removing any air bubbles.
- Step 5: Finish and Set
- Before the chocolate fully sets, sprinkle each cup with a tiny pinch of flaky sea salt for visual appeal and flavor enhancement. Place the entire muffin tin in the refrigerator for at least 30 minutes until completely set. Once firm, remove the cups from the tin and peel away the paper liners. For the best flavor and texture, allow them to come to room temperature for about 5 minutes before enjoying - this lets the flavors fully develop and the chocolate soften slightly for the perfect bite.
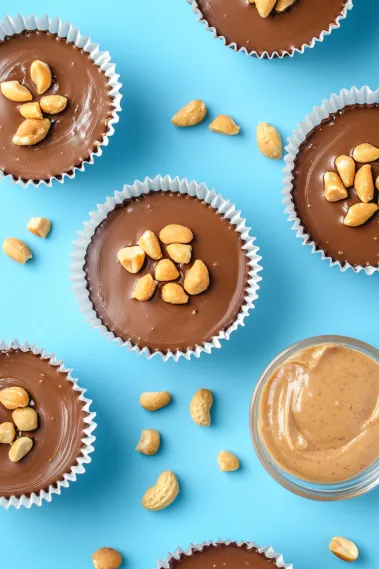 Pin it
My first attempt at these cups taught me an important lesson about patience with chocolate. I rushed the process and tried adding warm filling to barely-set chocolate bases, resulting in a messy mixture instead of distinct layers. Now I always ensure each layer is properly set before proceeding, which results in perfectly layered cups with beautiful definition between the chocolate and nut butter.
Serving Inspiration
These versatile chocolate cups can be presented in numerous ways depending on the occasion. For casual snacking, keep them in a small container in the refrigerator for whenever chocolate cravings strike. For elegant entertaining, arrange them on a wooden board alongside fresh berries and mint leaves for a beautiful dessert platter. They also make thoughtful homemade gifts - place them in small paper cups inside a decorative tin or box, add a handwritten note about their lower-sugar benefits, and you have a personal gift that's sure to be appreciated.
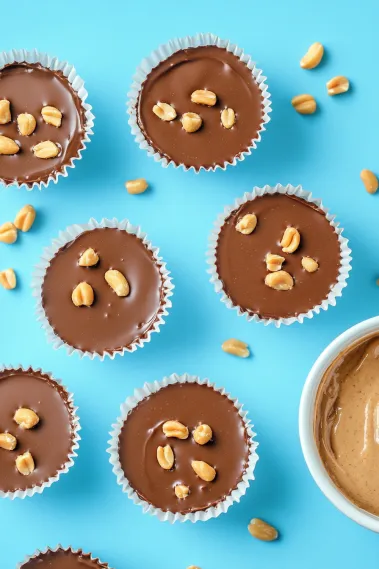 Pin it
Creative Variations
After making these countless times, I've developed several variations that keep the recipe exciting. For a coconut version, mix unsweetened shredded coconut into the nut butter filling and top with a sprinkle of toasted coconut before the chocolate sets. For a coffee-infused treat, add a quarter teaspoon of espresso powder to the melted chocolate. My personal favorite variation incorporates a tiny sprinkle of cinnamon and cayenne into the filling for a Mexican chocolate-inspired cup with a gentle warming spice that enhances the chocolate flavor.
Storage and Make-Ahead Tips
These chocolate cups store beautifully, making them perfect for batch preparation. Keep them in an airtight container in the refrigerator for up to two weeks, though they rarely last that long in my household! For longer storage, they freeze exceptionally well for up to three months - simply place them in a freezer-safe container with parchment between layers to prevent sticking. When ready to enjoy, thaw individual cups in the refrigerator or at room temperature for about 15 minutes. The texture actually improves after freezing, with the chocolate remaining snappy and the filling becoming even creamier.
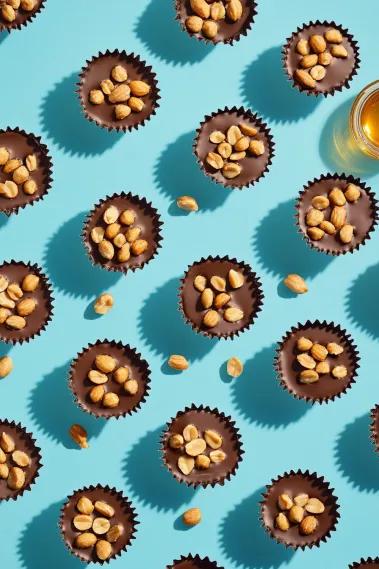 Pin it
These Better-for-you Chocolate Nut Cups represent the perfect balance between indulgence and mindful eating. They prove that healthier alternatives don't have to sacrifice flavor or satisfaction – in fact, they often enhance it by allowing the quality ingredients to shine without being masked by excessive sweetness. Whether enjoyed as an everyday treat, post-workout reward, or elegant dessert offering, these chocolate cups deliver deep chocolate satisfaction while supporting balanced eating habits.
Frequently Asked Questions
- → Can I use a different type of chocolate for these cups?
- Yes, you can use any dark chocolate you prefer, though using chocolate with at least 70% cacao will keep these cups healthier. If you're not concerned about sugar content, you could use semi-sweet or milk chocolate. For a completely sugar-free version, use stevia-sweetened chocolate chips. The higher the cacao percentage, the more bitter the taste will be, so adjust according to your preference.
- → What other nut butters work well in this recipe?
- This recipe is versatile and works with virtually any nut or seed butter. Peanut butter creates a more traditional flavor, while sunflower seed butter makes these cups allergen-friendly. Hazelnut butter creates a Nutella-like experience, and macadamia nut butter offers a buttery richness. Just make sure to use natural versions with no added sugars or oils for the healthiest option.
- → Do I need to keep these in the freezer?
- These cups don't need to be stored in the freezer long-term, though freezing helps them set initially. For everyday storage, keep them in an airtight container in the refrigerator, where they'll maintain a perfect consistency and last for up to two weeks. If you prefer a firmer texture or want to store them longer (up to 2 months), the freezer works well - just let them thaw for 5 minutes before enjoying.
- → Can I add any other ingredients to the nut butter filling?
- Absolutely! You can customize the filling by adding 1/2 teaspoon of cinnamon for warmth, 1 teaspoon of maple syrup for sweetness, or 1 tablespoon of collagen powder for protein. A pinch of cayenne adds a subtle heat that enhances the chocolate flavor. For texture, try mixing in 1 tablespoon of hemp seeds or chia seeds. Just avoid adding too much liquid, which can make the filling too soft.
- → How can I make these completely sugar-free?
- To make these cups completely sugar-free, use 100% unsweetened chocolate or stevia-sweetened chocolate chips. If using unsweetened chocolate, you may want to add a sugar-free sweetener like powdered erythritol (1-2 tablespoons) or liquid stevia (5-10 drops) to the melted chocolate. Make sure your nut butter has no added sugars, and you can add a pinch of monk fruit sweetener to the filling if desired.
- → Can I make these in a regular muffin tin if I don't have a mini one?
- Yes, you can use a standard-size muffin tin with regular liners. This will yield about 4-5 larger cups instead of 8-10 mini ones. Increase the chocolate base to about 1 tablespoon per cup and the filling to 1-1.5 teaspoons. You may need to increase the freezing time by a few minutes to ensure they set properly. The larger cups make a more substantial treat that's perfect for serious chocolate lovers.