
 Pin it
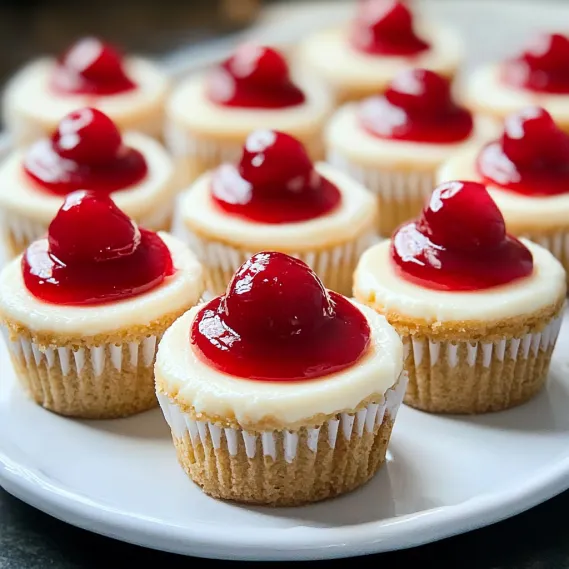
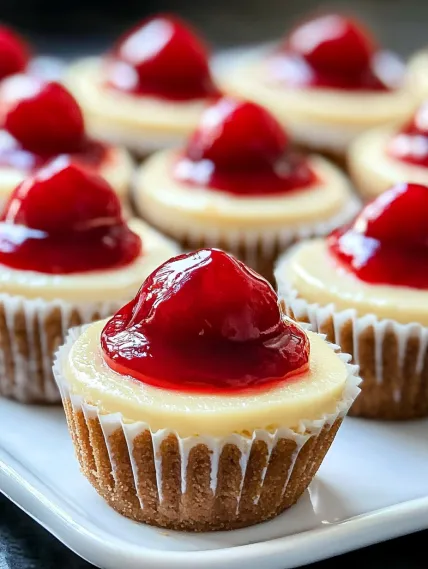
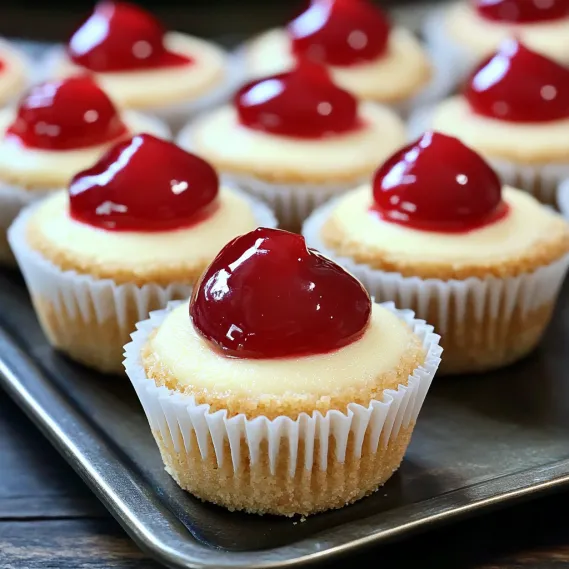
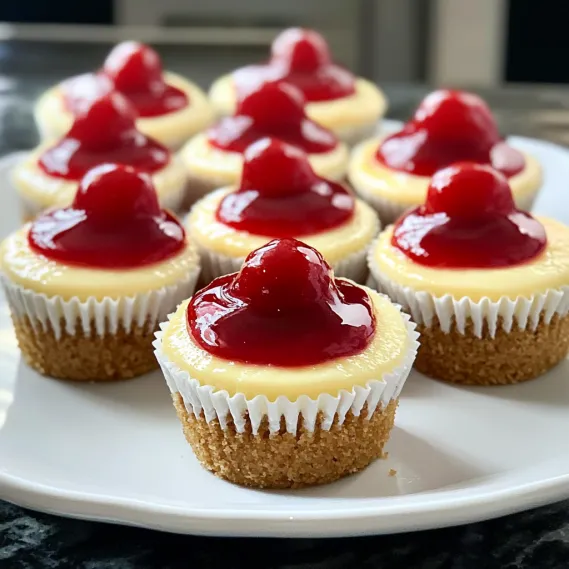
These adorable mini cheesecakes transform the sometimes intimidating process of cheesecake-making into a foolproof dessert anyone can master. The genius simplicity begins with a vanilla wafer cookie at the bottom of each muffin cup, eliminating the need for a traditional crumb crust. Topped with a velvety smooth cream cheese filling and your favorite fruit topping, these individual-sized treats bake in a fraction of the time of a full-sized cheesecake. Perfect for entertaining, potlucks, or anytime you need an impressive dessert without the fuss, these mini cheesecakes deliver all the creamy indulgence of a classic cheesecake in cute, perfectly portioned bites.
I stumbled across this recipe years ago when I needed a last-minute dessert for book club. These mini cheesecakes have saved me countless times since then when I need something that looks fancy but takes basically no effort. The vanilla wafer at the bottom creates this perfect little crust without all the crushing and mixing of traditional cheesecake bases. The first time I served these at a family gathering, my sister-in-law insisted I must have bought them from a bakery – she couldn't believe something so pretty could be so simple to make!
Essential Ingredients and Selection Tips
- Vanilla Wafer Cookies: These create an instant crust that softens slightly during baking. Nilla Wafers are the classic choice, but any similar vanilla cookie works.
- Cream Cheese: Use full-fat, brick-style cream cheese for the richest flavor and creamiest texture. Light cream cheese can make the filling runny.
- Eggs: Provide structure and that classic cheesecake texture. Room temperature eggs blend more easily into the batter.
- Sugar: Regular granulated sugar works perfectly, providing just the right sweetness without being overpowering.
- Vanilla: Pure vanilla extract or vanilla bean paste adds depth of flavor. The bean paste adds beautiful specks to the filling.
I've discovered that the temperature of ingredients makes a huge difference in the final texture. When I've used cream cheese straight from the refrigerator, I inevitably end up with lumps in the batter that no amount of mixing will smooth out. Now I always set the cream cheese out at least an hour before starting.
Detailed Cooking Instructions
- Step 1: Prepare Your Baking Canvas
- Preheat your oven to 350°F and line a standard 12-cup muffin tin with paper liners. This step is crucial – without liners, the cheesecakes will stick to the pan and fall apart when removed. Place one vanilla wafer cookie, flat side down, into the bottom of each paper liner. No need to crush or press down – the cookie will form a perfect crust during baking.
- Step 2: Create Velvety Smooth Filling
- In a large mixing bowl, beat 16 ounces (two 8-ounce packages) of room temperature cream cheese until completely smooth, about 2-3 minutes. This initial beating removes any lumps before adding other ingredients. Gradually add 1/2 cup granulated sugar while mixing on low speed until fully incorporated and slightly fluffy. Scrape down the sides of the bowl frequently to ensure even mixing.
- Step 3: Develop Perfect Texture
- Add 2 large eggs, one at a time, beating well after each addition. This method incorporates air properly and creates the ideal cheesecake texture. After adding the eggs, mix in 1 teaspoon vanilla extract and a pinch of salt. The mixture should look glossy, smooth, and pourable but not runny. Avoid overmixing at this stage, which can incorporate too much air and cause cracking.
- Step 4: Fill And Prepare For Baking
- Using a cookie scoop or 1/4 cup measure, divide the filling evenly among the muffin cups, filling each about 3/4 full. Each liner should contain about 2-3 tablespoons of the cream cheese mixture. Tap the pan gently on the counter a few times to release any air bubbles that might cause cracking during baking.
- Step 5: Bake With Care
- Bake in the preheated oven for 20-22 minutes, until the centers are almost set but still slightly jiggly when the pan is gently shaken. The tops should not be browned. Turn off the oven, crack the door open slightly, and let the cheesecakes cool in the oven for 10 minutes – this gradual cooling helps prevent cracks. Then remove from oven, cool completely at room temperature, and refrigerate for at least 2 hours or overnight before serving.
 Pin it
The first time I made these, I was nervous about underbaking and left them in too long. They still tasted amazing but developed cracks across the top. Now I know that slight underbaking and gradual cooling is the secret to perfectly smooth tops. If cracks do appear, I simply embrace them as an excuse to add more topping!
Topping Ideas And Presentation
The versatility of these mini cheesecakes extends to their countless topping possibilities. While the classic cherry pie filling creates that iconic cheesecake look, I've experimented with numerous alternatives that have become family favorites. Fresh berries tossed in a little sugar create a lighter, more elegant finish perfect for spring gatherings. For fall, I often use apple pie filling with a sprinkle of cinnamon. During the holidays, a drizzle of caramel and crushed pecans transforms these into festive treats that disappear from dessert tables. For dinner parties, I love creating a topping bar with different options so guests can customize their own. My most popular presentation has been arranging them on a tiered cake stand with alternating toppings, which creates a beautiful dessert centerpiece with minimal effort.
 Pin it
Make-Ahead And Storage Solutions
One of the greatest advantages of these mini cheesecakes is their make-ahead potential, which has saved me countless times when entertaining. I've found they actually improve after a day in the refrigerator as the flavors meld and the texture becomes even creamier. For optimal results, I make them up to two days in advance but add the toppings just before serving to prevent the cheesecake from becoming soggy. For longer storage, these freeze beautifully for up to two months in an airtight container. I place them in a single layer, then cover with plastic wrap and foil to prevent freezer burn. When ready to serve, I thaw them overnight in the refrigerator still wrapped, then add toppings just before presenting. This strategy has been invaluable for holiday entertaining when oven space and time are at a premium.
Creative Flavor Variations
While the classic vanilla cheesecake is always a hit, I've developed several variations that have become signature desserts in my repertoire. For citrus lovers, adding the zest of one lemon or lime to the batter creates a bright, refreshing version perfect for summer. During fall, incorporating 1/2 teaspoon of pumpkin pie spice and 1/4 cup canned pumpkin puree (reducing the cream cheese slightly to compensate) creates mini pumpkin cheesecakes that capture the essence of the season. For chocolate enthusiasts, swapping the vanilla wafer for a chocolate cookie and adding 2 tablespoons of cocoa powder to the filling makes a decadent chocolate version. My personal favorite variation involves adding 2 tablespoons of espresso powder to the batter and using a chocolate cookie base for a tiramisu-inspired treat that coffee lovers rave about.
Troubleshooting Common Issues
Through many batches of these mini cheesecakes, I've encountered and solved several common problems. If your cheesecakes sink dramatically in the center, they likely need another minute or two of baking time. Conversely, if they crack significantly, they may be overbaked or cooled too quickly – next time, reduce the baking time by a minute and cool them more gradually. For cheesecakes that stick to the paper liners, refrigerate them fully before attempting to unwrap – the cold firms the filling and makes for cleaner removal. If your filling has small lumps despite your best efforts, pressing it through a fine mesh sieve before filling the cups can salvage the batch. For those rare occasions when presentation is paramount and cracks still occur, a thin layer of sweetened sour cream (2 tablespoons sour cream mixed with 1 teaspoon sugar) spread on top before refrigerating creates a smooth, crack-free surface.
 Pin it
These mini cheesecakes have become my signature dessert, the one friends and family request for gatherings and the recipe most frequently asked for after parties. What began as a last-minute solution has evolved into a go-to dessert that never fails to impress while being nearly impossible to mess up. There's something magical about offering each person their own individual cheesecake – it elevates any occasion from casual to special with minimal effort, the hallmark of truly great entertaining.
Frequently Asked Questions
- → Can I use different toppings instead of cherry pie filling?
- Absolutely! These mini cheesecakes are extremely versatile. Try strawberry, blueberry, or apple pie filling. You could also use fresh berries, chocolate ganache, caramel sauce, lemon curd, or even a dollop of whipped cream with a sprinkle of cinnamon. For a fancy presentation, drizzle with melted chocolate or add a mint leaf garnish.
- → What if I don't have vanilla wafers?
- You can substitute other cookies for the crust. Graham crackers, gingersnaps, Oreos (with filling removed), shortbread cookies, or even chocolate chip cookies work well. Simply place one cookie in the bottom of each liner. If using smaller cookies, you might need to crush them and mix with a little melted butter to form a proper crust base.
- → Why did my mini cheesecakes sink in the middle after baking?
- A slight depression in the center is normal and actually perfect for holding your toppings! If they sink dramatically, it could be due to overmixing (which incorporates too much air) or sudden temperature changes. Make sure to mix just until ingredients are combined after adding eggs, and allow cheesecakes to cool gradually at room temperature before refrigerating.
- → Can I make these mini cheesecakes ahead of time?
- Yes, these are perfect for making ahead! You can prepare them up to 3-4 days in advance and store them in the refrigerator. For longer storage, freeze them without toppings for up to 2 months. Add the toppings just before serving for the freshest presentation. If frozen, thaw overnight in the refrigerator before adding toppings and serving.
- → How can I tell when the mini cheesecakes are done baking?
- The mini cheesecakes are done when the edges are set but the centers still have a slight jiggle (like Jell-O, not like liquid). Overbaking can cause them to crack and become dry. The centers will continue to set as they cool. If you gently touch the center, it should spring back slightly but still feel soft.
- → Can I add other flavors to the cheesecake filling?
- Definitely! There are many delicious variations you can try. Add 1-2 tablespoons of lemon juice and 1 teaspoon of zest for lemon cheesecakes. Mix in 1/4 cup of cocoa powder for chocolate cheesecakes. Swirl in 2-3 tablespoons of caramel or fruit preserves before baking. You can also add 1/2 teaspoon of extracts like almond, coconut, or maple for different flavor profiles.