
 Pin it
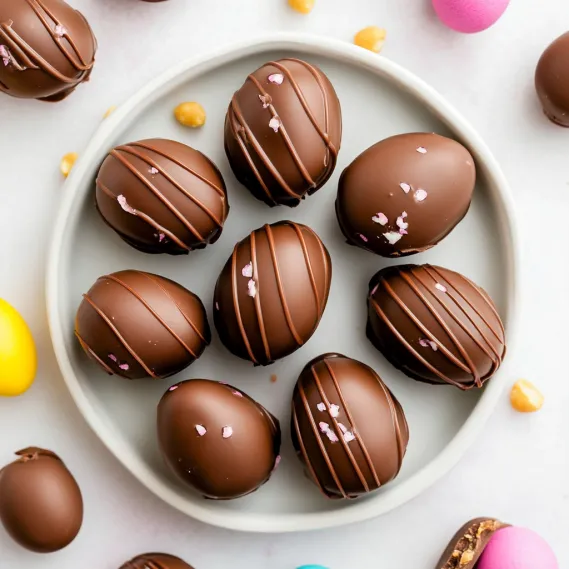
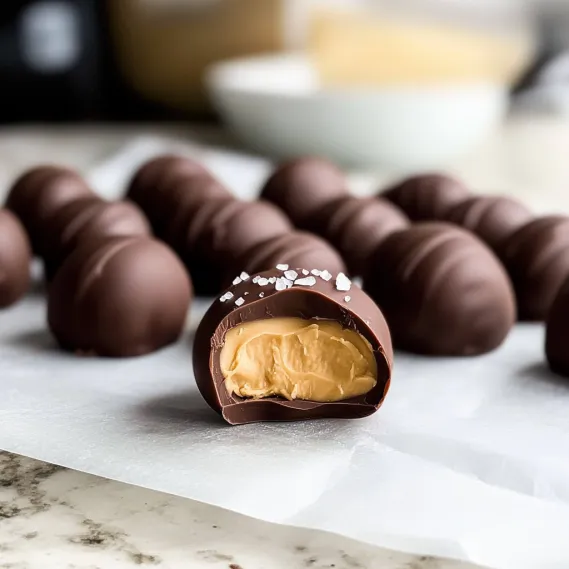
These homemade peanut butter Easter eggs deliver pure chocolate-peanut butter bliss in every bite – a creamy, rich peanut butter filling enrobed in smooth chocolate coating. The combination creates an irresistible candy that rivals store-bought versions but with a fresher taste and customizable sweetness. Perfect for Easter baskets, holiday gatherings, or whenever a chocolate-peanut butter craving strikes, these no-bake treats come together with minimal ingredients and equipment. The addition of flaky sea salt on top provides a sophisticated flavor contrast that balances the sweetness beautifully.
I first made these for my sister's Easter brunch, where they disappeared within minutes. What surprised me most was how many guests asked if I'd bought them from a specialty chocolate shop! The secret is getting the right peanut butter-to-sugar ratio and properly chilling the eggs before dipping – two simple steps that elevate these treats from homemade to seemingly professional.
Essential Ingredients and Selection Tips
- Peanut Butter: Use creamy, processed brands like Jif or Skippy for the best texture. Natural peanut butter creates a filling that's too dry and crumbly.
- Butter: Softened but not melted butter provides the perfect consistency. Let it sit at room temperature for one hour before beginning.
- Confectioners' Sugar: This fine sugar dissolves seamlessly into the filling, creating smooth texture and needed sweetness.
- Chocolate: Use real baking chocolate bars (not chips) for the best melting and coating. Ghirardelli or Baker's brands work beautifully.
- Vanilla Extract: A touch of pure vanilla enhances both the peanut butter and chocolate flavors.
- Sea Salt: Optional but highly recommended, flaky sea salt on top creates a sophisticated sweet-salty balance.
I've discovered that combining different chocolates can create the perfect coating. For a milk chocolate-like coating with less sweetness, try mixing 8 ounces of dark chocolate with 4 ounces of white chocolate for the ideal balance of sweetness and chocolate flavor.
Detailed Cooking Instructions
- Step 1: Prepare Your Perfect Filling
- Beat 6 tablespoons softened butter until creamy, then add 1 cup creamy peanut butter, 1 teaspoon vanilla extract, and 1/4 teaspoon salt. Mix until smooth and completely combined. Gradually add 2 1/4 cups confectioners' sugar, beating on low speed until incorporated, then increase to high speed until the mixture forms a thick, moldable dough.
- Step 2: Shape The Easter Eggs
- Scoop 1.5 tablespoon portions of filling using a cookie scoop or measuring spoon. Roll each portion into a ball between your palms, then flatten to about 3/4-inch thickness. Use your fingers to narrow one end slightly to create an egg shape. Place shaped eggs on a parchment-lined baking sheet and refrigerate for at least 1 hour until firm.
- Step 3: Prepare The Chocolate Coating
- Chop 12 ounces of baking chocolate into small pieces and place in a microwave-safe bowl with 1 teaspoon vegetable oil. Microwave in 20-second intervals, stirring after each, until completely melted and smooth. Allow the chocolate to cool for 5 minutes so it won't melt the cold peanut butter filling.
- Step 4: Master The Dipping Technique
- Working with one chilled egg at a time, place it on a fork and lower into the melted chocolate. Spoon chocolate over the top to coat completely, then lift and gently tap the fork on the edge of the bowl to remove excess chocolate. Use a toothpick to slide the egg off the fork onto a parchment-lined baking sheet. Continue with remaining eggs, returning them to the refrigerator if they begin to soften.
- Step 5: Add Finishing Touches
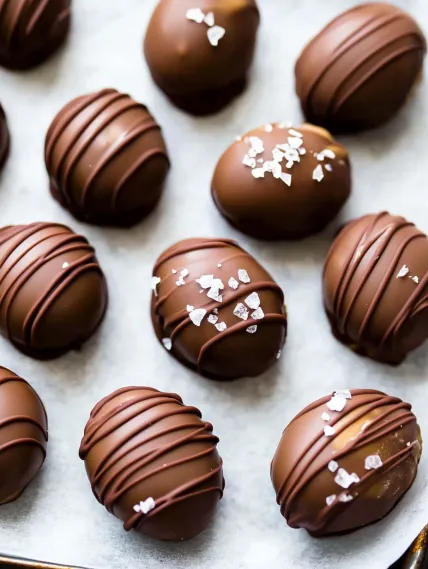
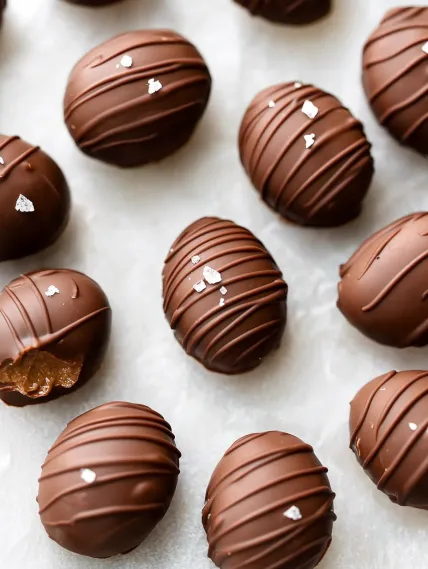
- While the chocolate is still wet, sprinkle each egg with a small pinch of flaky sea salt or festive sprinkles if desired. For a decorative touch, transfer any remaining chocolate to a small zip-top bag, snip off a tiny corner, and drizzle over the eggs in a zigzag pattern. Refrigerate until chocolate is completely set, about 30 minutes.
 Pin it
My first attempt at these candies was nearly ruined when I tried to dip room-temperature eggs into the chocolate. They immediately began to melt and fall apart. Now I make sure the shaped eggs are thoroughly chilled, and the process is virtually foolproof.
The Secret To Perfect Wok Technique
High heat is essential for authentic fried rice. My grandmother taught me to heat the wok until smoking before adding oil. Keep ingredients moving constantly to achieve that elusive "wok hei" flavor. Never overcrowd the pan—cook in batches instead. This technique transformed my fried rice into restaurant-quality perfection.
 Pin it
Making The Most Of Leftovers
This dish excels at transforming leftovers into something exciting. I've used roast chicken, holiday ham, and even Thanksgiving turkey with great success. Cut meat into uniform pieces that distribute evenly throughout. Leftover grilled steak adds incredible depth with its smoky edges. Even roasted vegetables bring delightful caramelized sweetness.
Balancing Flavors And Textures
Special fried rice succeeds through balanced components. Char siu provides richness, prawns add sweetness, eggs contribute silkiness, while vegetables offer freshness. The sequence matters—aromatics first build flavor, eggs midway remain distinct, vegetables maintain crispness. Adding spring onions last preserves their brightness for that authentic restaurant finish.
Customization For Dietary Needs
This dish adapts easily to dietary restrictions. For vegetarians, I omit meat, double eggs and add extra vegetables. Low-carb diners enjoy my cauliflower rice version that carries flavors beautifully. For gluten-sensitive guests, tamari replaces soy sauce while ensuring chicken powder is certified gluten-free. Everyone enjoys this beloved dish regardless of restrictions.
Creative Flavor Variations
While the classic peanut butter-chocolate combination is divine, I've experimented with several delicious variations. For peanut butter and jelly eggs, add 2 tablespoons of freeze-dried strawberry powder to the filling for a fruity twist. Chocolate lovers appreciate the addition of 1/4 cup cocoa powder to the peanut butter mixture for double-chocolate eggs. My personal favorite variation includes mixing 1/3 cup finely chopped toasted salted peanuts into the filling for added crunch and texture. For special occasions, I've even filled the center with a small amount of caramel or raspberry jam before coating in chocolate – the surprise filling delights both children and adults alike.
Stunning Presentation Ideas
These Easter egg candies make beautiful gifts when packaged thoughtfully. I often place them in paper cupcake liners and arrange in small pastry boxes tied with ribbon. For Easter baskets, nestle them in natural paper grass alongside other homemade treats. At brunches, I create a stunning dessert board by arranging the eggs on a wooden serving platter with fresh berries, small cookies, and edible flowers. For an elegant dinner party dessert, place a single egg on each dessert plate with a small dollop of whipped cream and a mint leaf. The versatility of these candies makes them appropriate for casual gatherings and sophisticated events alike.
Troubleshooting Common Issues
Over years of making these treats, I've encountered and solved several common problems. If your chocolate coating develops white streaks after setting (called blooming), it's likely due to temperature fluctuations – next time, make sure all tools are dry and chocolate is properly cooled before dipping. If the filling becomes too soft while shaping, don't add more sugar which makes them too sweet; instead, refrigerate the mixture for 15-20 minutes. For those struggling with chocolate that's too thick for dipping, adding an additional 1/2 teaspoon of vegetable oil will help achieve the perfect consistency. Remember that humidity affects chocolate, so on particularly humid days, work quickly and return eggs to the refrigerator frequently during the dipping process.
 Pin it
These Easter Egg Peanut Butter Candies have become my signature holiday treat, requested by friends and family year after year. What began as a simple homemade alternative to store-bought candy has evolved into a cherished tradition and the perfect way to share something special with those I love. There's something deeply satisfying about transforming simple ingredients into something so impressive and delicious that people can't believe it's homemade. The combination of creamy peanut butter filling and rich chocolate coating creates a treat that's not just seasonal but worthy of making any time a special chocolate craving strikes.
Frequently Asked Questions
- → Can I use natural peanut butter for these candies?
- It's best to avoid natural peanut butter for this recipe. Natural peanut butter (the kind that separates and needs stirring) has a higher oil content and different texture that makes the filling too soft and oily to hold its shape properly. Stick with conventional creamy peanut butter brands like Jif or Skippy for the best results.
- → Why can't I use chocolate chips for coating?
- Chocolate chips contain stabilizers that help them maintain their shape when baked, but these same stabilizers prevent them from melting into the smooth, fluid consistency needed for dipping. For the best coating, use chocolate bars marketed as 'baking chocolate' or chocolate melting wafers, which will melt smoothly and set with a nice snap.
- → My peanut butter mixture is too crumbly to shape - what can I do?
- If your mixture is too crumbly, there are a few fixes: 1) Keep working it with your hands - the warmth will help it come together; 2) Add 1/2-1 teaspoon of water or a little more butter and mix again; 3) Make sure your butter was properly softened before mixing. If it's too soft and sticky instead, refrigerate the mixture for 15-20 minutes to firm it up before shaping.
- → Can I make these candies in different shapes?
- Absolutely! While the egg shape is traditional for Easter, you can form the peanut butter filling into any shape that's easy to dip - balls, hearts, or flattened discs all work well. Just make sure the shapes aren't too thin or they may break when dipped, and adjust chilling time as needed depending on the size of your shapes.
- → How do I get a smooth chocolate coating without marks or pooling?
- For a professional-looking finish: 1) Make sure the peanut butter eggs are thoroughly chilled before dipping; 2) Tap excess chocolate off gently but thoroughly; 3) Use a fork to dip and another fork or toothpick to slide the candy off onto the parchment; 4) If you notice pools forming around the base, wait until the chocolate begins to set (but isn't completely hard) and then use a small knife to trim around the edges.
- → Can I use other nut butters instead of peanut butter?
- Yes, you can substitute other nut butters like almond butter or cashew butter, but expect some differences in texture and flavor. Almond butter tends to be thicker and may require a bit more butter to achieve the right consistency. Also, because these alternatives are often less sweet than commercial peanut butter, you might want to taste and adjust the sugar content.