
 Pin it
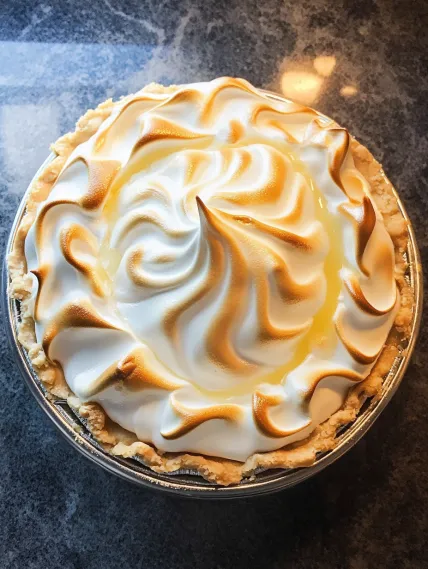
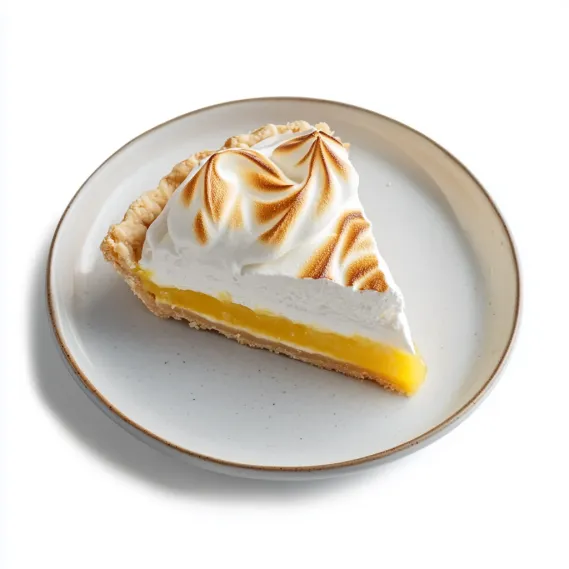
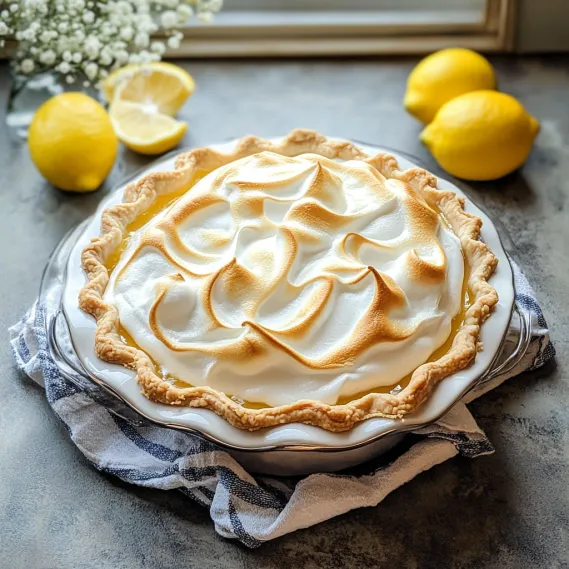
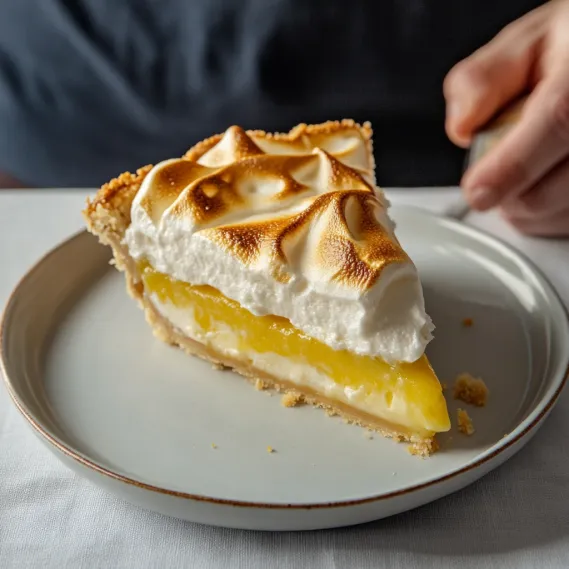
This classic lemon meringue pie delivers the perfect balance of sweet and tart in every bite – a buttery, flaky crust filled with bright, silky lemon filling and crowned with a billowy cloud of toasted meringue. The contrasting layers create a dessert that's visually stunning and delivers multiple flavor and texture experiences in each forkful. After countless tests and refinements, this recipe solves the three common challenges of lemon meringue pie: soggy crust, watery filling, and weeping meringue. The result is a showstopping dessert that tastes as impressive as it looks.
I perfected this recipe through exhaustive testing, making at least a dozen pies over several months until every element was flawless. What began as a frustrating series of soggy crusts and weeping meringues evolved into this foolproof method that has impressed even the most discerning pie critics. My neighbor, who claimed she "never liked lemon meringue pie," requested the recipe after her first bite, saying it completely changed her opinion of the classic dessert.
Essential Ingredients and Selection Tips
- Lemons: Use fresh lemons, not bottled juice. Meyer lemons offer a sweeter profile, while standard lemons provide that classic tart flavor.
- Eggs: Separate while cold for easier separation, but allow whites to come to room temperature for maximum volume in the meringue.
- Cornstarch: The key stabilizing ingredient in the filling; ensure it's fresh as cornstarch loses thickening power over time.
- Cream of Tartar: Essential for stabilizing the meringue; don't skip this ingredient.
- Pie Crust: Homemade delivers superior results, but a high-quality store-bought crust will work in a pinch.
I've found that the quality of your lemons makes a remarkable difference in the final flavor. Look for heavy, fragrant fruits with fine-textured skin, which indicates they're juicy and fresh. I always buy extra lemons to ensure I have enough juice and zest.
Detailed Cooking Instructions
- Step 1: Prepare Perfect Pie Crust
- Start with your favorite pie crust recipe or high-quality store-bought crust. Blind bake the crust by lining it with parchment and filling with pie weights. Bake at 375°F for 15 minutes, remove weights and parchment, then bake for an additional 5-7 minutes until lightly golden. This partial blind bake ensures your crust won't become soggy under the lemon filling.
- Step 2: Create Stable Lemon Filling
- In a medium saucepan, whisk together 1½ cups water, 1½ cups sugar, ⅓ cup cornstarch, and ¼ teaspoon salt. Bring to a boil over medium heat, stirring constantly. Once boiling, cook for 1-2 minutes until thickened. Remove from heat. In a separate bowl, whisk 5 egg yolks, then gradually whisk in 1 cup of the hot mixture to temper the eggs. Return everything to the saucepan, cook for 2 more minutes, then remove from heat and add ½ cup lemon juice, 2 tablespoons butter, and 1 tablespoon lemon zest.
- Step 3: Perfect The Meringue
- In a completely clean, grease-free bowl, beat 5 room-temperature egg whites with ½ teaspoon cream of tartar until foamy. Gradually add ½ cup sugar while beating until soft peaks form. Increase speed and continue beating until stiff, glossy peaks form. The meringue should hold its shape but not appear dry or grainy, which indicates overbeating.
- Step 4: Assemble With Proper Technique
- Pour the hot lemon filling directly into the warm par-baked crust. Immediately dollop the meringue onto the hot filling, starting around the edges to "seal" the meringue to the crust. This prevents shrinking and weeping. Add remaining meringue to the center and spread, creating decorative peaks and swirls with the back of a spoon or spatula.
- Step 5: Bake To Golden Perfection
- Bake the assembled pie at 350°F for 15-18 minutes until the meringue is golden brown with toasted peaks. Watch carefully to prevent over-browning. Cool the pie on a wire rack for 2 hours, then refrigerate for at least 4 hours before slicing. Use a knife dipped in hot water and wiped clean between cuts for the neatest slices.
 Pin it
My first attempts at this pie were disasters – soupy filling that wouldn't set, meringue that wept and shrank, and crusts soggy enough to make Paul Hollywood scowl. Through methodical testing and adjustment, I discovered that proper cornstarch activation in the filling and careful temperature management between layers were the secrets to success.
The Secret To Perfect Wok Technique
High heat is essential for authentic fried rice. My grandmother taught me to heat the wok until smoking before adding oil. Keep ingredients moving constantly to achieve that elusive "wok hei" flavor. Never overcrowd the pan—cook in batches instead. This technique transformed my fried rice into restaurant-quality perfection.
 Pin it
Making The Most Of Leftovers
This dish excels at transforming leftovers into something exciting. I've used roast chicken, holiday ham, and even Thanksgiving turkey with great success. Cut meat into uniform pieces that distribute evenly throughout. Leftover grilled steak adds incredible depth with its smoky edges. Even roasted vegetables bring delightful caramelized sweetness.
Balancing Flavors And Textures
Special fried rice succeeds through balanced components. Char siu provides richness, prawns add sweetness, eggs contribute silkiness, while vegetables offer freshness. The sequence matters—aromatics first build flavor, eggs midway remain distinct, vegetables maintain crispness. Adding spring onions last preserves their brightness for that authentic restaurant finish.
Customization For Dietary Needs
This dish adapts easily to dietary restrictions. For vegetarians, I omit meat, double eggs and add extra vegetables. Low-carb diners enjoy my cauliflower rice version that carries flavors beautifully. For gluten-sensitive guests, tamari replaces soy sauce while ensuring chicken powder is certified gluten-free. Everyone enjoys this beloved dish regardless of restrictions.
The Art Of Perfect Meringue
Creating a stable, beautiful meringue took numerous attempts to perfect. I discovered that adding sugar gradually after the whites become foamy creates the most stable structure. Too early, and the whites won't develop proper volume; too late, and the meringue becomes grainy. Temperature of egg whites matters tremendously – room temperature whites whip to significantly greater volume than cold ones. For my Easter gathering last year, I decided to create decorative peaks on my meringue by gently touching the surface with the back of a spoon and lifting quickly. These golden-brown peaks became the most admired feature of the dessert table, with guests taking photos before the pie was even sliced.
Mastering The Lemon Filling
The filling's texture is critical – it needs to be firm enough to slice cleanly but still creamy on the palate. After multiple tests, I found that cooking the cornstarch mixture until it becomes translucent rather than just thickened ensures proper activation of the starch molecules. This seemingly small detail prevents the dreaded watery filling that plagues so many lemon meringue pies. For enhanced lemon flavor, I add both juice and zest, but incorporate the zest after cooking to preserve its bright, aromatic oils. My mother-in-law, who considered herself a lemon meringue pie expert, declared this technique produced "the perfect consistency" after years of her own less successful attempts.
Seasonal Adaptations Worth Trying
While classic lemon meringue pie is perfection, I've created seasonal variations that showcase different citrus fruits. In winter, blood orange meringue pie offers a striking ruby filling and complex flavor. Summer calls for Key lime or a mixture of lemon and lime for extra brightness. For special occasions in spring, I've added a tablespoon of lavender-infused sugar to the meringue, which pairs beautifully with the lemon and creates a subtle floral aroma. These adaptations keep the fundamental techniques the same while offering new flavor experiences that reflect the changing seasons and available produce.
 Pin it
This lemon meringue pie has become my signature dessert, requested for birthdays, holidays, and special gatherings. The bright lemon flavor is universally appealing, while the dramatic presentation never fails to impress. What began as a frustrating baking challenge has become a source of pride and joy, especially when I see faces light up at the first heavenly bite of perfectly balanced sweet-tart filling and cloud-like meringue. Mastering this classic has taught me that attention to detail and understanding the science behind each component leads to truly exceptional results.
Frequently Asked Questions
- → Why is my meringue weeping or shrinking?
- Meringue can weep or shrink for several reasons: 1) The filling wasn't hot when the meringue was added - always spread meringue over warm filling to create a seal; 2) The meringue wasn't spread all the way to the crust edges; 3) The egg whites weren't at room temperature; 4) The meringue was overbeaten; or 5) The pie was baked in a humid environment. Make sure to follow all the tips in the recipe for best results.
- → How do I prevent a soggy bottom crust?
- To prevent a soggy bottom crust, you must blind bake (pre-bake) the crust before adding the filling. Line your pie crust with parchment paper, fill with pie weights or dried beans, and bake at 375°F for about 15 minutes. Then remove the weights and parchment and bake another 5-10 minutes until the bottom is lightly golden. This creates a barrier that prevents the wet filling from making the crust soggy.
- → Can I make lemon meringue pie ahead of time?
- Lemon meringue pie is best enjoyed the day it's made. However, you can prepare components ahead: the pie crust can be made up to 5 days ahead (refrigerated) or 3 months ahead (frozen). You can also blind bake the crust a day ahead. The assembled pie needs to chill for 4 hours before serving, so plan accordingly. Unfortunately, this pie doesn't freeze well, as both the filling and meringue textures are negatively affected.
- → Why is my lemon filling runny?
- A runny filling is usually caused by undercooking. The filling must be cooked until it's quite thick and large bubbles burst on the surface. Another cause could be inaccurate measurement of cornstarch - be precise! Also, make sure to temper the egg yolks properly by slowly streaming the hot mixture into them while whisking constantly, then returning the mixture to the pan to finish cooking.
- → How do I know when my meringue is beaten to 'stiff peaks'?
- Meringue has reached stiff peaks when you lift the beater out of the mixture and the peaks stand straight up without flopping over at the tips. The meringue should be glossy and smooth, not dry or grainy looking. Be careful not to overbeat, as this can cause the meringue to break down and weep during baking.
- → Can I use bottled lemon juice instead of fresh?
- For the best flavor, always use freshly squeezed lemon juice. Bottled lemon juice often has preservatives and a somewhat stale taste that will be noticeable in the filling. Since the lemon flavor is the star of this dessert, using fresh juice and zest makes a significant difference in the final taste.