
 Pin it
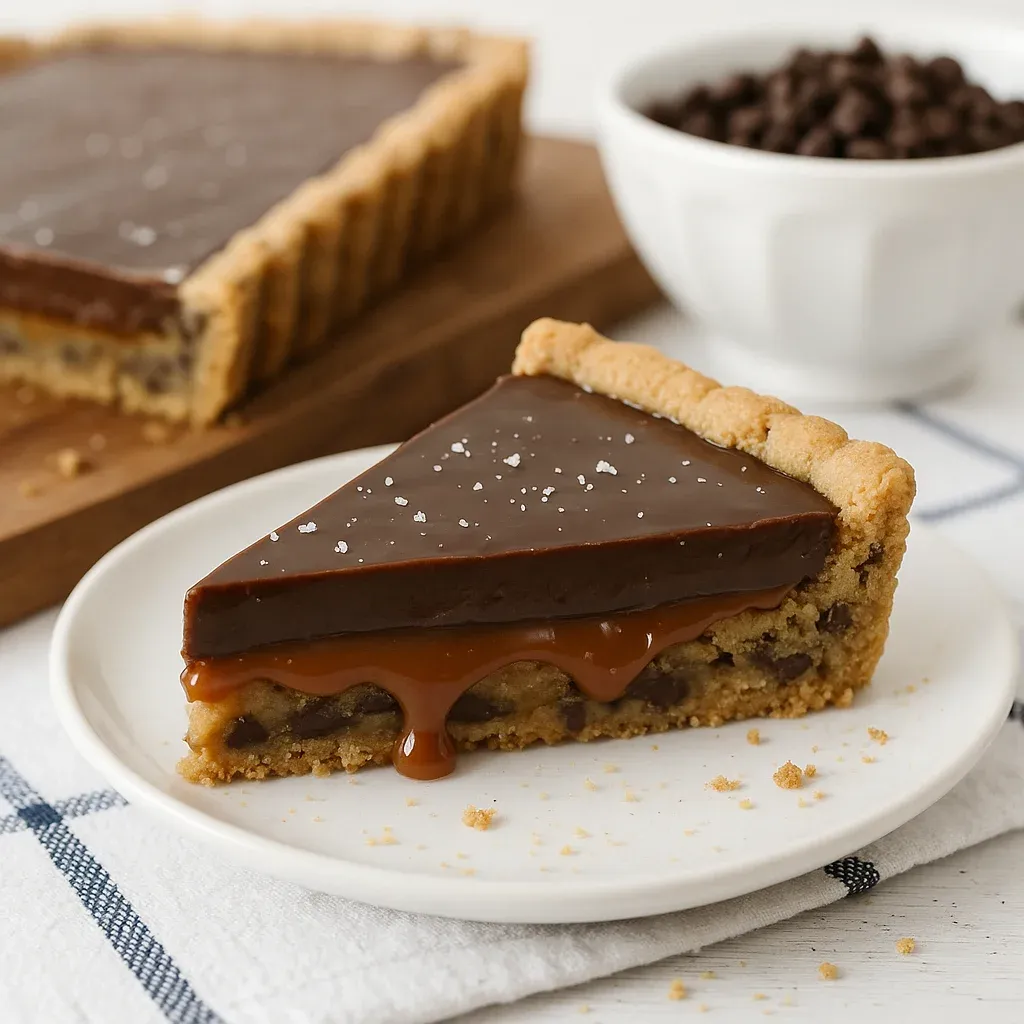
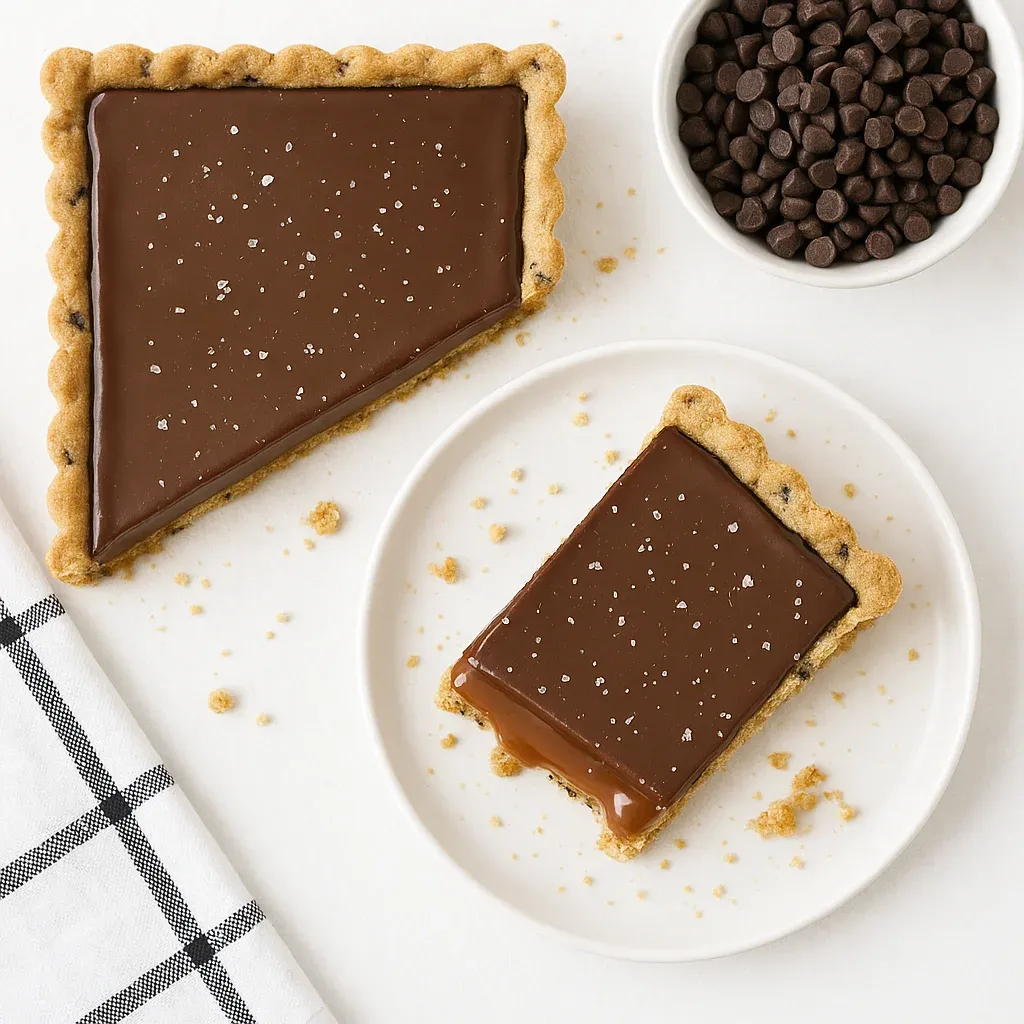
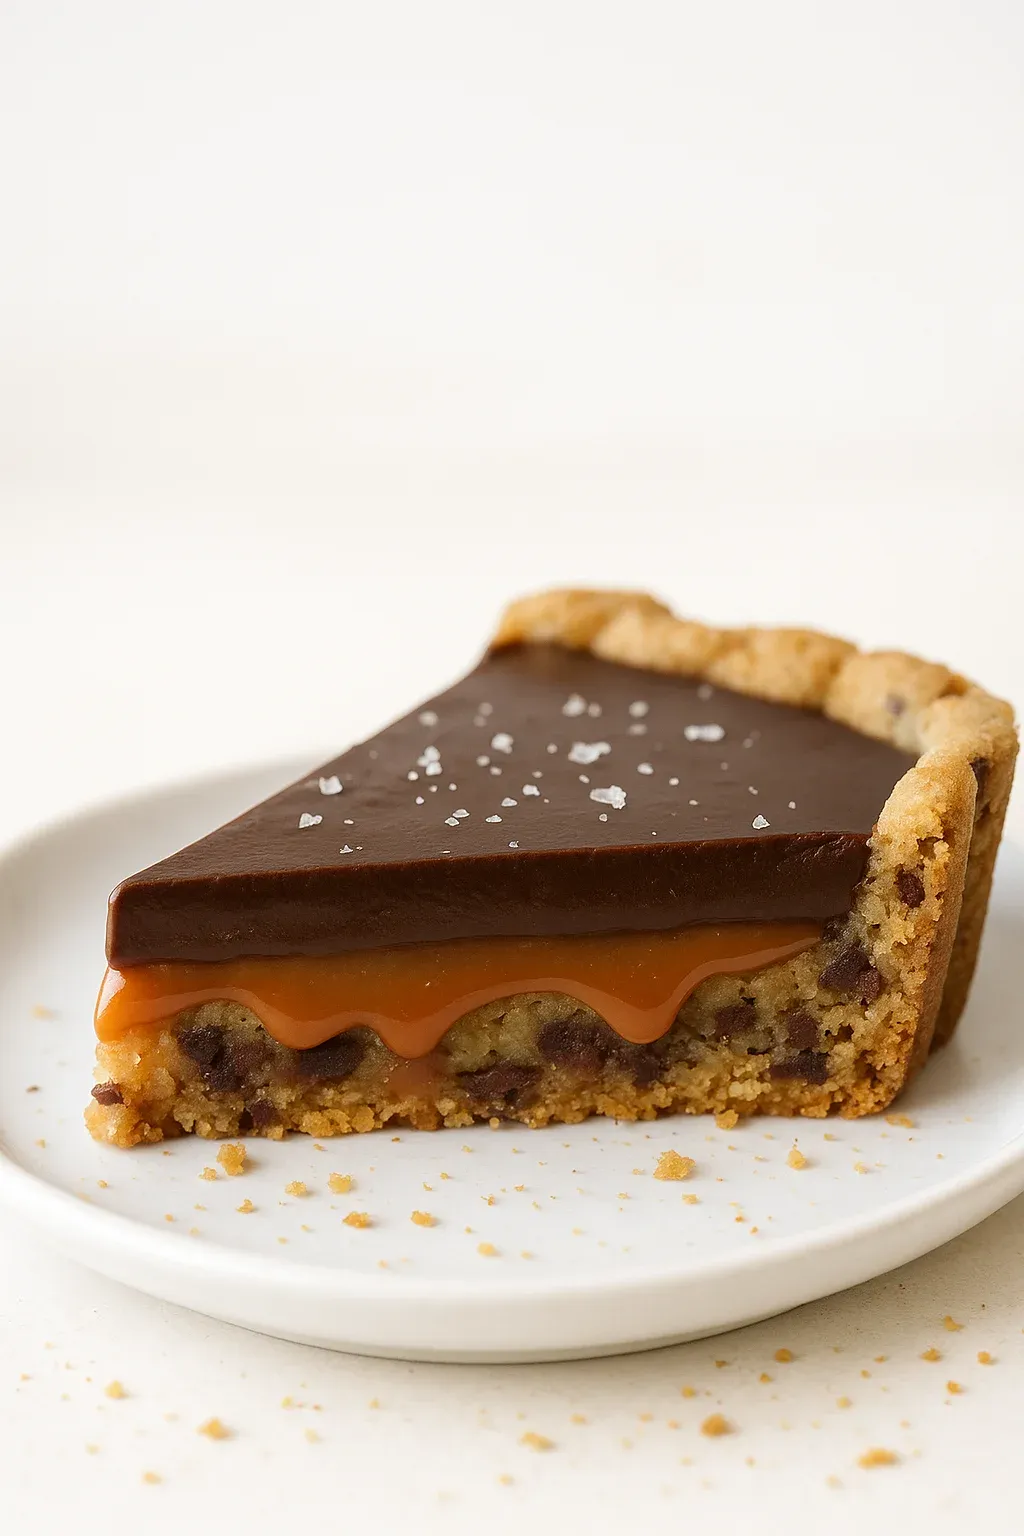
This chocolate chip salted caramel tart combines three irresistible layers that create a dessert worthy of special occasions. The chewy chocolate chip cookie base provides the perfect foundation for rich salted caramel and decadent chocolate fudge glaze, resulting in a treat that balances sweetness with a hint of salt.
I first created this tart for a holiday gathering when I wanted something more special than regular cookies but just as approachable. The empty plate at the end of the night and multiple recipe requests told me this one was a keeper.
Ingredients
Chocolate Chip Cookie Base
- Flour: Provides structure while keeping a tender texture in the base
- Brown sugar: Creates that signature cookie chewiness and depth of flavor
- Mini chocolate chips: Distribute more evenly throughout the base than regular chips
- Challenge butter: Brings richness that forms the foundation of this dessert
Salted Caramel Filling
- Heavy cream: Creates silky smoothness in the caramel
- Quality sea salt: Balances the sweetness with complex flavor
- Corn syrup: Prevents crystallization for a smooth caramel texture
- Vanilla extract: Adds aromatic warmth to the caramel layer
Chocolate Fudge Glaze
- Semisweet chocolate chips: Provide the perfect balance of sweetness and chocolate intensity
- Challenge butter: Creates a glossy shine and rich mouthfeel
- Corn syrup: Ensures a smooth pour and beautiful finish
- Fleur de sel: As the finishing touch elevates the entire dessert experience
Step-by-Step Instructions
- Prepare Cookie Base:
- Begin by whisking together the dry ingredients in a small bowl. In your mixer, cream together butter and both sugars until light and fluffy. This creates air pockets that give your cookie base structure. Add vanilla and egg while mixing slowly to incorporate completely without overmixing. Gently mix in the flour mixture just until combined. Overmixing at this stage can result in a tough cookie. Press the dough evenly into your tart pan, paying special attention to create slightly raised edges to contain the fillings.
- Bake to Perfection:
- Chill the prepared dough for 5 minutes before baking. This prevents the butter from melting too quickly and helps maintain the shape during baking. Bake until the cookie is golden brown and puffed. The center will likely rise during baking, which is perfect as we will press it down after cooling slightly to create space for our fillings. If edges brown too quickly, shield them with foil strips to prevent burning while allowing the center to finish cooking.
- Create the Caramel Filling:
- Making caramel requires patience and attention. Warm your cream first so adding it to the hot sugar mixture causes less of a temperature shock. Cook your sugar mixture undisturbed once it begins to boil. Watch carefully as the color changes from clear to a honey amber. This happens quickly, so remove from heat immediately when it reaches the right color before it burns. The addition of butter and salt after cooling slightly creates that perfect salted caramel flavor we love.
- Finish with Chocolate Layer:
- Allow the caramel to cool slightly before pouring onto the cookie base. Melt the chocolate and butter gently to avoid burning. Adding corn syrup creates a glossy finish that makes the dessert look professional. Allow the chocolate to cool slightly before pouring over the caramel to prevent it from melting into the caramel layer. The sprinkle of fleur de sel on top not only looks beautiful but adds bursts of salt that enhance all the flavors.
 Pin it
The caramel layer is truly what makes this dessert special. I learned through many batches that patience is crucial when making caramel. Removing it from heat at just the right moment results in that perfect amber flavor without any bitterness from burning. My family now requests this tart for every birthday celebration, and watching everyone's eyes close in bliss with the first bite makes the extra effort worthwhile.
Storing Your Tart
The completed tart keeps beautifully in the refrigerator for up to 5 days. Cover loosely with foil rather than plastic wrap to avoid disturbing the chocolate surface. Allow it to sit at room temperature for about 15 minutes before serving for the best texture and flavor experience. The cookie base will remain chewy while the caramel softens just enough to create the perfect bite.
 Pin it
Perfect Serving Suggestions
This tart stands beautifully on its own, but for special occasions, consider adding a scoop of vanilla bean ice cream or a dollop of lightly sweetened whipped cream. The contrast of temperatures and textures creates an even more memorable dessert experience. For a dinner party presentation, dust plates with a little cocoa powder before placing slices for an elegant touch.
The Art of Caramel Making
Understanding the stages of caramel is crucial for this recipe. The difference between perfect caramel and bitter burned sugar is just seconds. Look for a honey amber color rather than deep brown. Using a heavy bottomed pan helps distribute heat evenly to prevent hot spots that can cause burning. The addition of corn syrup helps prevent crystallization, but avoid stirring once the mixture boils as this can cause the sugar to seize.
Frequently Asked Questions
- → How do I prevent the cookie base from over-baking?
To prevent the cookie base from over-baking, you can cover the edges with foil strips once they are golden brown but before the center is fully baked. This ensures even cooking.
- → Can I make the caramel sauce in advance?
Yes, the caramel sauce can be prepared up to two days in advance. Store it in an airtight container in the refrigerator and allow it to come to room temperature before using.
- → What is the best way to layer the dessert?
Allow the cookie base to cool completely before adding the caramel layer. Chill the caramel slightly before adding the chocolate glaze to achieve clean, even layers.
- → How do I store leftovers?
Store leftover tart slices in an airtight container in the refrigerator for up to 5 days. Bring the slices to room temperature before serving for the best texture.
- → What type of sea salt works best for this dessert?
Fleur de sel, or any high-quality flaky sea salt, is recommended for a perfect balance of salty and sweet flavors.