
 Pin it
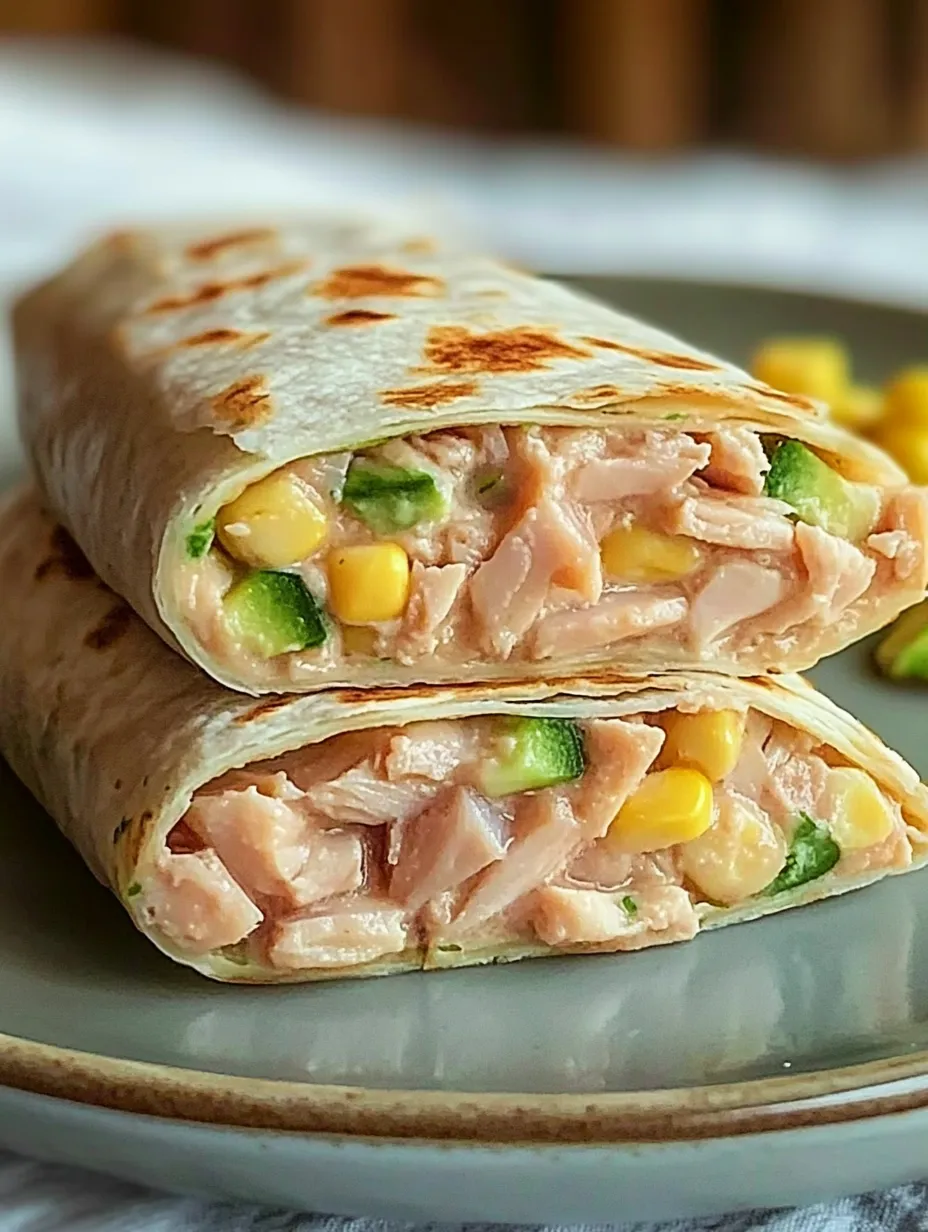
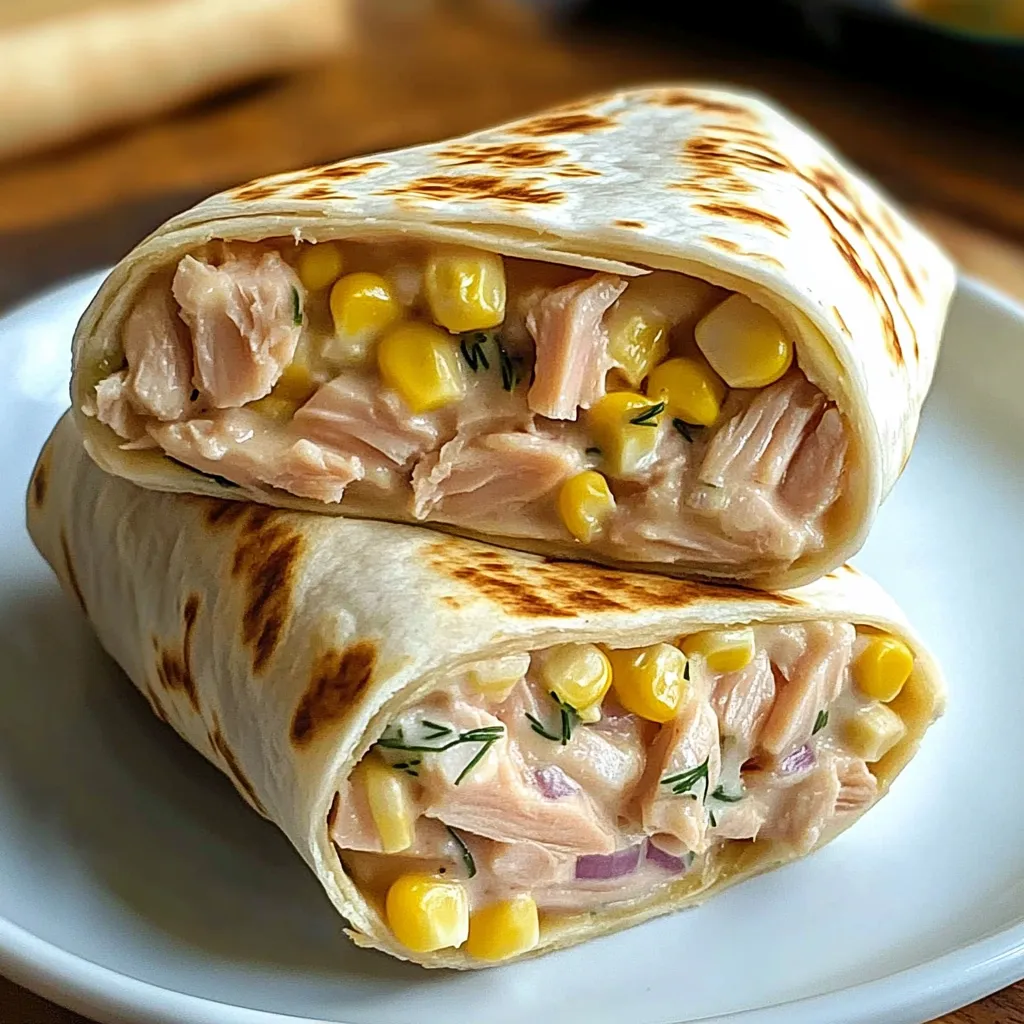
This tuna melt wrap is the perfect solution for a satisfying, protein-packed lunch that comes together in just 10 minutes. The creamy combination of Greek yogurt, corn, red onion, and melted cheese inside a warm, crispy tortilla creates a comforting yet elevated take on the classic tuna melt. Whether you're looking for a quick weekday meal or something special to pack for lunch, this recipe delivers every time.
Last week, I prepared these wraps for my kids' school lunches. Even my most selective eater came home asking for the same lunch again! That moment solidified how much everyone loves this recipe—it's simple but packed with flavor.
Fresh Ingredient Guide
- Tuna: Opt for high-quality canned tuna in water rather than oil. Drain it thoroughly to prevent excess moisture, which can make the wrap soggy.
- Red Onion: Choose firm, colorful bulbs with no soft spots. Red onions bring a mild sweetness and vibrant color to the mix.
- Corn Kernels: Bright yellow kernels are ideal; use fresh if available, but frozen works just as well when thawed before adding.
- Cheese: Grate real cheese yourself instead of using pre-shredded varieties—it melts better and tastes richer. Cheddar or Monterey Jack works beautifully here.
- Wraps: Select large, flexible tortillas free from tears or dry edges. These ensure easier rolling and a more enjoyable texture.
- Lemon: Freshly squeezed lemon juice adds brightness and tanginess that complements the richness of the tuna and cheese.
Using quality ingredients enhances the overall experience of eating this wrap. For instance, freshly grated cheese melts smoother and has a superior taste compared to store-bought shredded options.
Step-by-Step Instructions
- 1. Prepare the Base:
- In a mixing bowl, combine drained tuna with Greek yogurt until smooth and fluffy. Use a fork to break apart any large chunks of tuna, ensuring an even consistency throughout. The yogurt not only adds creaminess but also boosts the nutritional value of the dish.
- 2. Season the Mixture:
- Stir in Dijon mustard, fresh lemon juice, and black pepper to taste. Adjust seasoning gradually, tasting as you go. The mustard provides depth, while the lemon brightens the flavors, creating a balanced profile.
- 3. Add Crunch and Sweetness:
- Fold in corn kernels and diced red onion. These ingredients introduce texture and natural sweetness, making each bite more dynamic. Ensure everything is evenly distributed for consistent flavor in every mouthful.
- 4. Warm the Tortilla:
- Heat a nonstick skillet over medium heat. Gently warm each tortilla for about 10 seconds per side, just enough to soften it without browning. This step ensures flexibility during assembly.
- 5. Assemble the Wrap:
- Place a layer of grated cheese on one half of the tortilla, followed by the tuna mixture. Spread the filling evenly, leaving some space around the edges to seal the wrap properly. The cheese acts as a barrier, preventing the filling from soaking into the tortilla.
- 6. Create the Roll:
- Fold the sides of the tortilla inward, then roll tightly from the bottom toward the top. Press gently to secure the shape, being careful not to squish out the filling. Aim for a snug roll similar to wrapping a sleeping bag.
- 7. Grill the Wrap:
- Place the seam-side down in the heated skillet. Press lightly with a spatula to encourage even browning. Cook for 2-3 minutes per side, listening for that satisfying sizzle indicating proper heat. Flip carefully and repeat until both sides are golden brown and crispy.
- 8. Rest Before Cutting:
- Remove the wrap from the skillet and let it rest for 1 minute before slicing. This resting period allows the cheese to set slightly, preventing messy spills. Slice diagonally for a visually appealing presentation.
 Pin it
Whenever I prepare these wraps, the aroma of melting cheese and crisping tortilla fills the kitchen, signaling that something delicious is coming soon. Watching the golden-brown color develop tells me exactly when it’s ready.
 Pin it
Serving Ideas
Slice the wrap diagonally and serve alongside a side of cherry tomatoes or cucumber slices for added crunch. During colder months, pair it with a steaming bowl of tomato soup for dipping those crispy edges. Adding pickles or sliced jalapeños offers an extra tangy kick if desired.
For variety, try substituting tuna with canned salmon for a different twist. Mixing in mashed avocado increases creaminess, while sprinkling everything bagel seasoning adds an exciting burst of flavor. Experimenting with toppings keeps things interesting while maintaining the core appeal of the dish.
Customizing Your Wrap Experience
One of the best things about this tuna melt wrap is its versatility. While the base recipe offers a delicious blend of flavors and textures, there’s plenty of room for personalization. For instance, swapping the Greek yogurt for mashed avocado adds an extra layer of creaminess and richness that pairs beautifully with the tuna mixture. Adding diced bell peppers or spinach brings additional freshness and nutrition to each bite. You could also experiment with different types of cheese—Monterey Jack for mildness, cheddar for sharpness, or even feta for a tangy twist. Encouraging creativity in the kitchen keeps meals exciting and ensures everyone finds their perfect combination.
Storing and Reheating Tips
When it comes to meal prep, these wraps are fantastic because they allow you to prepare components ahead of time without sacrificing quality. The tuna mixture can be stored in an airtight container in the refrigerator for up to two days. However, avoid assembling the entire wrap beforehand, as the tortilla may become soggy. Instead, warm the tortilla just before serving and assemble fresh for optimal texture. If reheating leftovers, wrap individual portions loosely in foil and heat them in the oven at 350°F for about 5 minutes. This method helps maintain the crispy exterior while melting the cheese again for that irresistible gooey center. Proper storage and reheating techniques ensure your wraps taste freshly made every time.
 Pin it
Over years of preparation, I’ve discovered that patience pays off when making these wraps. That extra minute spent grilling transforms them from ordinary to extraordinary. Now, they’ve become my go-to lunch option—quick enough for busy days yet special enough to look forward to.
Frequently Asked Questions
- → Can I use mayo instead of Greek yogurt?
- Yes, use the same amount of mayonnaise for a more traditional taste.
- → What other cheese works well?
- Any melting cheese like cheddar, Swiss, or provolone works great.
- → Can I make this ahead?
- Best assembled and grilled fresh, but filling can be made ahead and stored.
- → What kind of wrap is best?
- Large flour tortillas work best as they crisp nicely and hold ingredients well.
- → Can I add vegetables?
- Yes, try adding spinach, tomatoes, or bell peppers for extra nutrition.