
 Pin it
Making the perfect roast beef was my culinary Mount Everest until I mastered this method. After years of experimenting with temperatures and timing, I've discovered the secrets to achieving that beautiful pink center and flavorful crust every single time. The key lies in understanding how heat affects the meat and being patient with the process.
Choosing Your Cut
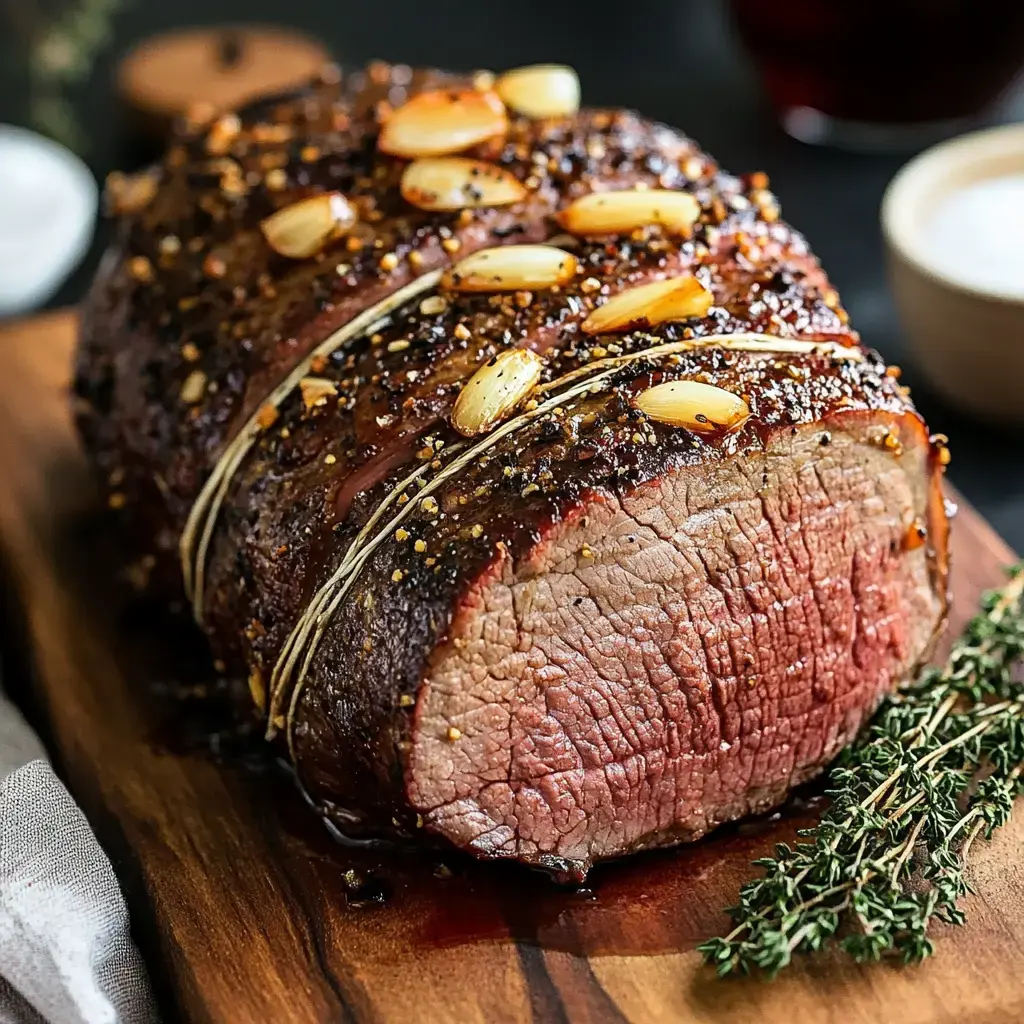
The right cut makes all the difference. A rump roast or bottom round offers fantastic value while delivering great flavor. Look for meat with good marbling and a rich red color. I always ask my butcher to tie it if needed. Remember to bring your roast to room temperature before cooking this ensures even cooking and better browning.
Essential Ingredients & Tools
- For the Roast:
- 3-4 lb rump roast or bottom round
- 1 tbsp olive oil or softened butter
- 2 tsp kosher salt (not table salt)
- 1 tsp freshly ground black pepper
- 2 tsp garlic powder
- 1 tsp dried rosemary or thyme
- For the Pan:
- 1 large onion, quartered
- 2 carrots, roughly chopped
- 1 cup high-quality beef stock
- Equipment Needed:
- Roasting pan with rack
- Reliable meat thermometer
- Kitchen twine if needed
- Heavy-duty aluminum foil
Step-by-Step Success
- Preparation is Key
- Take your roast out of the fridge 2 hours before cooking. Pat it completely dry with paper towels moisture is the enemy of a good crust. Rub all over with oil or butter then season generously. Don't be shy with the seasonings they create that amazing crust.
- The Perfect Sear
- Start in that screaming hot 450°F oven. This initial blast of heat creates a beautiful brown crust through the Maillard reaction locking in those precious juices. Watch carefully during this stage every oven is different.
- Low and Slow Magic
- Here's where patience pays off. Drop that temperature down to 225°F and let the gentle heat work its magic. Use your thermometer to check the internal temperature starting about 30 minutes before you expect it to be done.
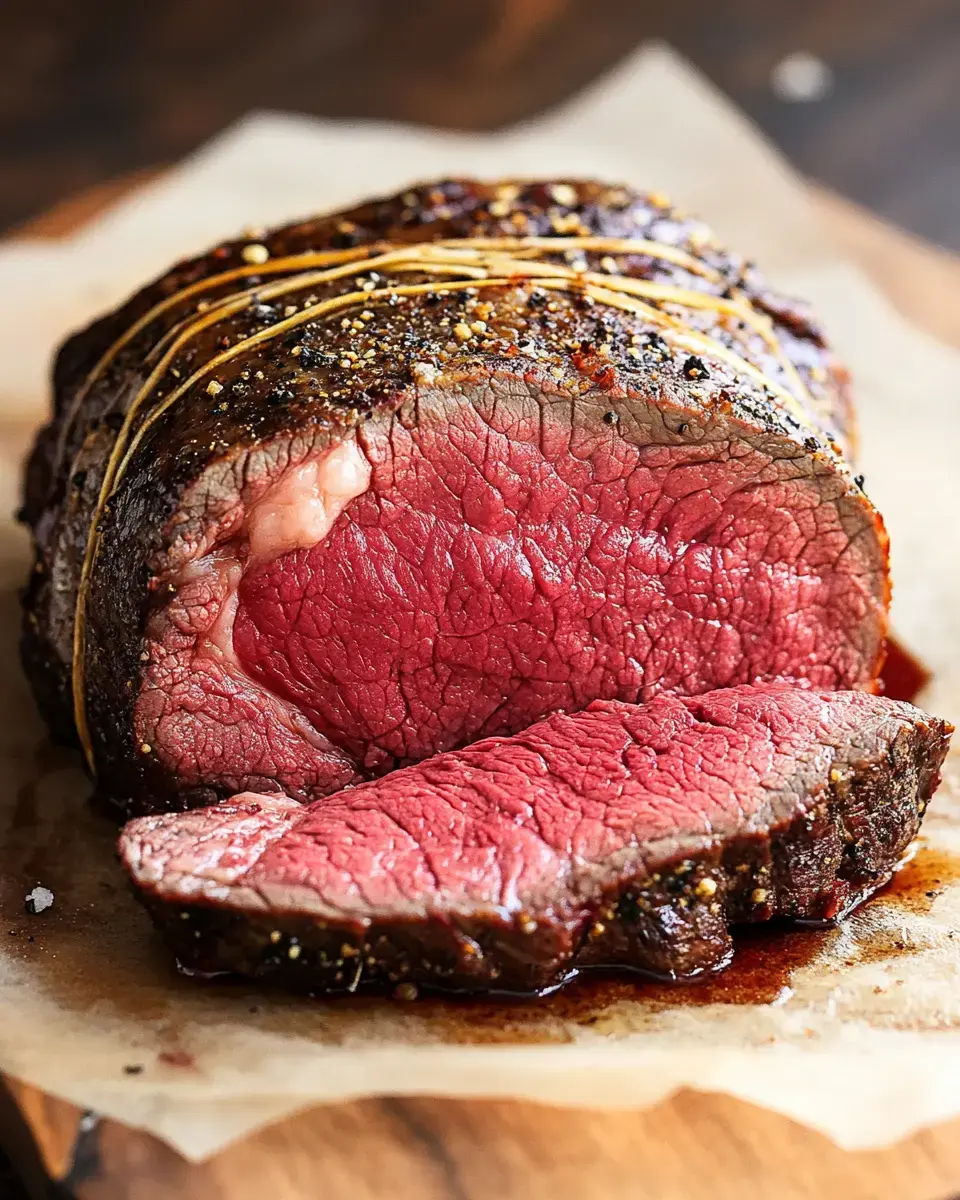
- The Critical Rest
- This 20-minute rest isn't optional it's crucial. The meat will continue cooking slightly and more importantly the juices redistribute throughout the roast. Tent with foil but don't wrap tightly or you'll lose that beautiful crust.
Pro Tricks and Tips
Score the fat cap in a diamond pattern if your roast has one it helps render the fat beautifully. Position your roast with the fat side up so it bastes the meat as it cooks. Keep that oven door closed resist the urge to peek. Every time you open it the temperature drops significantly. For the juiciest results remove the roast 5 degrees before your target temperature it'll continue cooking during the rest.
 Pin it
Creating Amazing Gravy
Those pan drippings are liquid gold. While your roast rests pour off the juices and separate the fat. For every tablespoon of fat and flour make a roux then slowly whisk in the defatted juices and extra beef stock. Season well and simmer until thickened. If you're feeling fancy add a splash of red wine or some sautéed mushrooms.
Storing and Using Leftovers
Cool your roast completely before storing. For the best sandwiches slice it paper-thin against the grain while it's cold. Vacuum sealing portions before freezing prevents freezer burn. To reheat wrap portions in foil with a few spoonfuls of beef broth this keeps the meat moist. Those leftovers are perfect for French dip sandwiches stir-fries or chopped into hearty salads.
Perfect Pairings
Serve your roast with Yorkshire puddings they're perfect for soaking up those delicious juices. Horseradish sauce either creamy or straight adds a wonderful kick. For vegetables nothing beats roasted potatoes that have been cooking in those beef drippings. A bold red wine like Cabernet Sauvignon or Malbec complements the rich meat perfectly.
Frequently Asked Questions
- → How do I know when it's done?
A meat thermometer is your best friend. For medium-rare, pull it at 135-140°F. It'll keep cooking while it rests.
- → Why rest the meat?
Let it rest 20-30 minutes so the juices stay in when you cut it. Cut too soon and you'll lose all those tasty juices to your cutting board.
- → Not many drippings for gravy - help!
This happens with rare meat. Either cook it longer at very low heat or add extra beef stock to make enough gravy.
- → Do I need to tie the roast?
It helps it cook evenly but isn't crucial. Ask your butcher to tie it, or just cook it as is.
- → Can I cook it faster at higher heat?
Low and slow is best for tender, evenly cooked meat. Higher heat might give you well-done edges with rare middle.
Conclusion
A comprehensive guide to creating the perfect roast beef, focusing on temperature control, seasoning, and gravy preparation for a classic Sunday meal.