
 Pin it
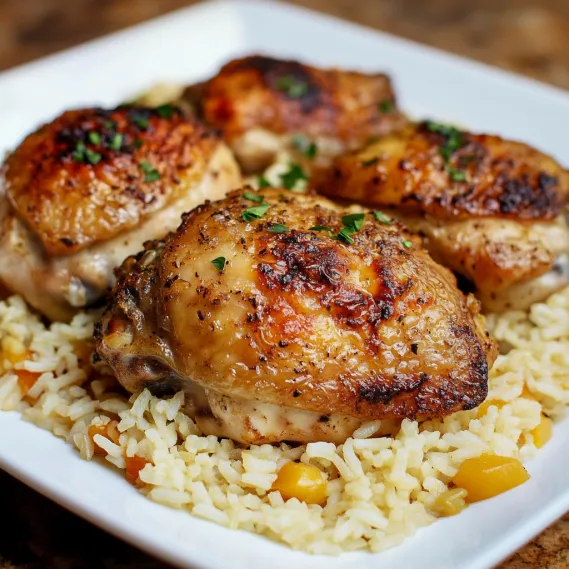
Oven Baked Chicken and Rice delivers incredible flavor with minimal effort. The entire meal cooks in one pan with zero stovetop work. Bone-in chicken thighs roast atop a bed of garlicky, buttery rice, allowing their juices to infuse every grain. It's the perfect solution for busy weeknights when you want a homemade dinner without the fuss.
I discovered this recipe during a hectic work period when elaborate cooking wasn't possible. What amazed me was how something requiring so little effort could develop such complex flavors. My kitchen filled with an incredible aroma as it baked, and that first bite of chicken-infused rice convinced me this would become a regular in our meal rotation.
Essential Ingredients and Selection Tips
- Chicken Thighs: Bone-in thighs provide the best flavor and align perfectly with rice cooking time. Remove skin to prevent greasiness.
- White Rice: Long grain, jasmine, or basmati all work beautifully. Rinse thoroughly to remove excess starch.
- Butter: Creates rich flavor foundation and helps prevent rice from sticking. Use unsalted to control sodium.
- Aromatic Base: Fresh garlic and onion are non-negotiable for developing depth of flavor in the rice. Freshly grated provides the best flavor and melting quality.
- Chicken Broth: Enhances savory notes. Low-sodium varieties allow better seasoning control throughout the dish. Makes the perfect sauce for the rice.
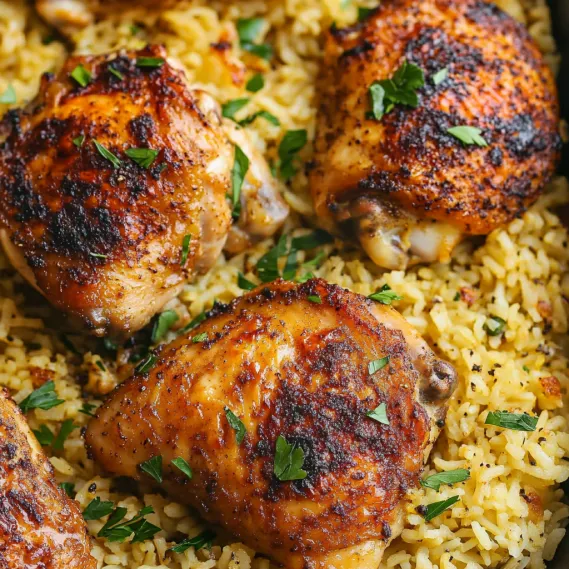
I've found that taking the extra minute to properly season the chicken on both sides makes a significant difference in the final dish. The spice rub creates a flavorful crust on the chicken while also dropping seasoning into the rice as it cooks, ensuring every bite is perfectly flavored.
Detailed Cooking Instructions
- Step 1: Create the Flavor Base
- Preheat your oven to 350°F and place 3 tablespoons of butter in a 9x13 inch baking dish. Put the dish in the oven for about 3 minutes until the butter completely melts, then carefully remove it. Add 1 diced medium onion and 4 minced garlic cloves to the melted butter, stirring to combine them thoroughly.
- Step 2: Prepare the Rice Layer
- Add 2 cups thoroughly rinsed white rice to the buttery onion mixture, stirring gently to coat each grain. Pour in 1½ cups chicken broth and 1½ cups water, season with 1teaspoon salt and ½teaspoon black pepper, then stir to distribute all ingredients evenly throughout the baking dish.
- Step 3: Season the Chicken
- In a small bowl, combine 2teaspoons paprika, 1teaspoon dried thyme, 1teaspoon onion powder, 1teaspoon garlic powder, 1teaspoon salt, and ½teaspoon black pepper, mixing to coat the chicken pieces thoroughly. Pat 6-8 bone-in chicken thighs dry after removing the skin, then coat them thoroughly with the spice mixture on both sides, pressing gently to adhere.
- Step 4: Assemble for Baking
- Arange the seasoned chicken thighs on top of the rice mixture, spacing them evenly throughout the dish. Cover the baking dish tightly with aluminum foil, ensuring a good seal to trap the steam during cooking, which is essential for properly cooking the rice. Place the covered dish in the preheated oven and bake for 30 minutes to get the cooking process well established.
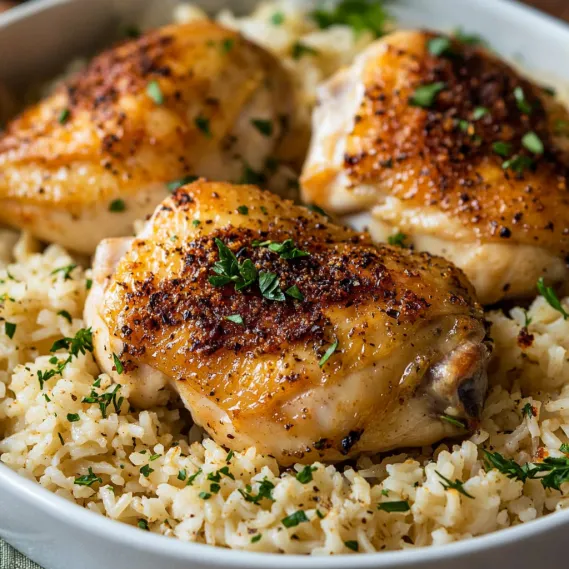
- Step 5: Bake to Perfection
- Remove the foil and continue baking for an additional 20-25 minutes until the chicken reaches an internal temperature of 165°F and the rice has absorbed all the liquid, becoming tender and fluffy.
 Pin it
I learned the importance of proper filling consistency through much trial and error. My first attempts were too runny, resulting in a soggy bottom crust that couldn't support the filling. Now I make sure to let the filling thicken properly and cool slightly before assembly, which makes all the difference in the final texture.
The Perfect Weeknight Solution
This pie has become our Sunday dinner tradition during the colder months. There's something deeply satisfying about the ritual of preparing it while the family gathers around, drawn by the aromatic promise of comfort to come. I often prepare the filling in the morning, letting the flavors develop throughout the day before assembling and baking just before dinner. The anticipation builds as the pastry puffs and turns golden in the oven, filling the house with an irresistible aroma that signals the delicious flavors to come.
 Pin it
Versatile Meal-Planning Hero
As grocery prices have increased, this pie has become even more valuable in our meal planning. The ingredients are affordable staples that stretch to feed many hungry mouths. I often find ground beef on sale and portion it specifically for this recipe. Potatoes and onions are inexpensive staples, and puff pastry, while not the cheapest ingredient, transforms these humble components into something that feels special and celebratory. When unexpected guests joined us for dinner last month, I simply added extra potatoes and vegetables to extend the filling, and no one left the table hungry.
Perfect for Sharing and Gifting
The communal nature of this pie makes it my go-to dish for supporting friends and neighbors through life's challenges and celebrations. When my neighbor underwent surgery, I delivered a fully baked pie that her family could easily reheat. For new parents in our community, I provide unbaked pies with baking instructions, offering them a home-cooked meal requiring minimal effort. These pies have become my signature contribution to our neighborhood, creating connections through shared food experiences. The grateful messages I receive confirm that this simple dish brings not just nourishment but also comfort during times of need, reinforcing my belief in food's power to convey care and support.
 Pin it
Chef's Helpful Tips
- For extra flavor, deglaze the pan with a splash of Irish stout beer when adding the broth
- Create individual hand pies for portable lunches or potluck contributions
- Add a teaspoon of Worcestershire sauce to the filling for additional umami depth
- Grade a little Irish cheddar into the filling for a subtle cheese undertone
- For an impressive presentation, use cookie cutters to create decorative shapes from pastry scraps to place on top of the pie
I've been making variations of this pie for over a decade, constantly refining the technique. The most significant improvement came when I started using the broiler to finish the salmon, creating that perfect balance of crisp exterior and tender, juicy interior.
Frequently Asked Questions
- → Can I use chicken breasts instead of thighs?
- Yes, you can use boneless skinless chicken breasts instead of thighs. Follow the alternative method mentioned in the notes: first bake the rice covered with foil for 30 minutes without the chicken, then place the chicken breasts on top and bake uncovered for about 20-25 minutes until the chicken is cooked through (internal temperature of 165°F/74°C).
- → What type of rice works best for this recipe?
- Regular long-grain white rice works best for this recipe. You can also use medium-grain rice, jasmine, or basmati rice with the same cooking times. For brown rice, follow the modification in the notes: add an extra 1/2 cup of hot water, bake covered for 1 hour, then uncover and bake for 15 more minutes until the rice is tender.
- → Can I add vegetables to this dish?
- Absolutely! You can add vegetables like frozen peas, diced carrots, or bell peppers. For harder vegetables like carrots, add them at the beginning with the onions. For quicker-cooking vegetables like frozen peas or bell peppers, add them when you remove the foil for the final 20 minutes of baking. You may need to add an extra 1/4 cup of liquid if adding a significant amount of vegetables.
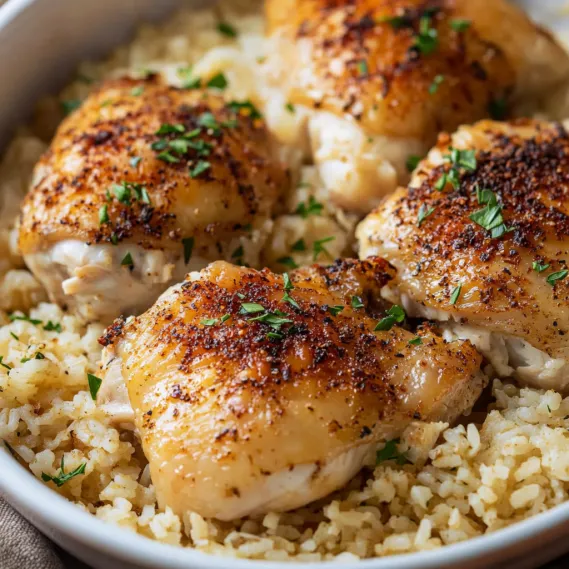
- → How do I know when the dish is fully cooked?
- The dish is done when the rice has absorbed all the liquid and the chicken has reached an internal temperature of 165°F (74°C). The rice should be tender and fluffy, not crunchy or overly wet. If the rice seems too firm but the liquid is gone, add a bit more hot water or broth (about 1/4 cup), cover with foil, and bake for another 5-10 minutes.
- → Can I make this dish ahead of time?
- This dish is best made fresh, but leftovers reheat well. Store in an airtight container in the refrigerator for up to 3 days. To reheat, add a splash of water or broth, cover with microwave-safe wrap, and heat in the microwave until hot. You can also assemble the dish up to the point of baking, refrigerate (no more than 2 hours), and then bake as directed, possibly adding 5-10 minutes to the covered baking time.