
 Pin it
These elegant smoked salmon appetizer bites deliver sophisticated flavor without the fuss typically associated with fancy finger food. Layers of creamy herb-infused spread and delicate smoked salmon are sandwiched between soft tortillas, then chilled and cut into perfect bite-sized squares. The combination of rich, tangy cream cheese and the smoky, buttery salmon creates an irresistible flavor profile that looks as impressive as it tastes.
I first served these at a gathering after my mother's golf game, where they received enthusiastic approval from her discerning friends. What I love most is that instead of being stuck in the kitchen assembling individual appetizers while my guests socialize, I can prepare these entirely ahead of time. One friend even asked if I had ordered them from a caterer – the ultimate compliment for such a simple recipe!
Essential Ingredients and Selection Tips
- Cream Cheese: Use full-fat cream cheese at room temperature for the smoothest spread. Light versions won't set as firmly.
- Smoked Salmon: Look for thinly sliced, high-quality salmon with a vibrant color. Wild-caught varieties offer superior flavor and texture.
- Soft Tortillas/Wraps: Choose large (9-inch), soft, pliable wraps that won't crack when cut. Flour tortillas or flatbreads work perfectly.
- Fresh Dill: The bright, grassy flavor is essential to complement the salmon. Use only fresh, not dried, for the best result.
- Lemon Zest: Adds crucial brightness that balances the richness of the cream cheese and salmon.
I've discovered that selecting a flank steak with visible marbling makes a significant difference in the final tenderness of the dish. While leaner cuts will work, that little bit of fat distributed throughout the meat creates a richer, more succulent result.
Detailed Cooking Instructions
- Step 1: Prepare the Flavorful Spread
- Mix 8 oz softened cream cheese with ½ cup sour cream, ½ tsp garlic powder, zest of one large lemon, ½ tsp salt, and ¼ cup chopped fresh dill until smooth and well combined. The spread should be easily spreadable but still thick enough to hold its shape.
- Step 2: Create the Perfect Stack
- Spread half the mixture evenly in a square shape on the first tortilla, leaving a small border around the edges. Layer half the smoked salmon over the spread, then fold the tortilla gently and place it butter-side down without touching each other.
- Step 3: Master the Assembly Technique
- Place one tortilla in your palm, add a tablespoon of cream cheese mixture in the center, and wet the edges with water. Fold the tortilla in half over the filling, then create pleats along one edge by pinching and folding, working from one side to the other while sealing tightly.
- Step 4: Achieve Perfect Pan-Frying
- Heat a tablespoon of oil in a non-stick skillet over medium heat. Place tortilla pleat-side up without touching each other. Cook until bottoms turn golden brown (about 2 minutes), then add 1/3 cup water and immediately cover with a lid. Steam for 3-4 minutes until water evaporates.
- Step 5: Finish with Crispy Perfection
- Once water has evaporated, let tortilla cook uncovered for another minute to crisp up the bottoms. Transfer to a serving plate, crispy-side up, and serve immediately with dipping sauce made from equal parts soy sauce and rice vinegar with a dash of chili oil.
 Pin it
The first time I attempted this recipe, I was intimidated by the folding technique. After several lopsided attempts, I realized that simple pleats work just as well as perfect ones - the flavor remains delicious regardless. Now my children help with the folding, creating their own unique styles that have become part of our family tradition.
The Secret to Perfect Texture
The magic of these tortillas lies in their contrasting textures - crispy bottoms and tender tops. I've found that the key to achieving this is controlling moisture at every stage. First, properly squeezing the salted cabbage removes excess water that would otherwise make the filling soggy. Second, the cornstarch not only binds the filling but also absorbs any remaining moisture. Finally, the cooking technique - first frying, then steaming, then frying again - creates that signature crispy bottom while ensuring the filling cooks through perfectly.
 Pin it
Make-Ahead Magic for Entertaining
One of the greatest advantages of this recipe is its make-ahead flexibility. I often prepare this dish on a Sunday afternoon, letting it simmer for hours while I tend to other chores. Once cooked, it freezes beautifully for up to three months. Simply reheat gently on the stovetop, adding a splash of water if needed to loosen the sauce. This prep-ahead magic means I can serve impressive homemade dinners even on the busiest weeknights.
Transforming Leftovers Into New Meals
If you somehow end up with leftovers (though this rarely happens in my house!), they can be transformed into entirely new dishes. Shredded tortilla makes an excellent filling for empanadas, burritos, or even savory crepes. My favorite repurposing trick is to nestle halved leftover tortillas atop a bowl of creamy grits, creating a satisfying breakfast that carries the flavors into the next day.
 Pin it
Chef's Helpful Tips
- Allow the tortillas to rest for 5 minutes after baking before serving – this helps set the interior for the perfect bite
- For extra flavor dimension, add a teaspoon of smoked paprika to your panko mixture
- If you have trouble finding tortillas locally, order them online from authentic suppliers like Bourgeois Meat Market or The Best Stop
- Serve with multiple dipping options – a spicy remoulade and cool ranch alongside the Louisiana dipping sauce
- For a festive presentation, arrange the tortillas on a platter with alternating sprinkles of chopped parsley, purple cabbage, and yellow bell pepper to represent the traditional green, purple, and gold
Frequently Asked Questions
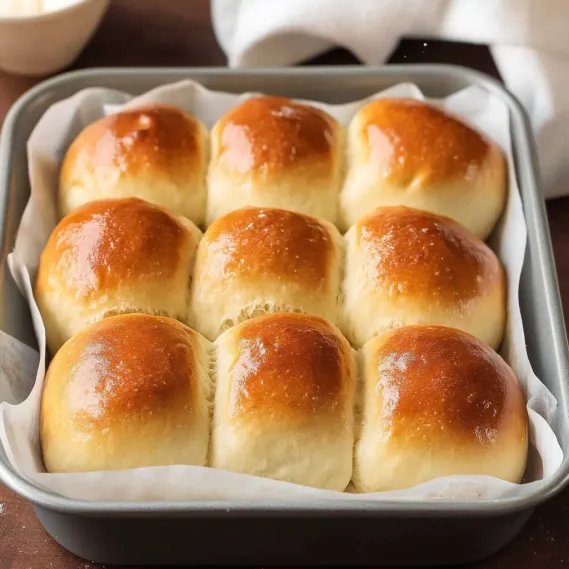
- → Why don't these rolls need kneading?
- The no-knead method works because the very wet, sticky dough allows gluten to develop naturally during the long rise time. Traditional kneading speeds up gluten development, but this slow method achieves the same result with much less effort. The high hydration (ratio of liquid to flour) is key to making this work.
- → My dough seems too wet/sticky - did I do something wrong?
- No, this dough is supposed to be quite wet and sticky - more like a very thick batter than traditional bread dough. That's why we don't knead it! When shaping the rolls, use plenty of flour on your work surface and hands, but don't work it into the dough. The moisture creates steam during baking, which helps the rolls rise and stay soft.
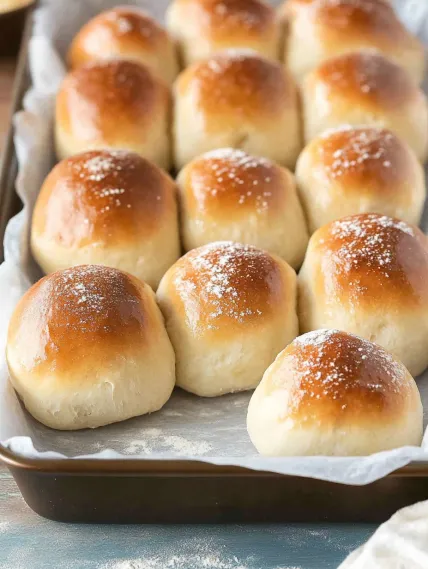
- → Can I make these rolls ahead of time?
- Yes! You can follow the recipe up to shaping the rolls, then cover them and refrigerate for 4-24 hours (this acts as the second rise). Take them out 30 minutes before baking. Alternatively, you can fully bake the rolls, freeze them, and reheat when needed - 15 seconds in the microwave works wonders to refresh them.
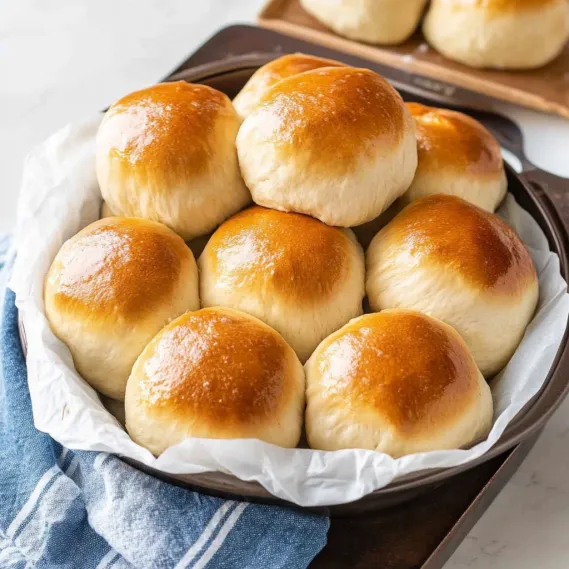
- → My kitchen is cold - how can I help the dough rise properly?
- Finding a warm spot is important for proper rising. Try placing the dough in a turned-off oven with just the light on, near a warm appliance, or in a barely warm clothes dryer (run empty for 2 minutes first). You can also set a bowl of hot water below the dough in a closed microwave or oven to create a warm environment.
- → Can I use regular all-purpose flour instead of bread flour?
- Yes! While bread flour gives a slightly fluffier texture due to its higher protein content, this recipe works great with all-purpose (plain) flour too. The difference will be minimal, and your rolls will still be deliciously soft.
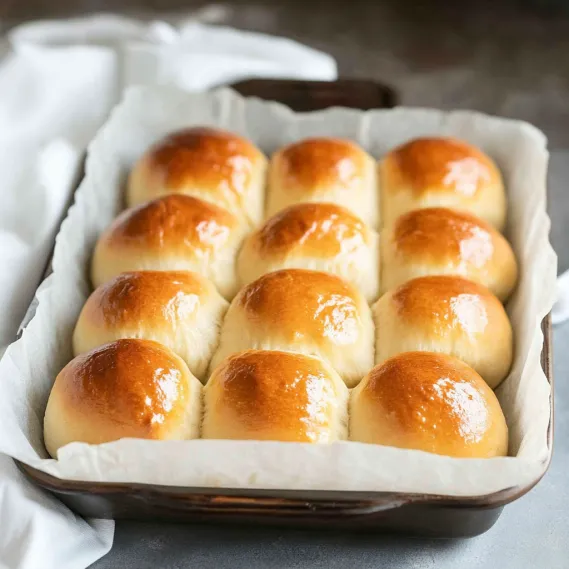
- → How do I know when the rolls are properly baked?
- Look for a golden brown surface - this is the best indicator for this recipe. You can also tap the center roll; it should sound hollow. If the rolls are browning too quickly but don't seem done inside, cover them with foil for the remaining bake time.